U.S. General 27 In. Roller Cabinets – Harbor Freight Tools
4/13/26 Web Log
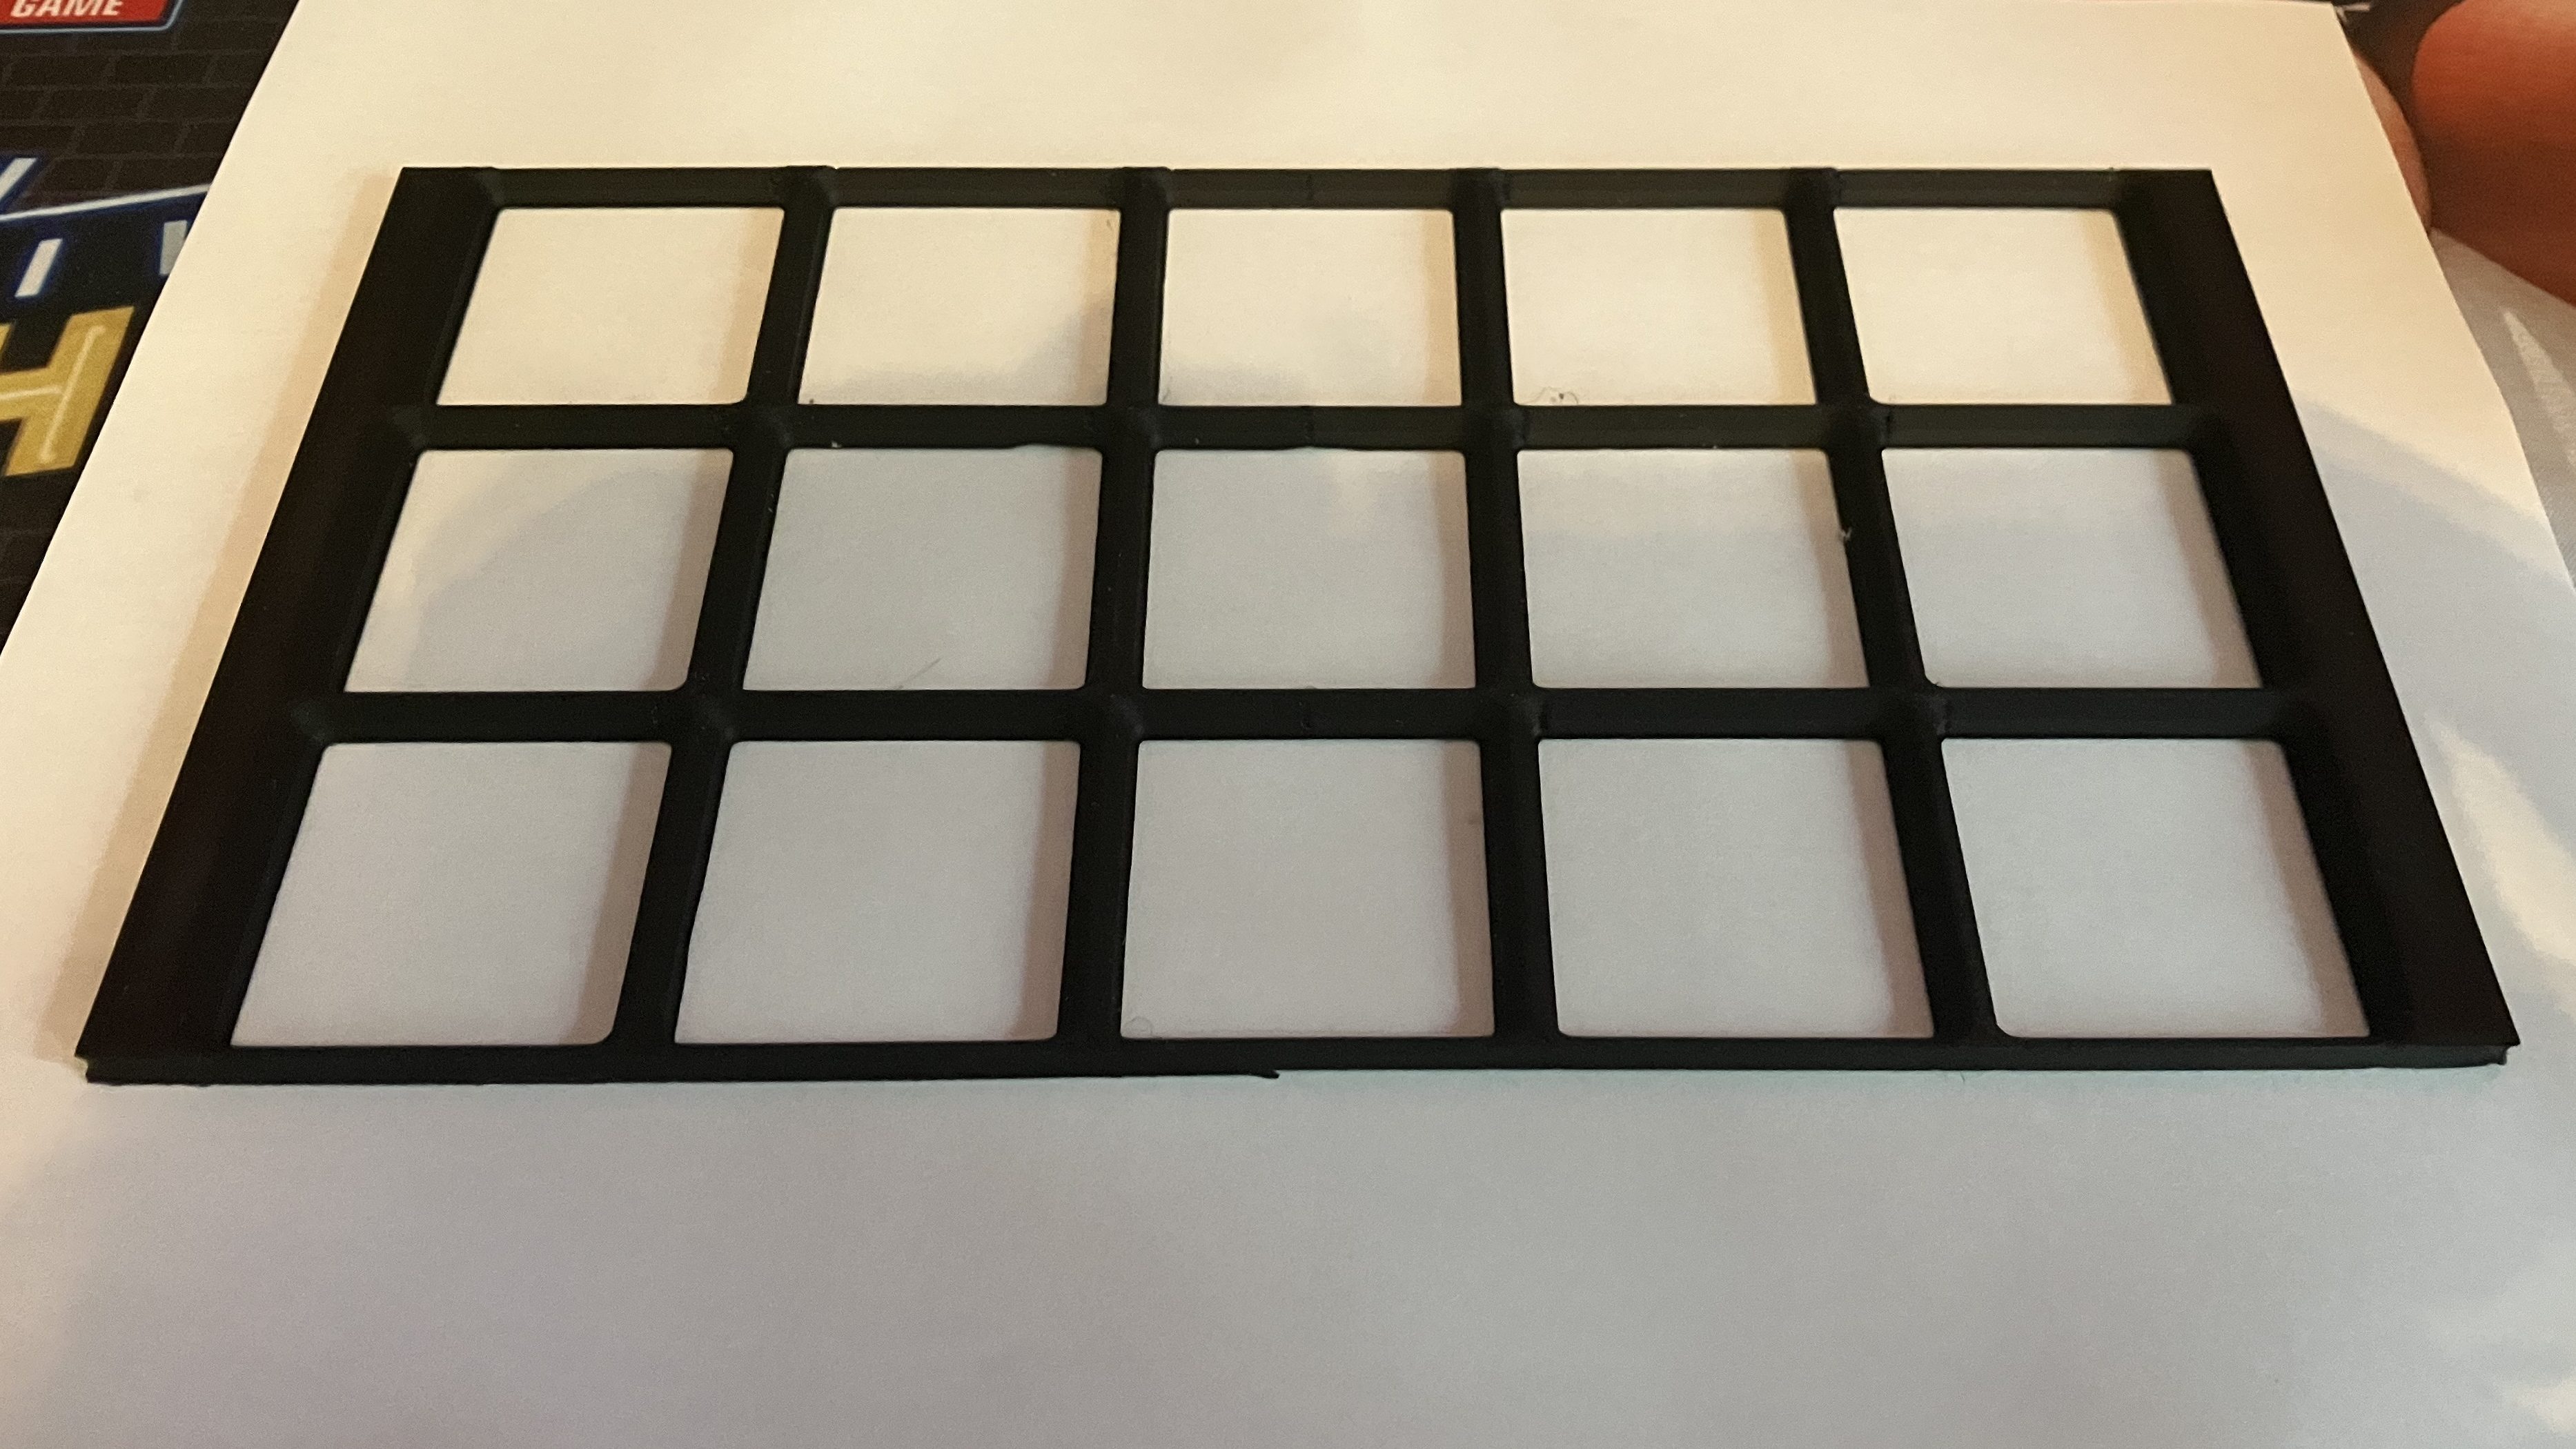
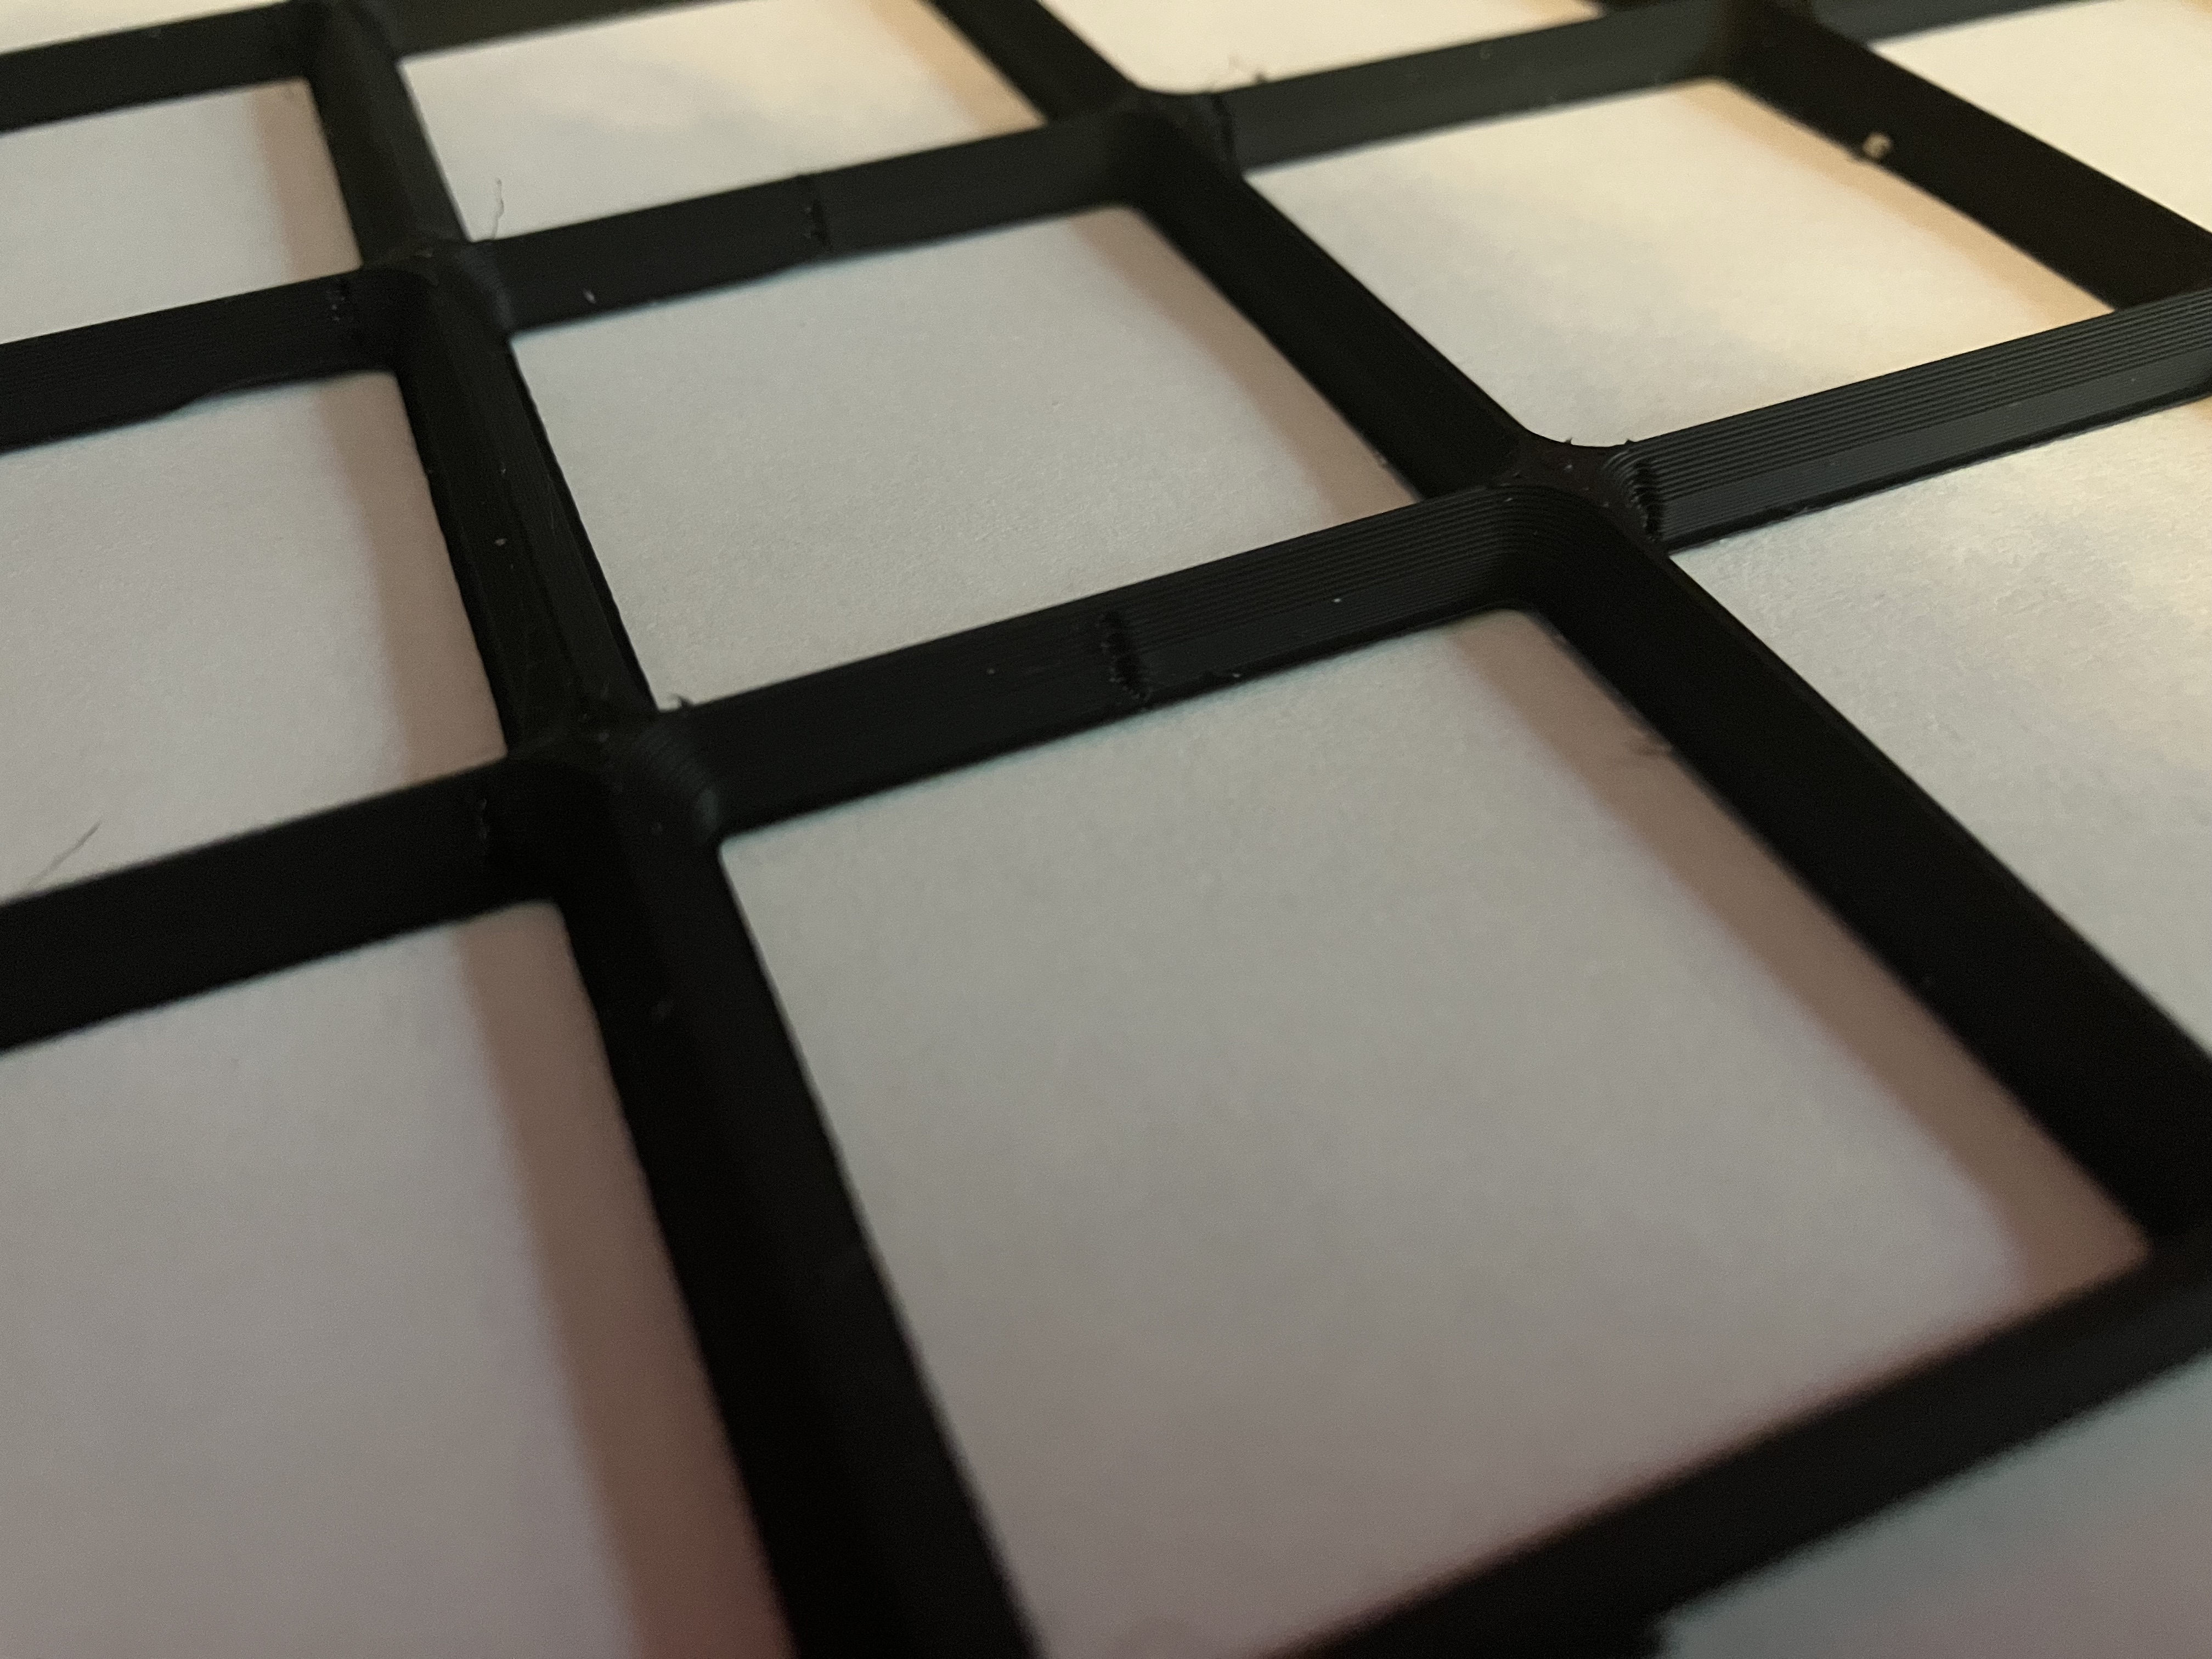
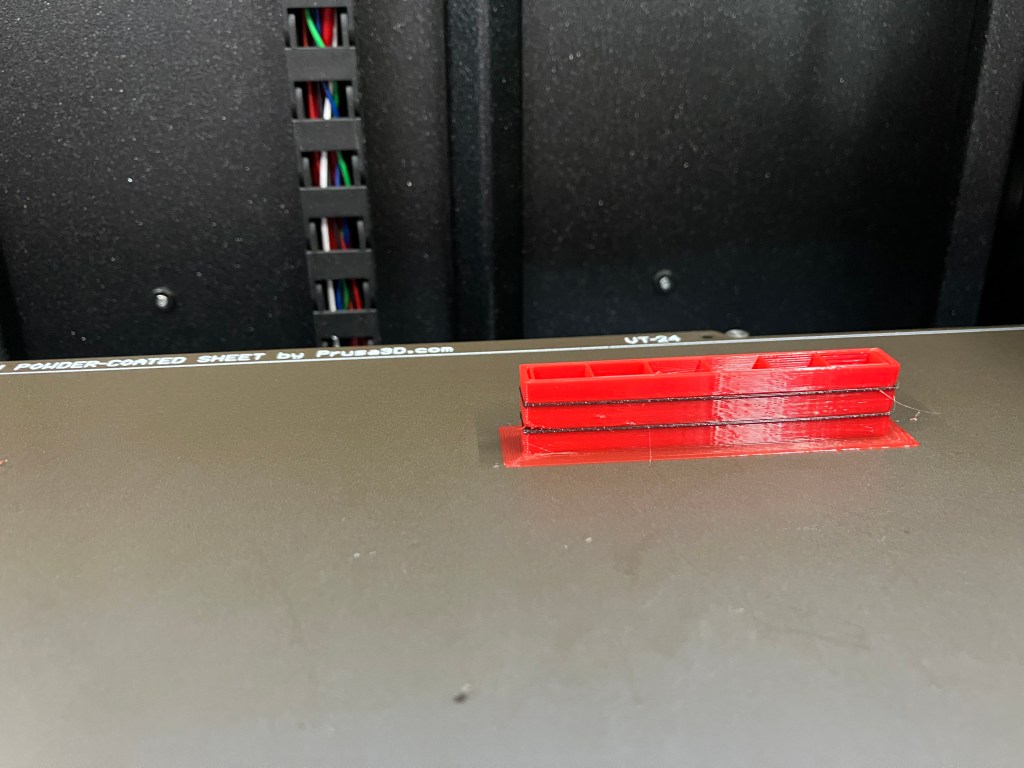
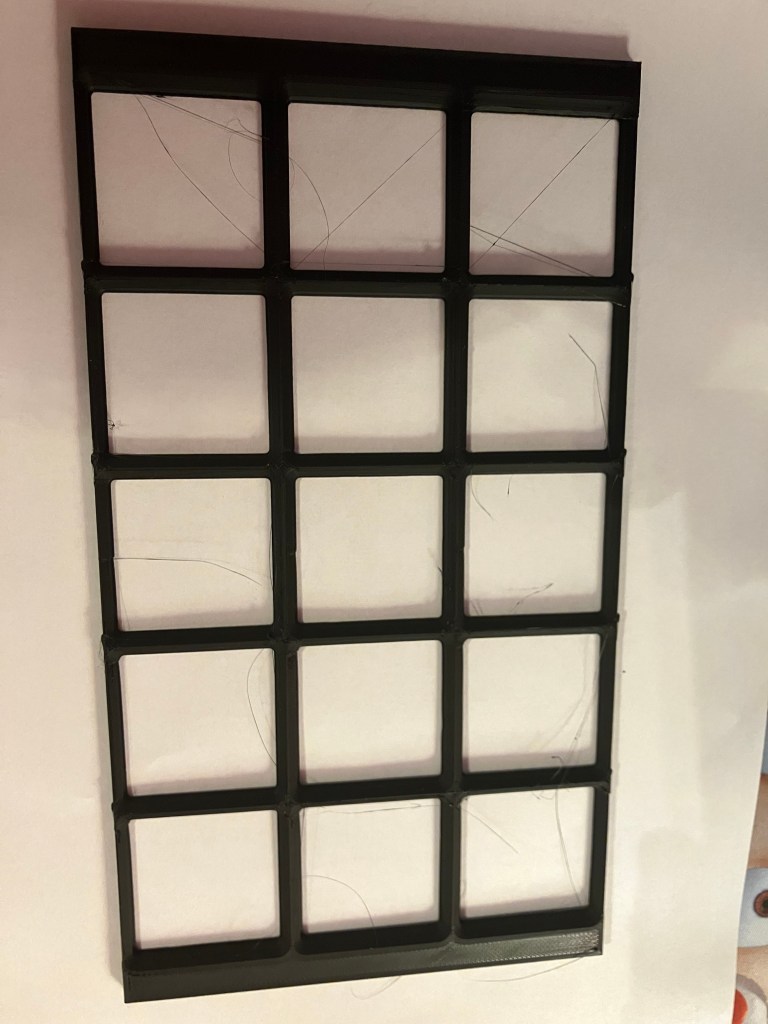
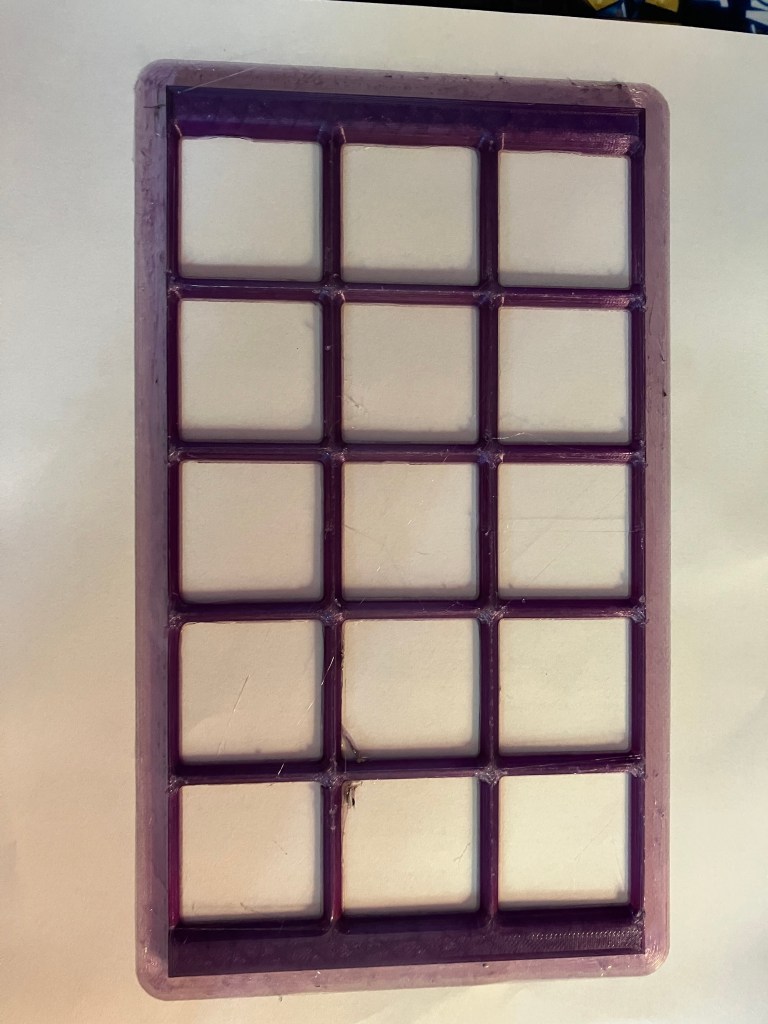
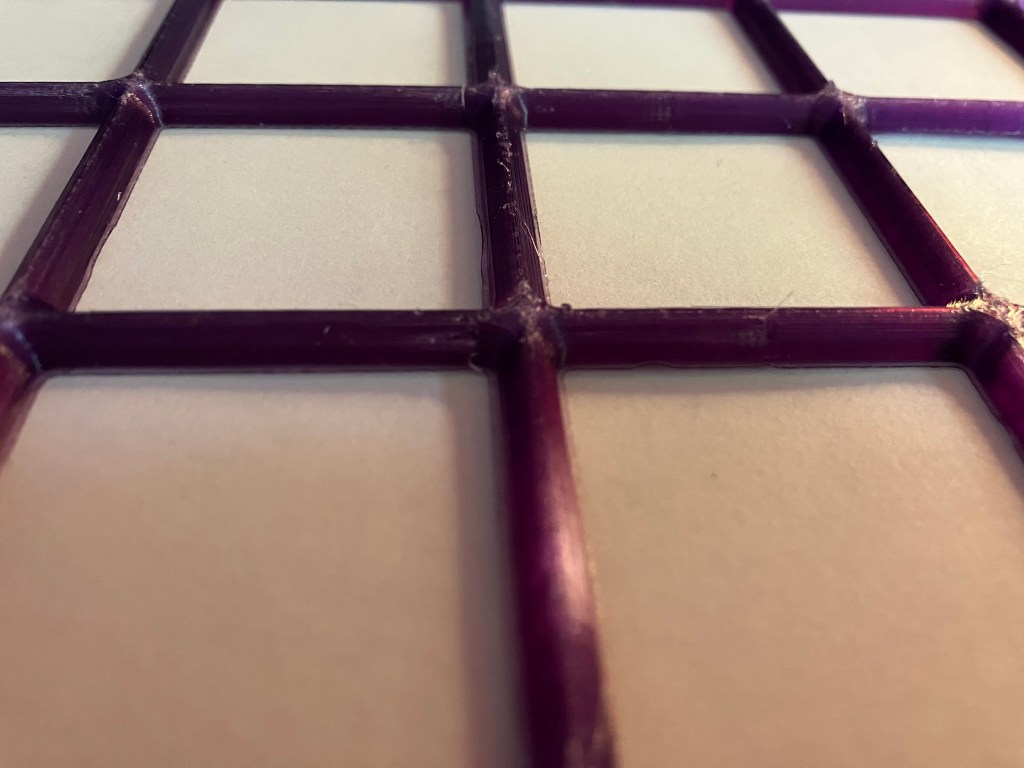
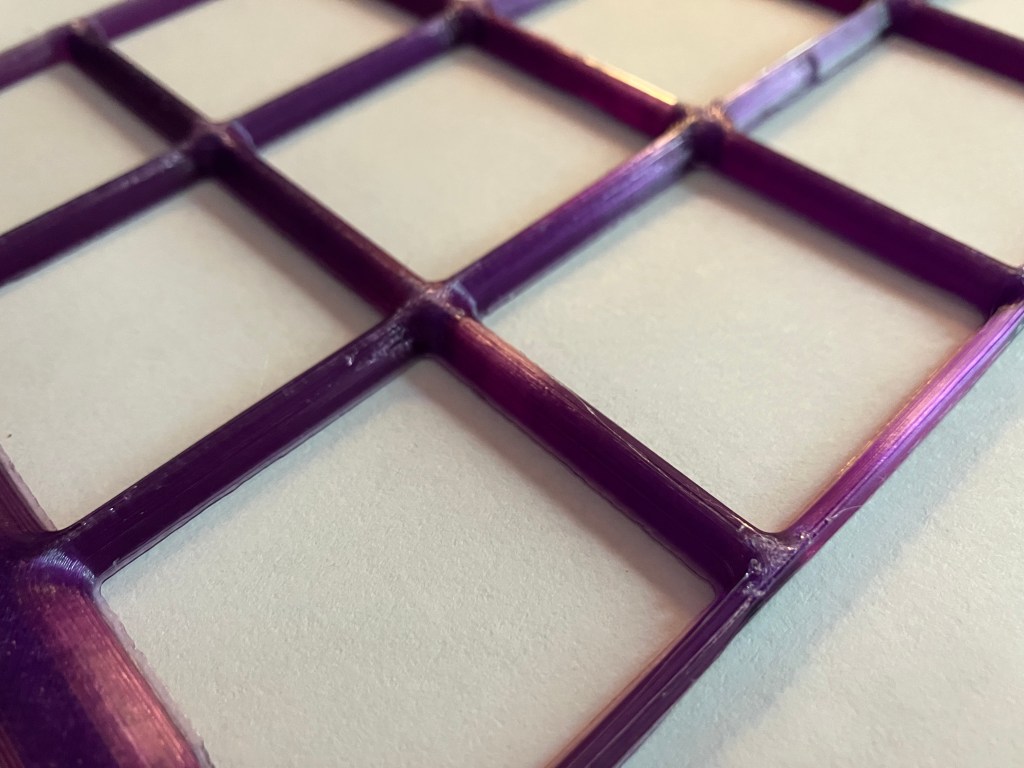
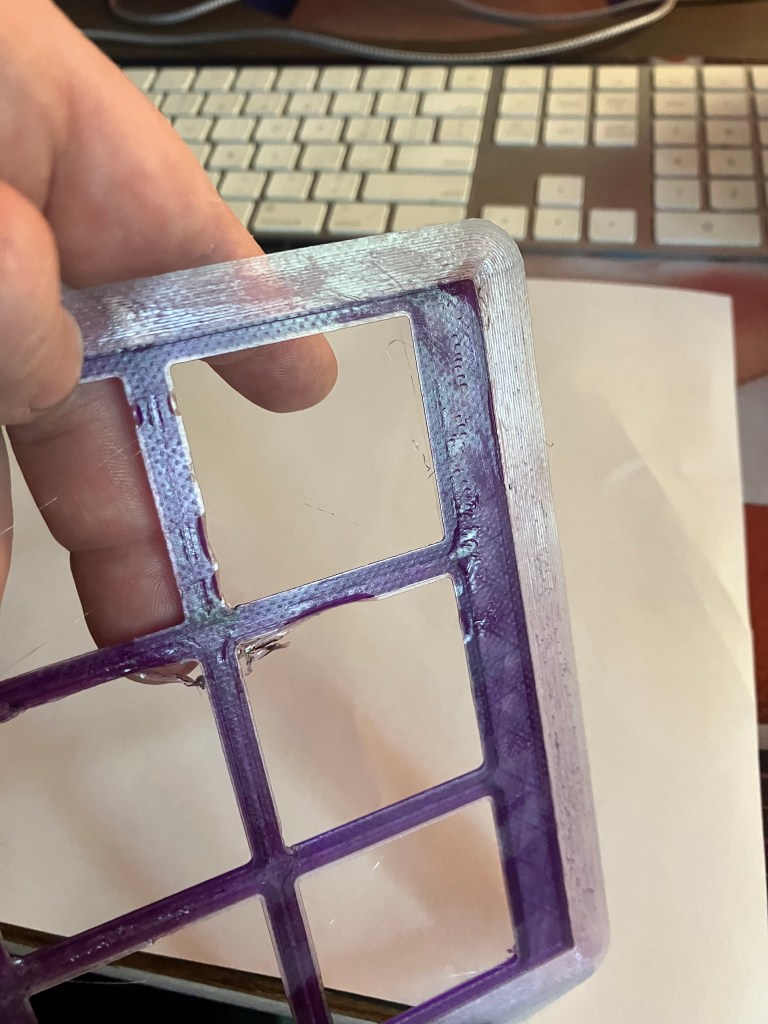
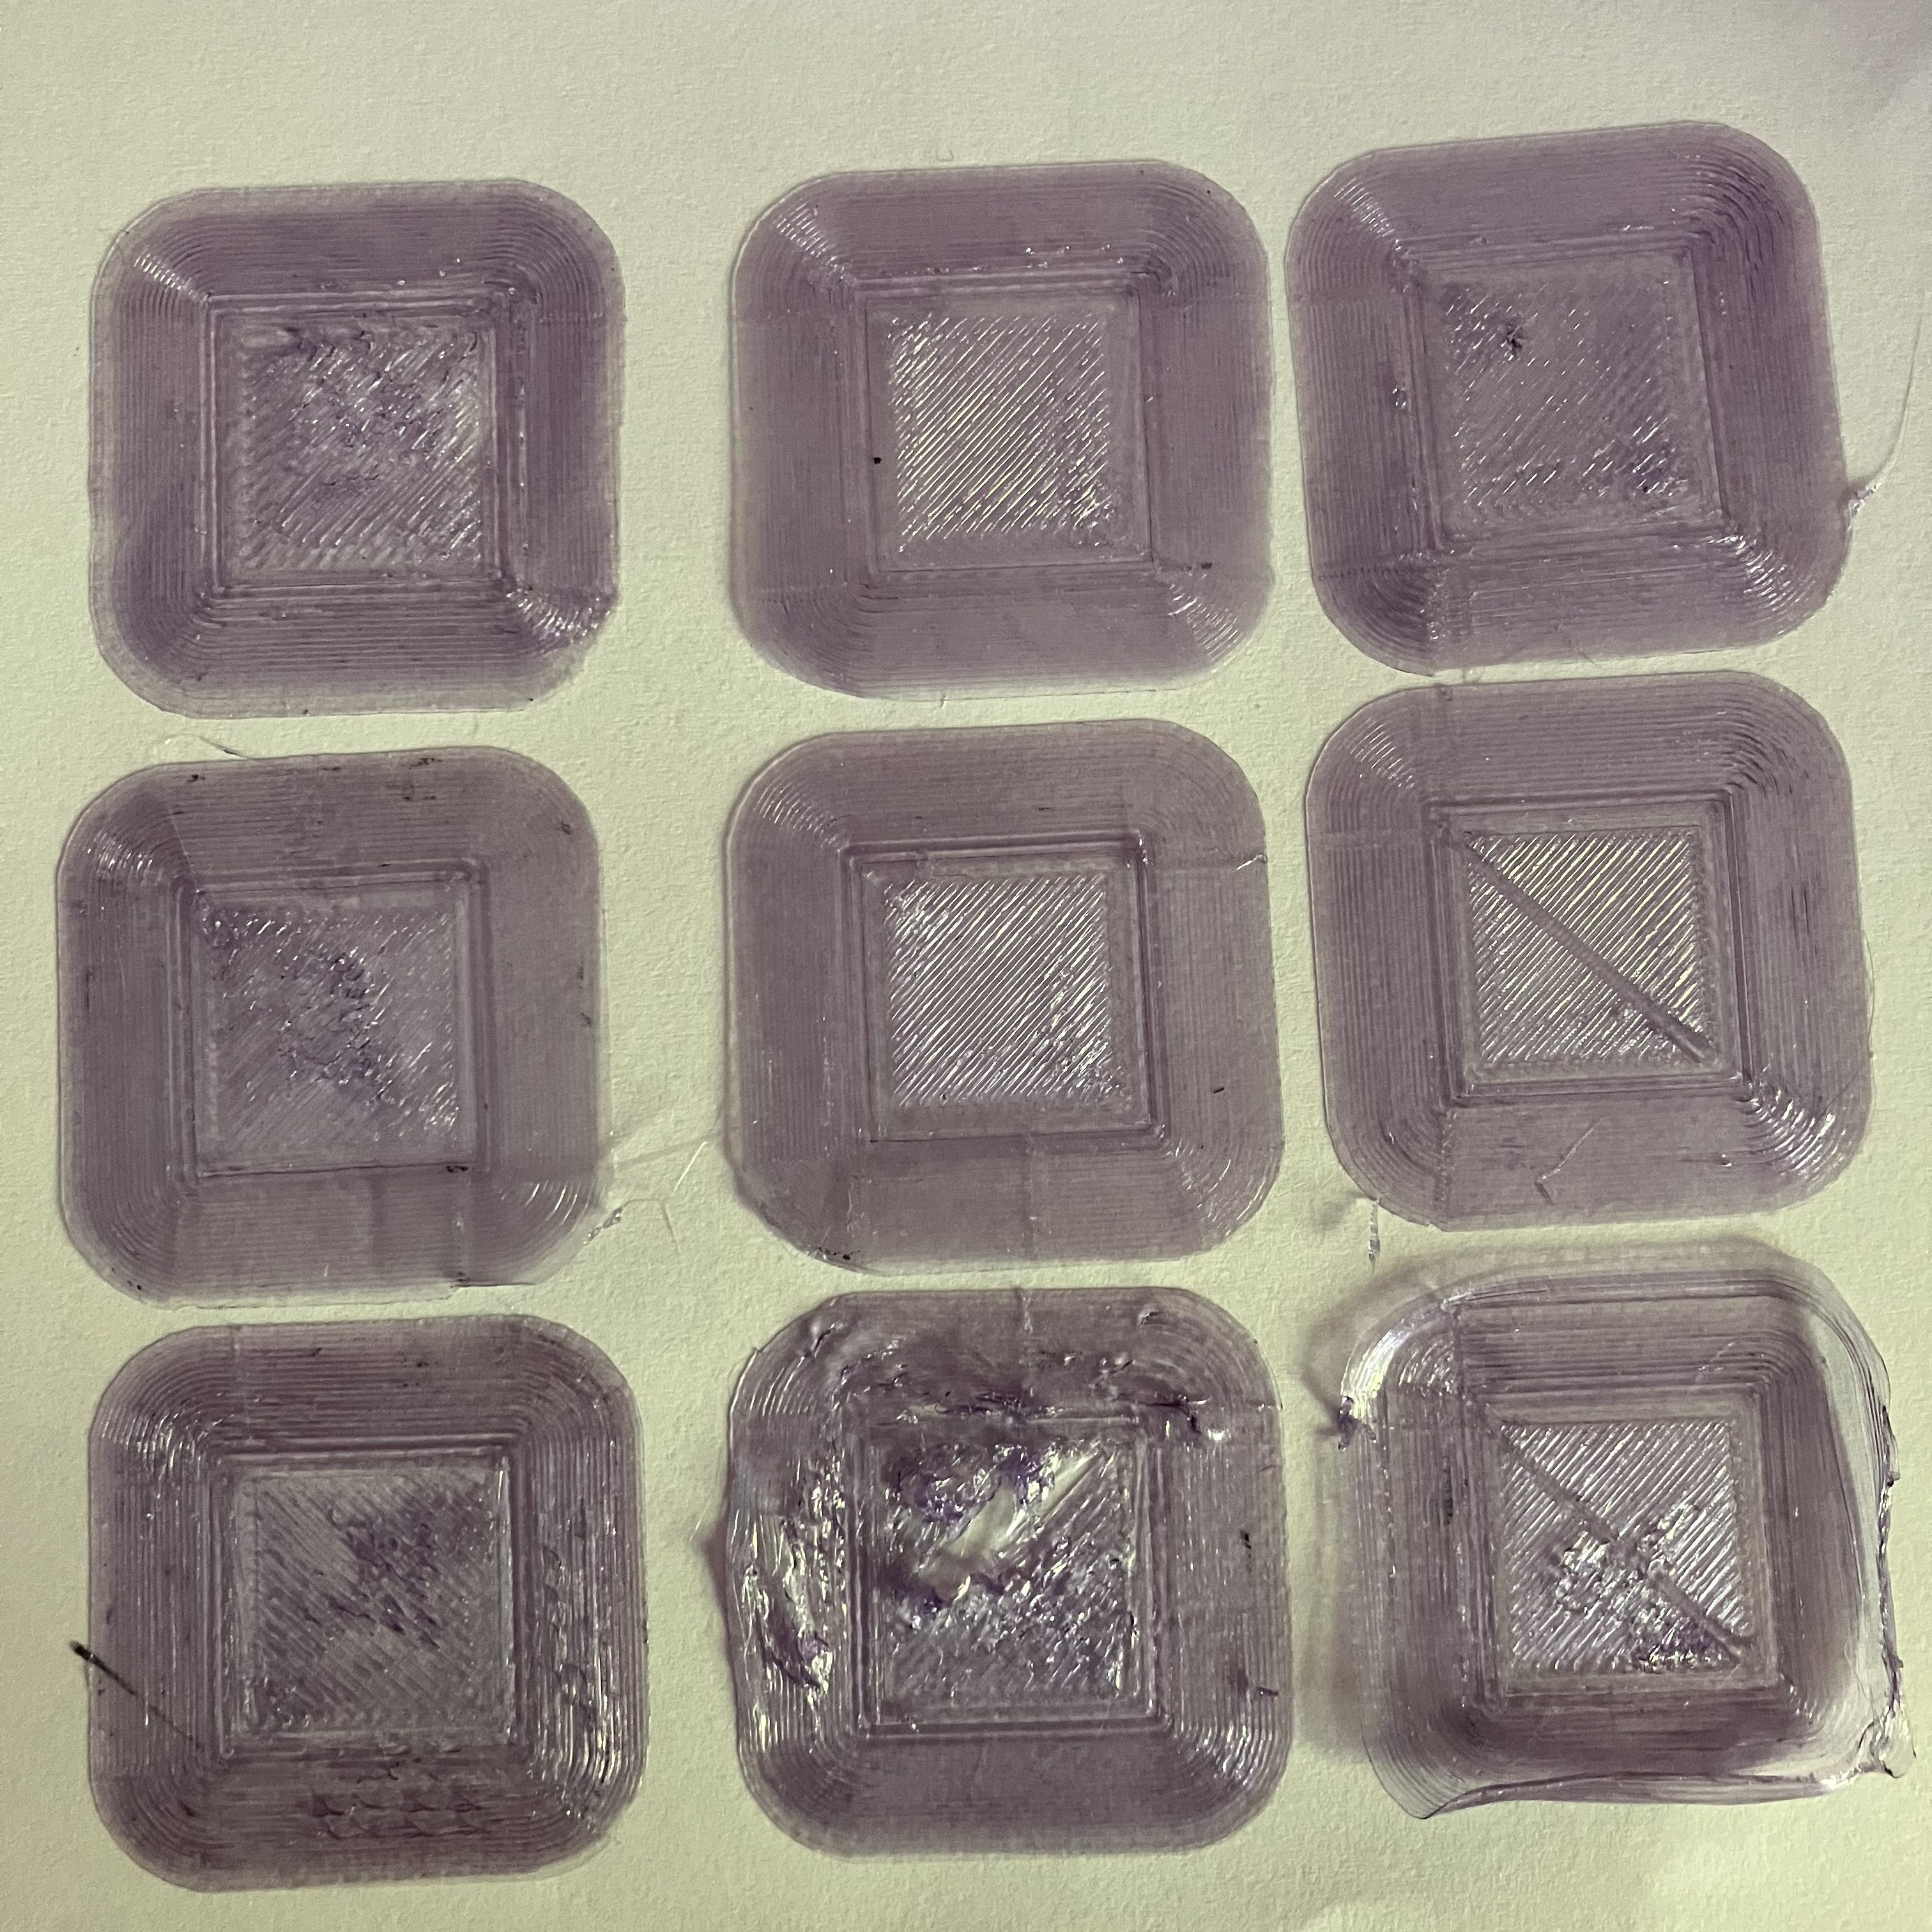
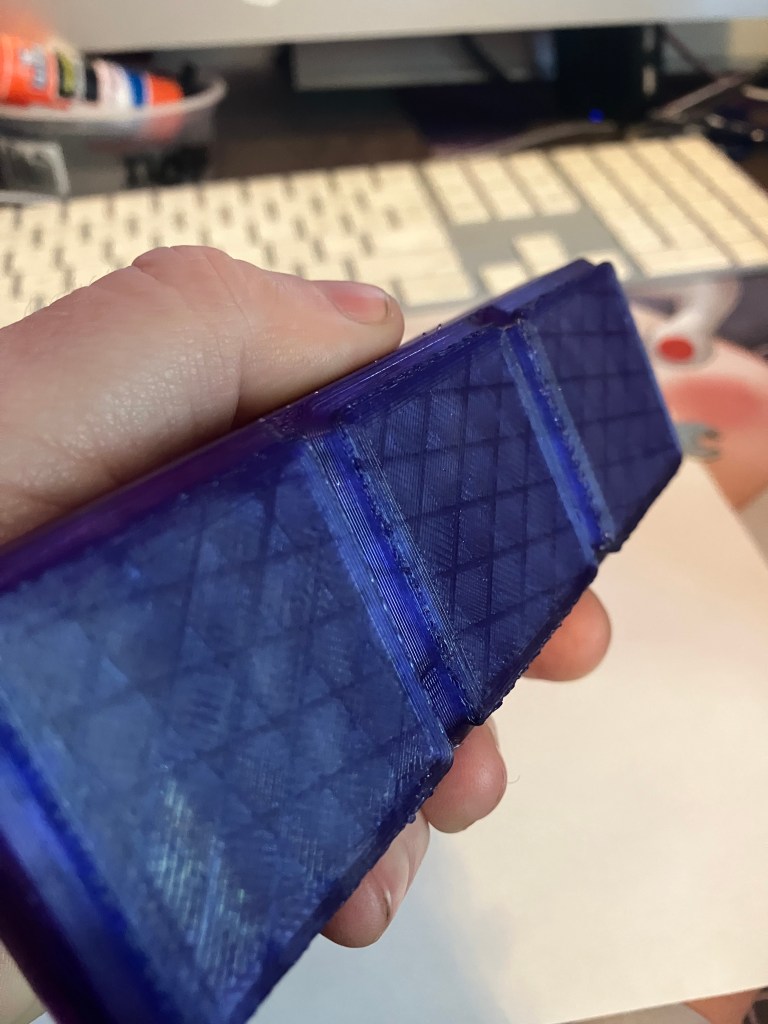
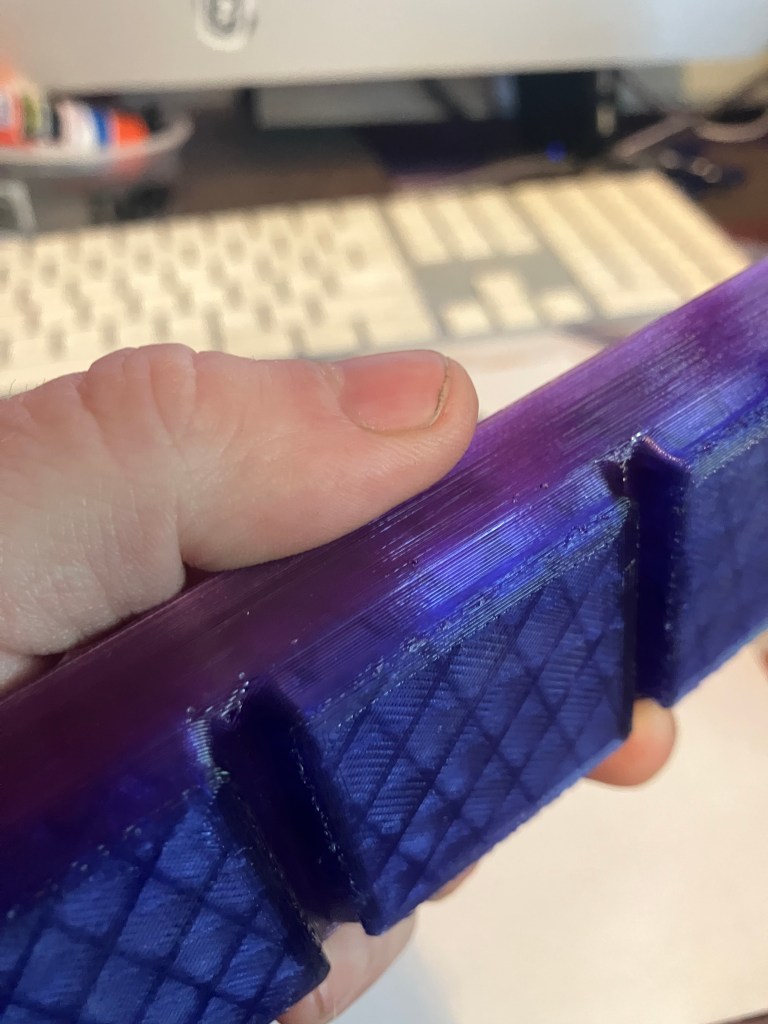
I printed a grid test at home last night, using PLA and my home printer (Artillery Sidewinder X2), sized for my kobalt mini toolchest, since my print bed isn’t big enough to be very size efficient for the shop toolchests. Print went well, but had some issues with gapping at the z seam. Did a little googling, updated my slicer settings (using Cura) to turn off retraction and combing to see if that helps. There is also some distortion at the corners, which I’m not sure about, since I’m printing with a brim and there doesn’t seem to be any pulling up from the print bed. Second test is printing now.
Next steps, in no order:
- Buy PETG to print test at home (maybe not necessary, but PLA is more hydroscopic so may not be the best since my filament has been open for a few months now)
Take more specific measurements of shop toolchest and tools (apparently not locked, just latched, so I’ll need to figure that out)- Practice printing with Prusa XL to familiarize with settings and software (do any computers print directly to the machines, or are they all through a drive?)
- Work through Fusion tutorials for gridfinity
- Design tool container to test process and fit
Update a few hours later:
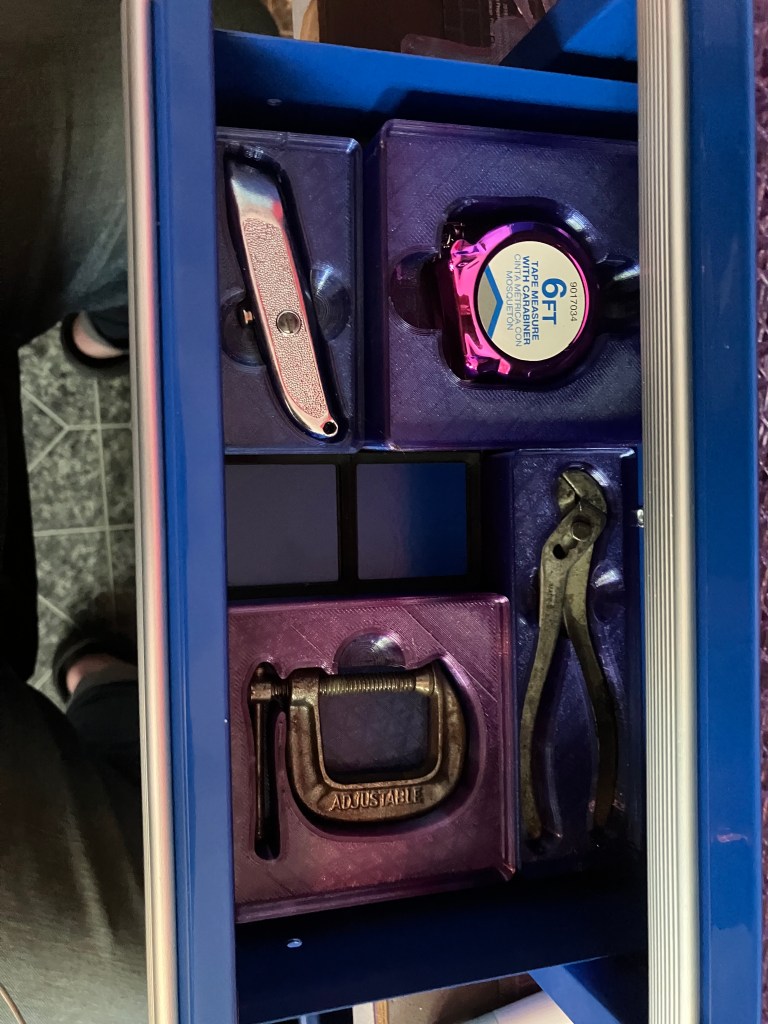
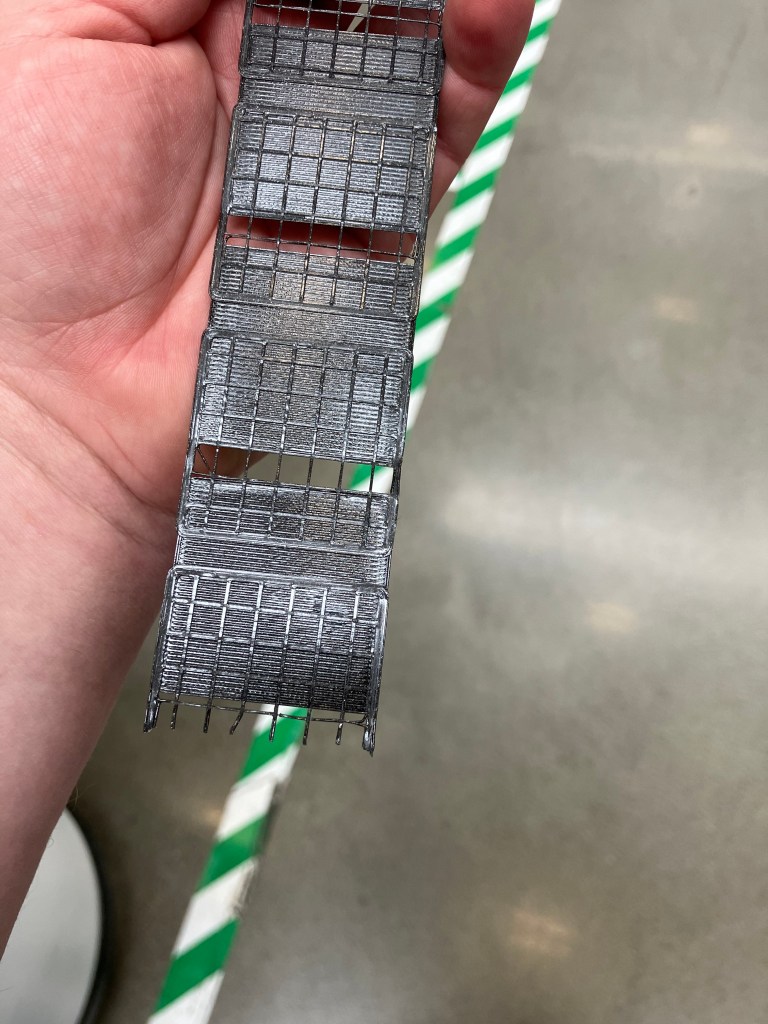
I measured the toolchest drawers, however they are basically empty. Stephen said to discuss with Nate tomorrow what tools should be going in the toolchests for the mills. I might develop suggestions for this as well, as I start working on my milling training All measurements were just done with a tape, which is not the best tool for the job, but close enough. Each drawer loses functional space due to overhangs at the front and back, rolled edges on the sides, and rivets/slider hooks impinging on the internal space on each side. So the precise measurements should be used for the border of the grid, but the grid itself should only use the functional dimensions, or else we risk tool bins/shadowboxes not sitting properly or tools being annoying to get out.
The “precise” measurements include the ‘true’ internal dimensions of the drawers (edge to edge, disregarding hardware attachments and lips) for width and depth, but only go to the edge of the rollover of the top of the drawers for the height measurement. The height is not relevant for building the grid itself, but it will be for planning the tool organization, so I’m considering the height of the rolled edge a necessary buffer to make sure the drawers can close.
There are 7 total drawers (numbered from the top down) plus the top shelf which I have clustered into 4 types:
A
- Includes drawers 2, 3, 4, and 5.
- Nominal internal measurements are: 57cm W, 49cm D, 6cm H
- Precise internal measurements: 56.9cm W, 49.5cm D, 5.3cm H
- Functional internal measurements: 56cm W, 48cm D, 5.3cm H
- Shallowest drawer type–tools should be organized in a single layer
B
- Includes drawers 1 and 6
- Nominal internal measurements are: 57cm W, 49cm D, 12cm H
- Precise internal measurements: 56.9cm W, 49.5cm D, 12cm H
- Functional internal measurements: 56cm W, 48cm D, 12cm H
- Deeper drawers, but only 1 slider on each side, so can stack organizers but should be careful not to overload
C
- Drawer 7 only
- Nominal internal measurements are: 57cm W, 49cm D, 13cm H
- Precise internal measurements: 56.9cm W, 49.5cm D, 13.5cm H
- Functional internal measurements: 56cm W, 48cm D, 13.5cm H
- Has 2 sliders on each side of drawer, so can safely use for heaviest items
D
- Top of toolchest, or ‘drawer 0’
- Nominal measurements: 68 cm W x 55 cm D x indefinite
- Functional measurements: 67.9 W x 55.4 cm D x single layer, multi/variable-height organizers ok
- If using multiple heights of trays, tall should be positioned towards rear and short to the front for access
- Flat space should be maintained to hold notebook, laptop, or other personal items
Update 2, even later
Donovan printed a test stack on the Prusa XL and it looks like the printer bed isn’t level and it’s challenging to figure out how to fix that, so Ian is recommending we maybe just use the Bambu instead. I’m going to look at the machine specs for what we have to work with and my drawer sizes and see what looks good.


4/14 WebLog
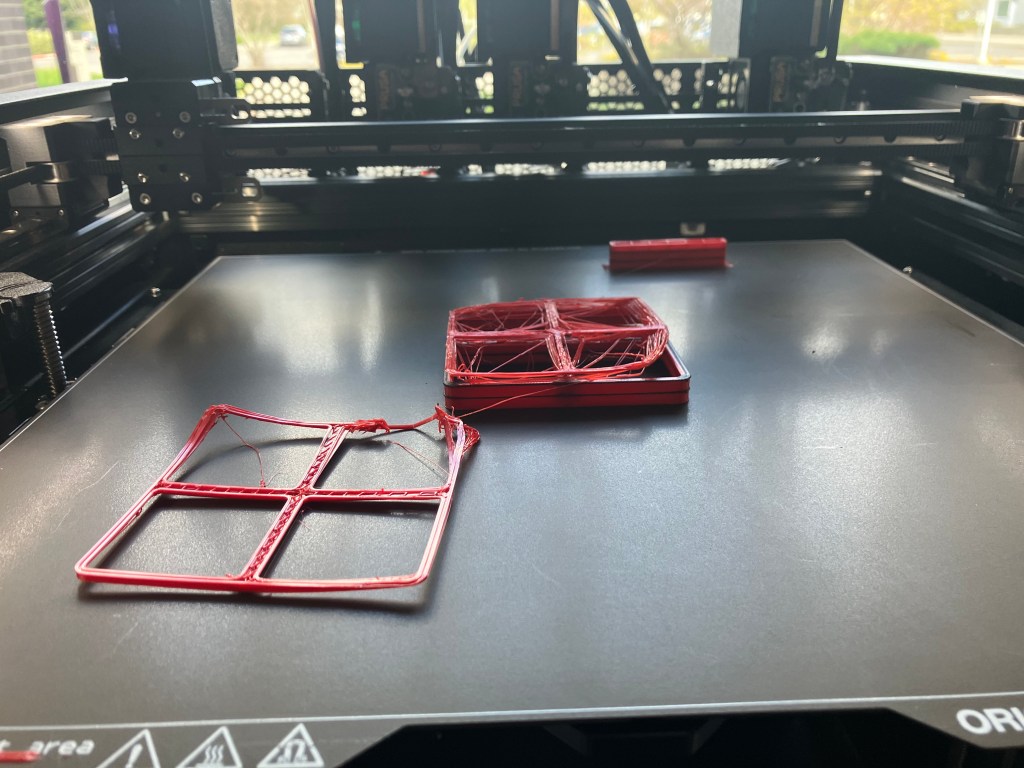
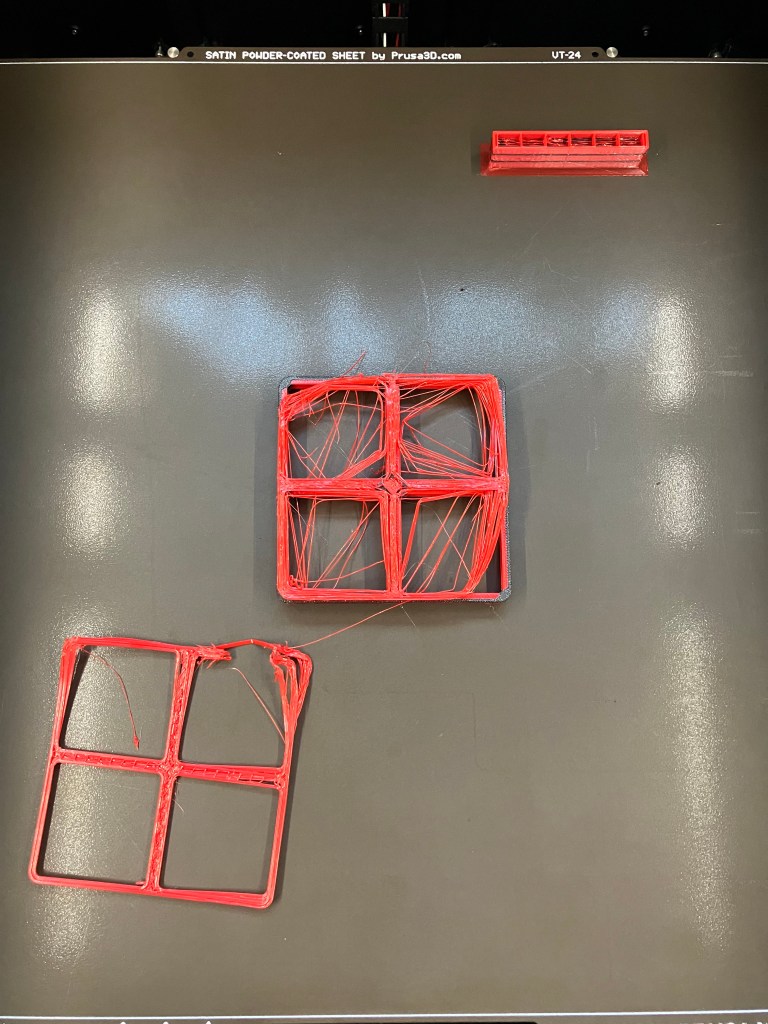
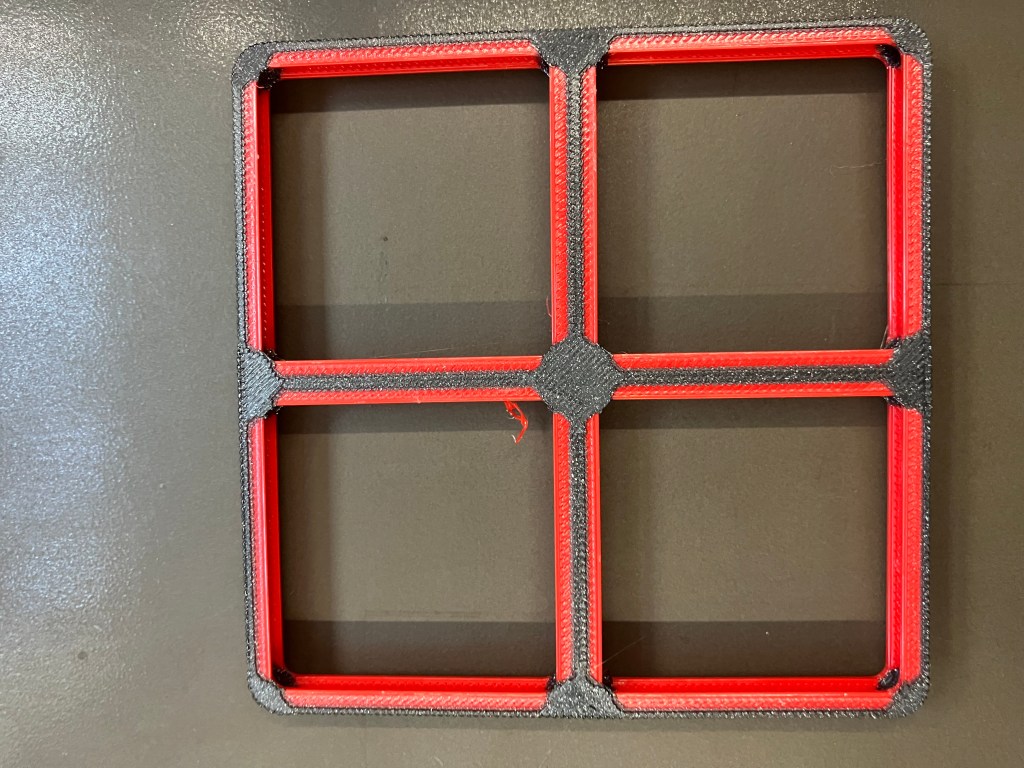
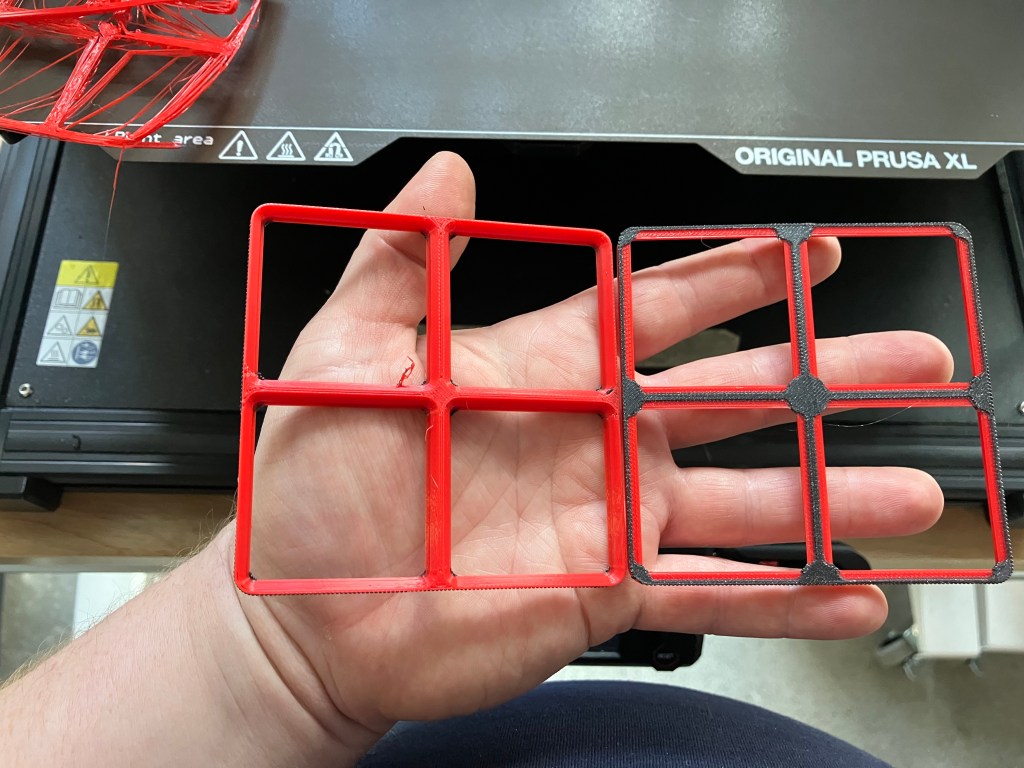
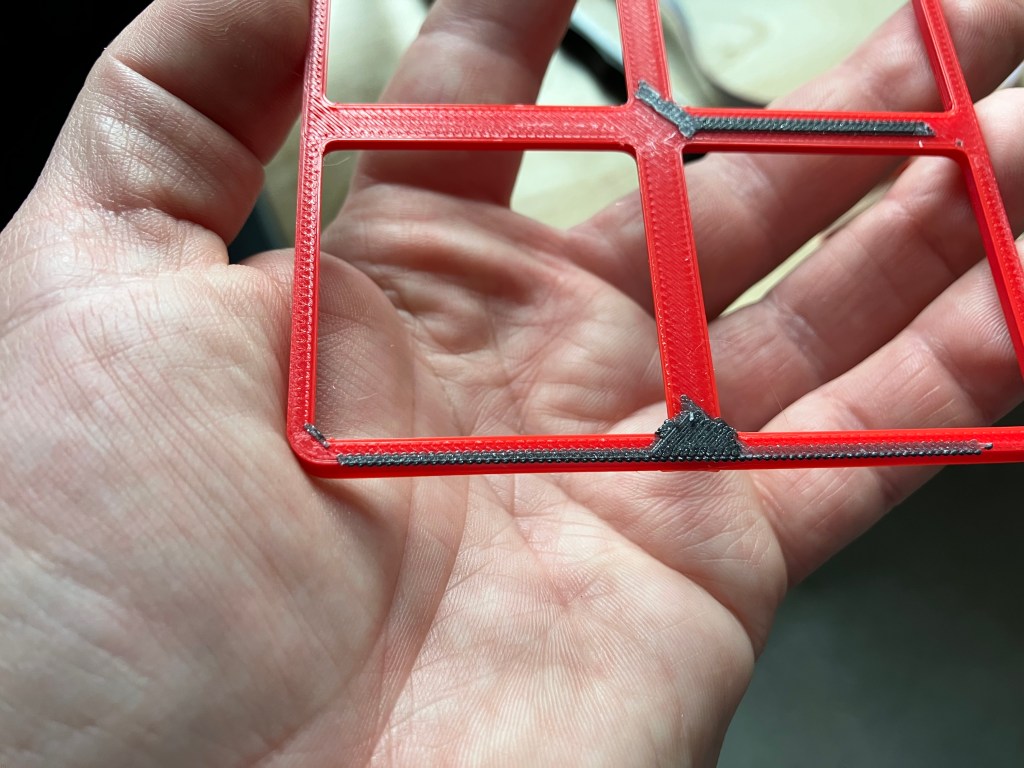
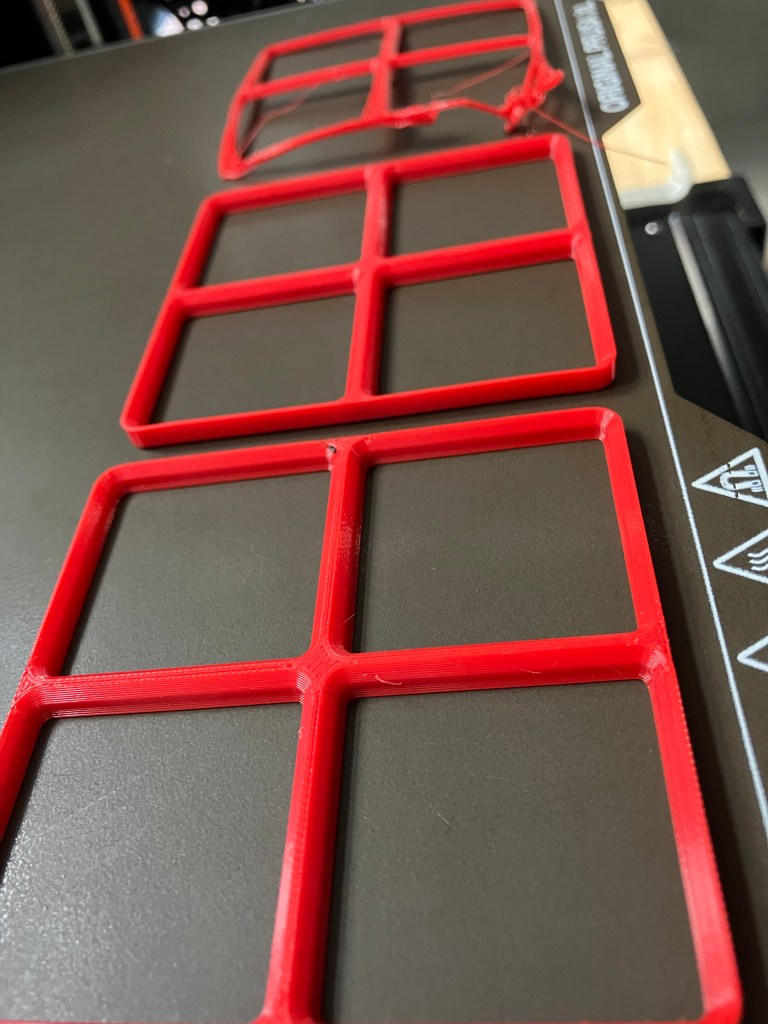
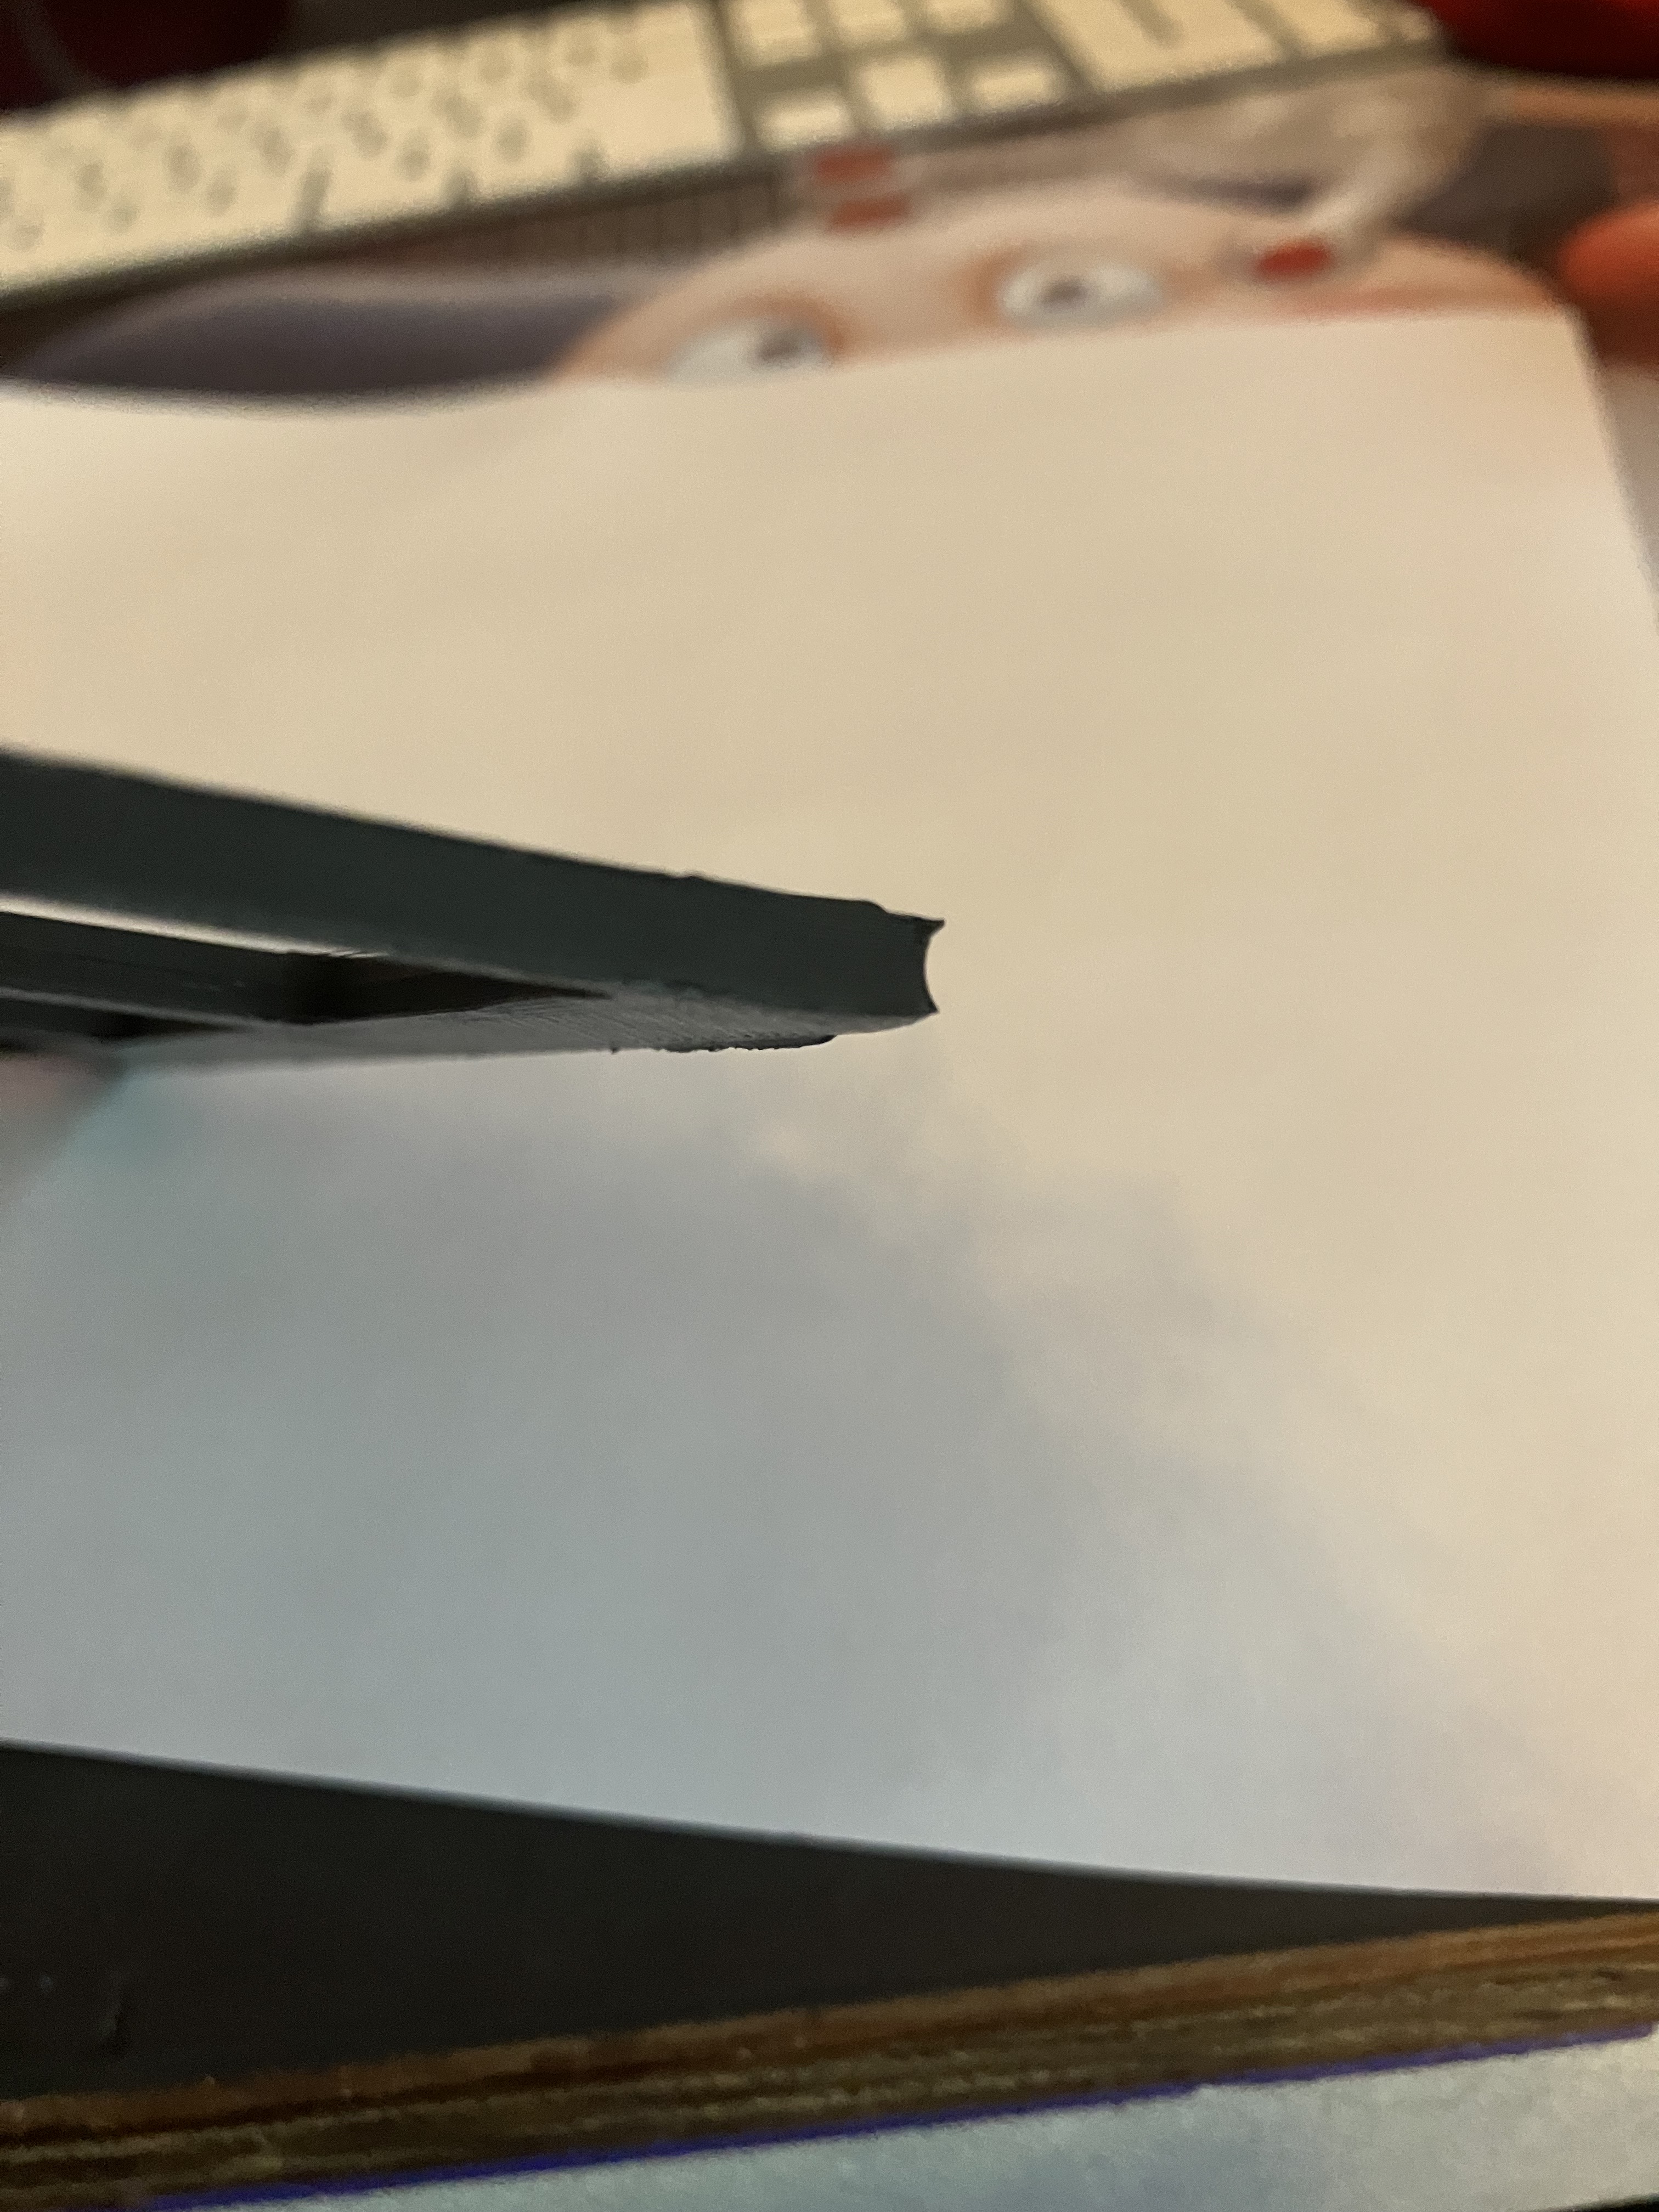
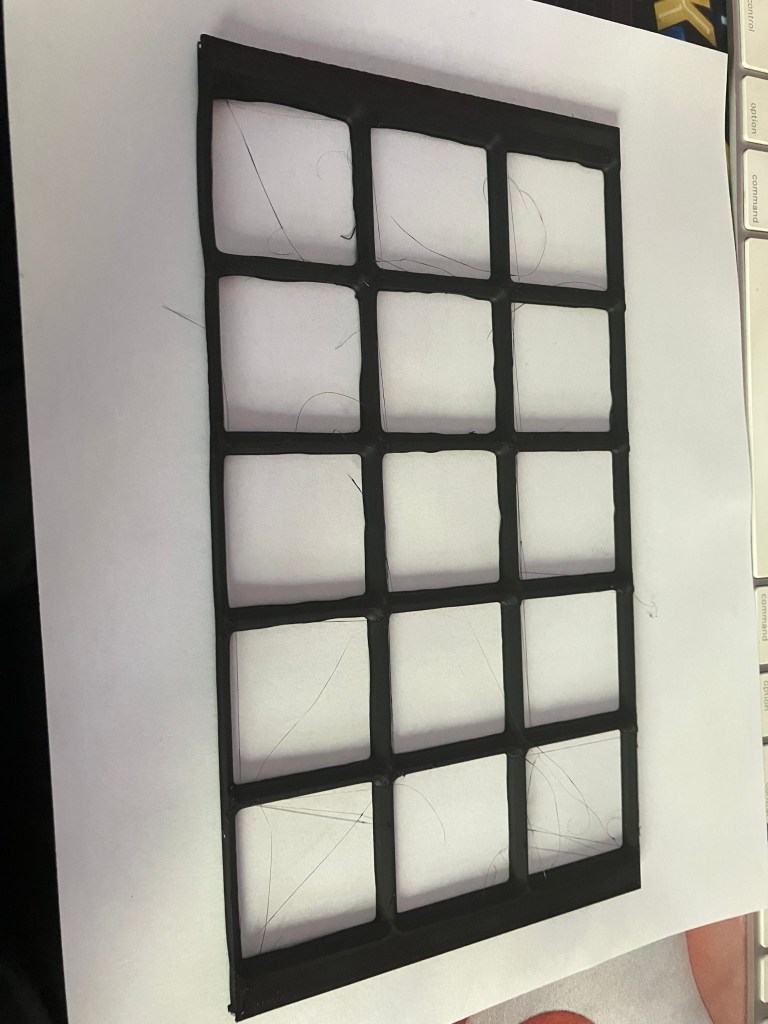
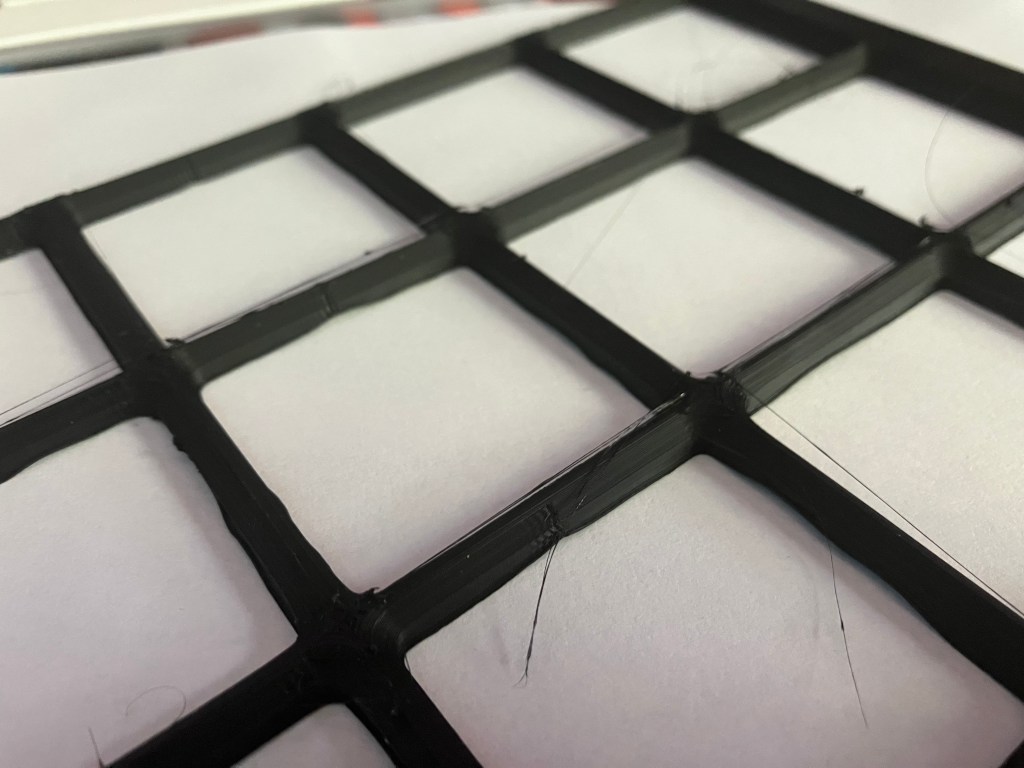
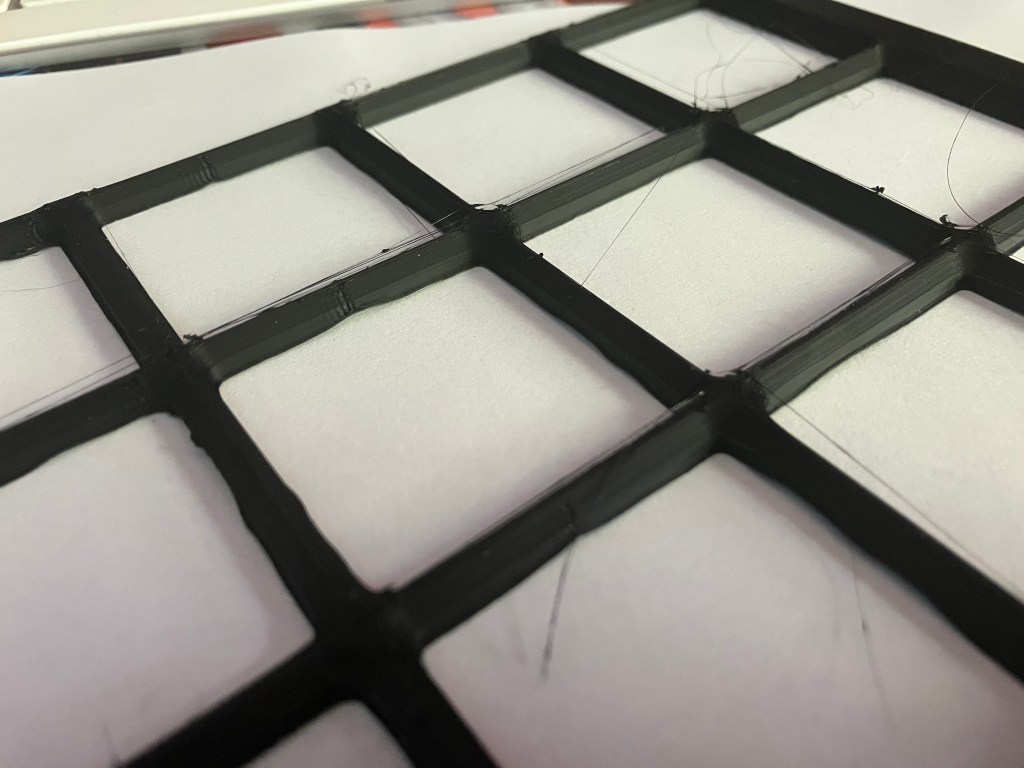
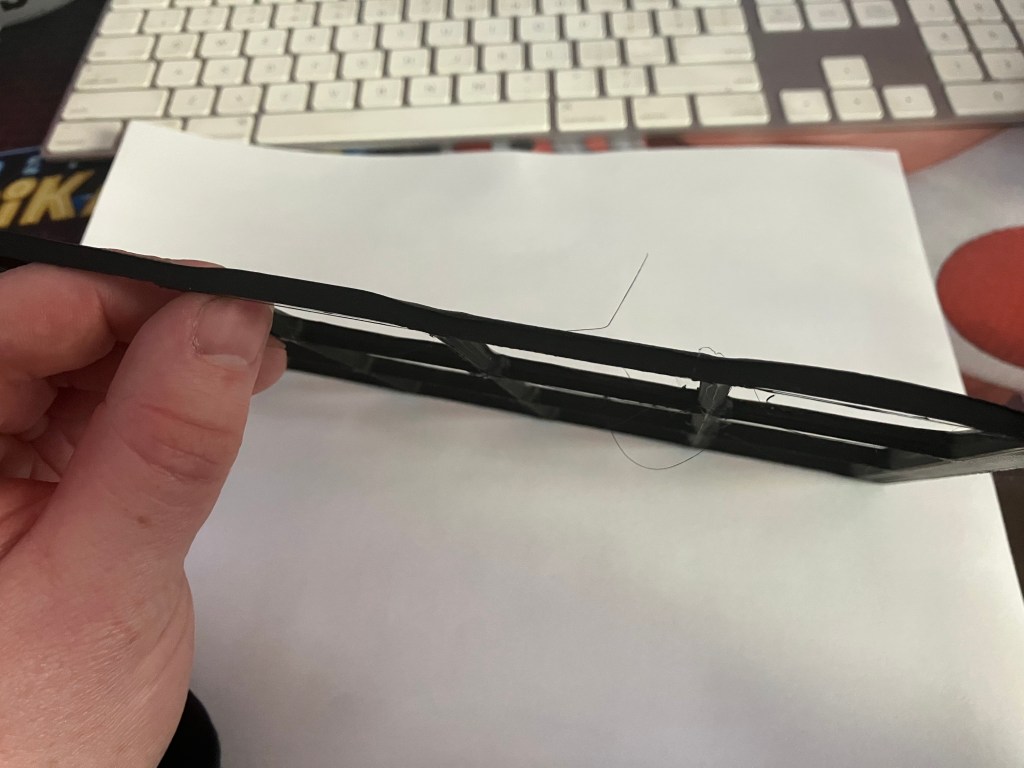
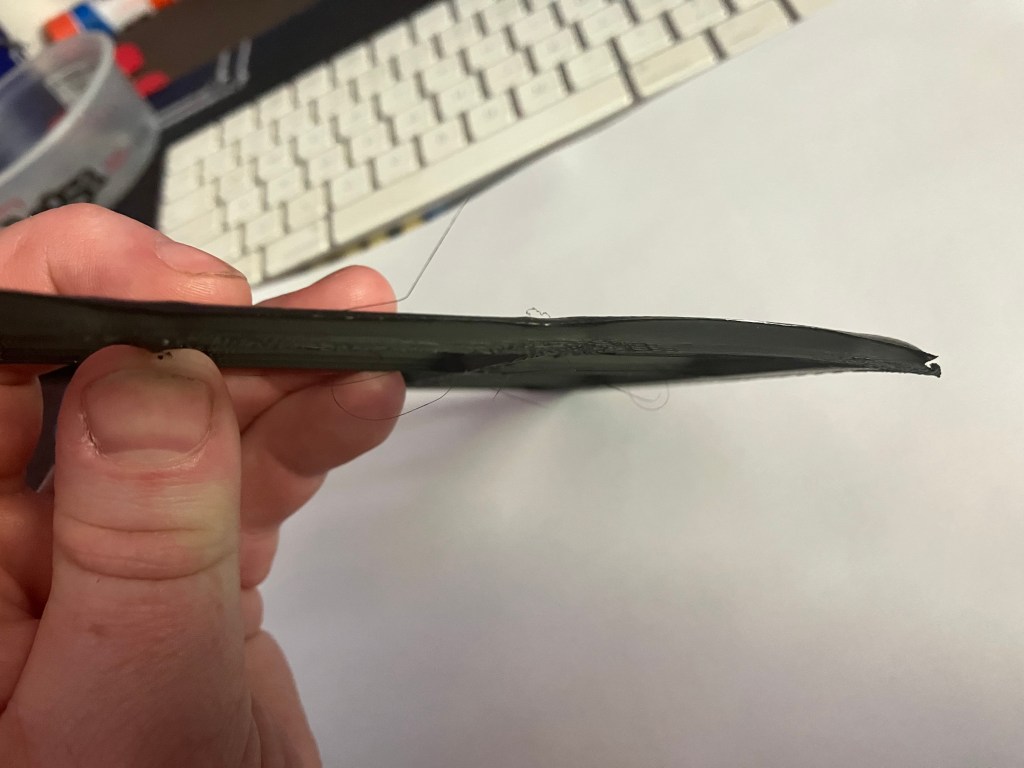
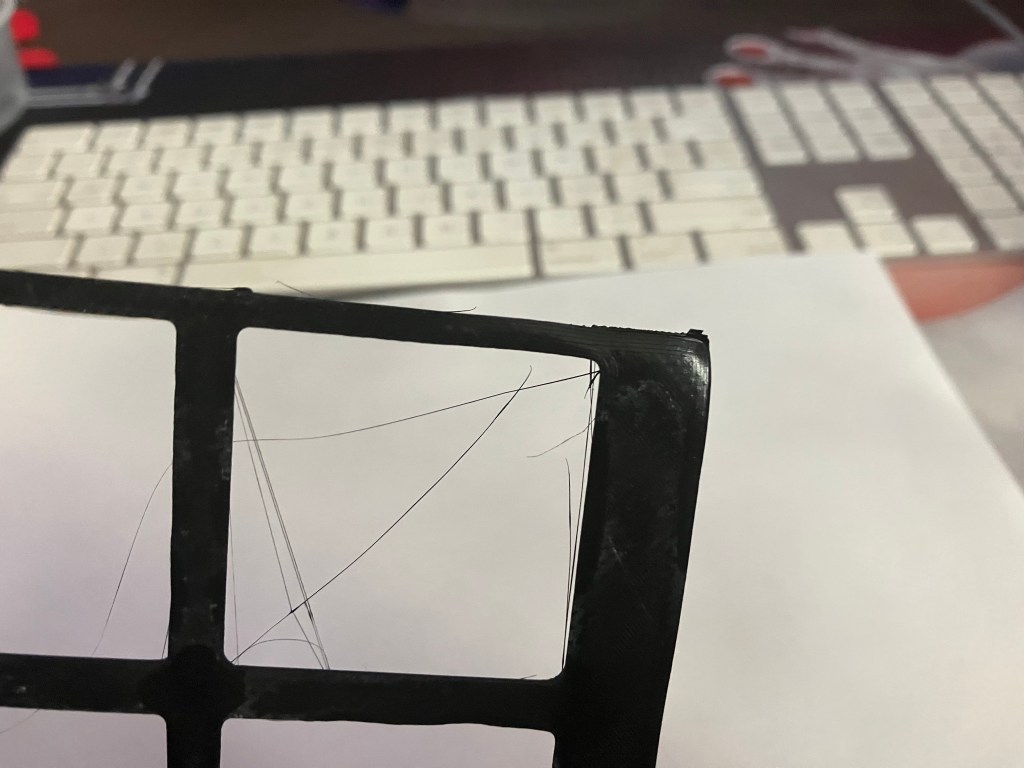
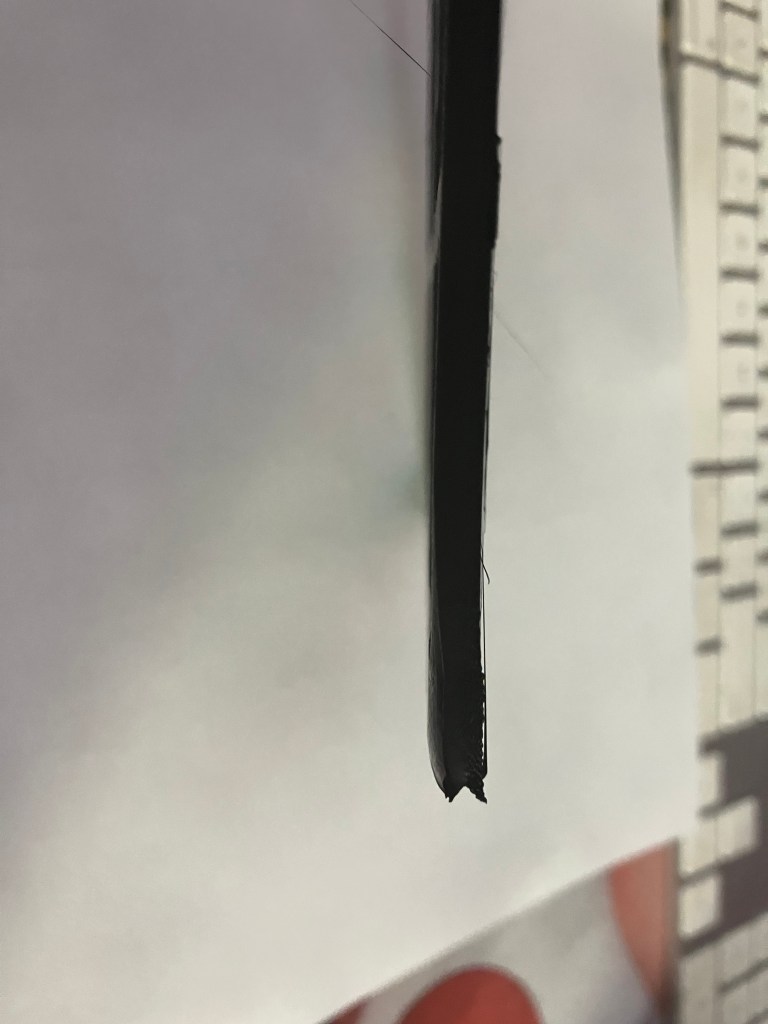
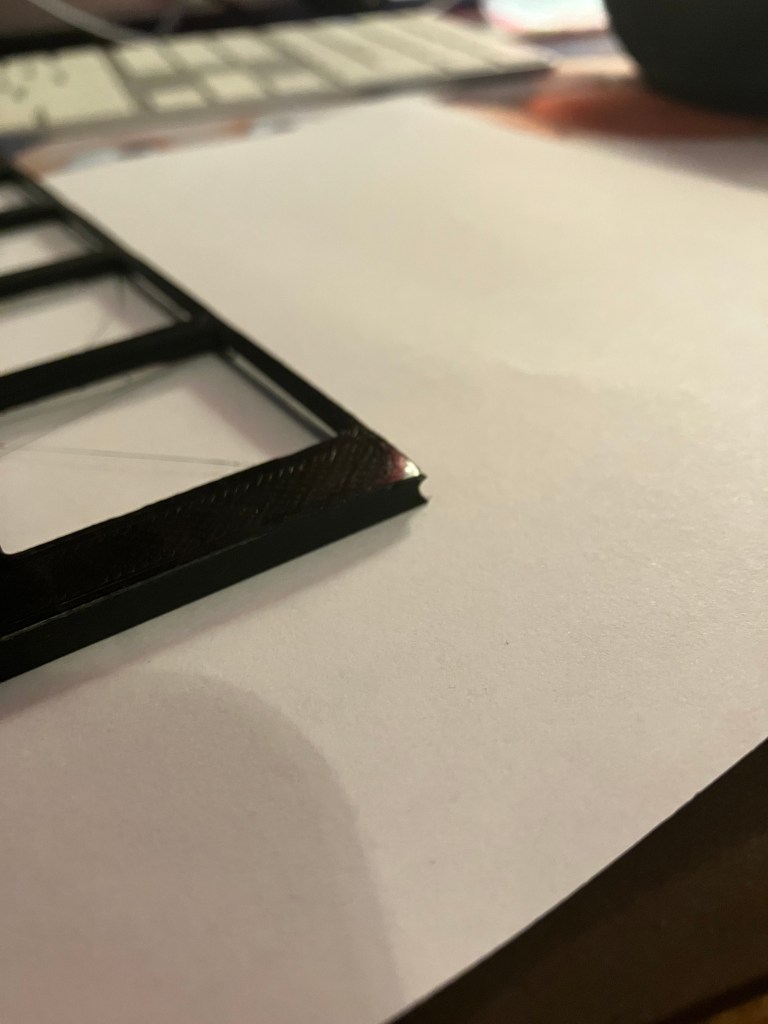
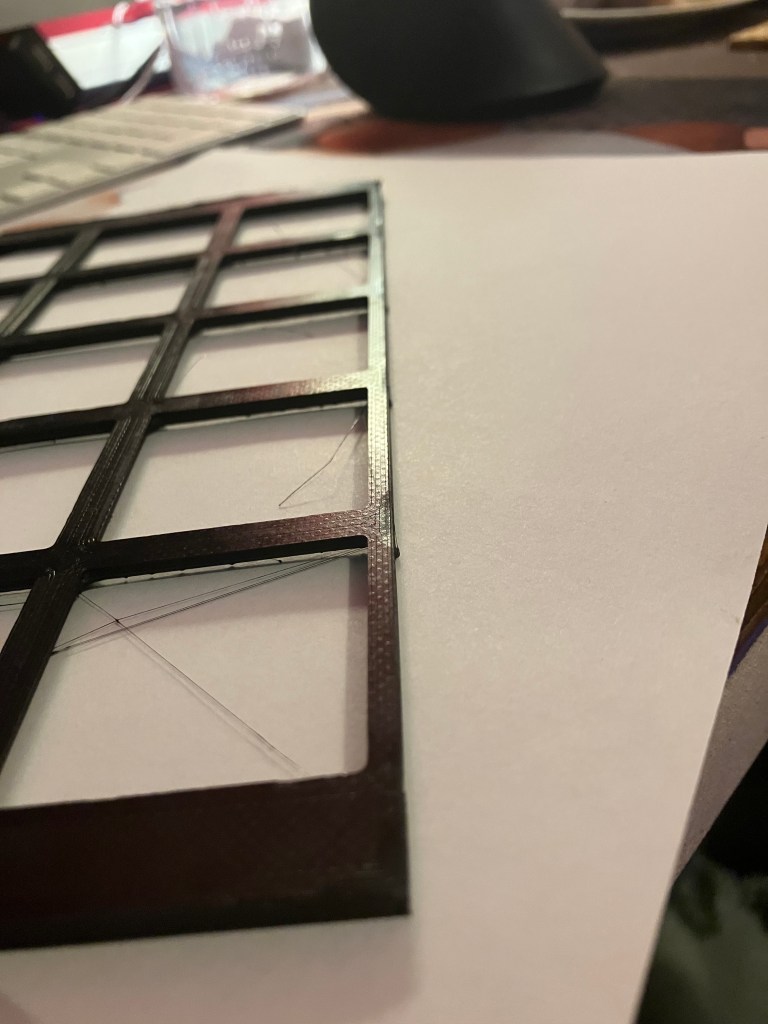
Yesterday’s second home test of the grid showed a slight improvement of the z seam gapping, but not much, and had some unappealing stringing, which also led to more roughness on the top layer and trimming it off affected the overall structure. It also has the same corner distortion issue.
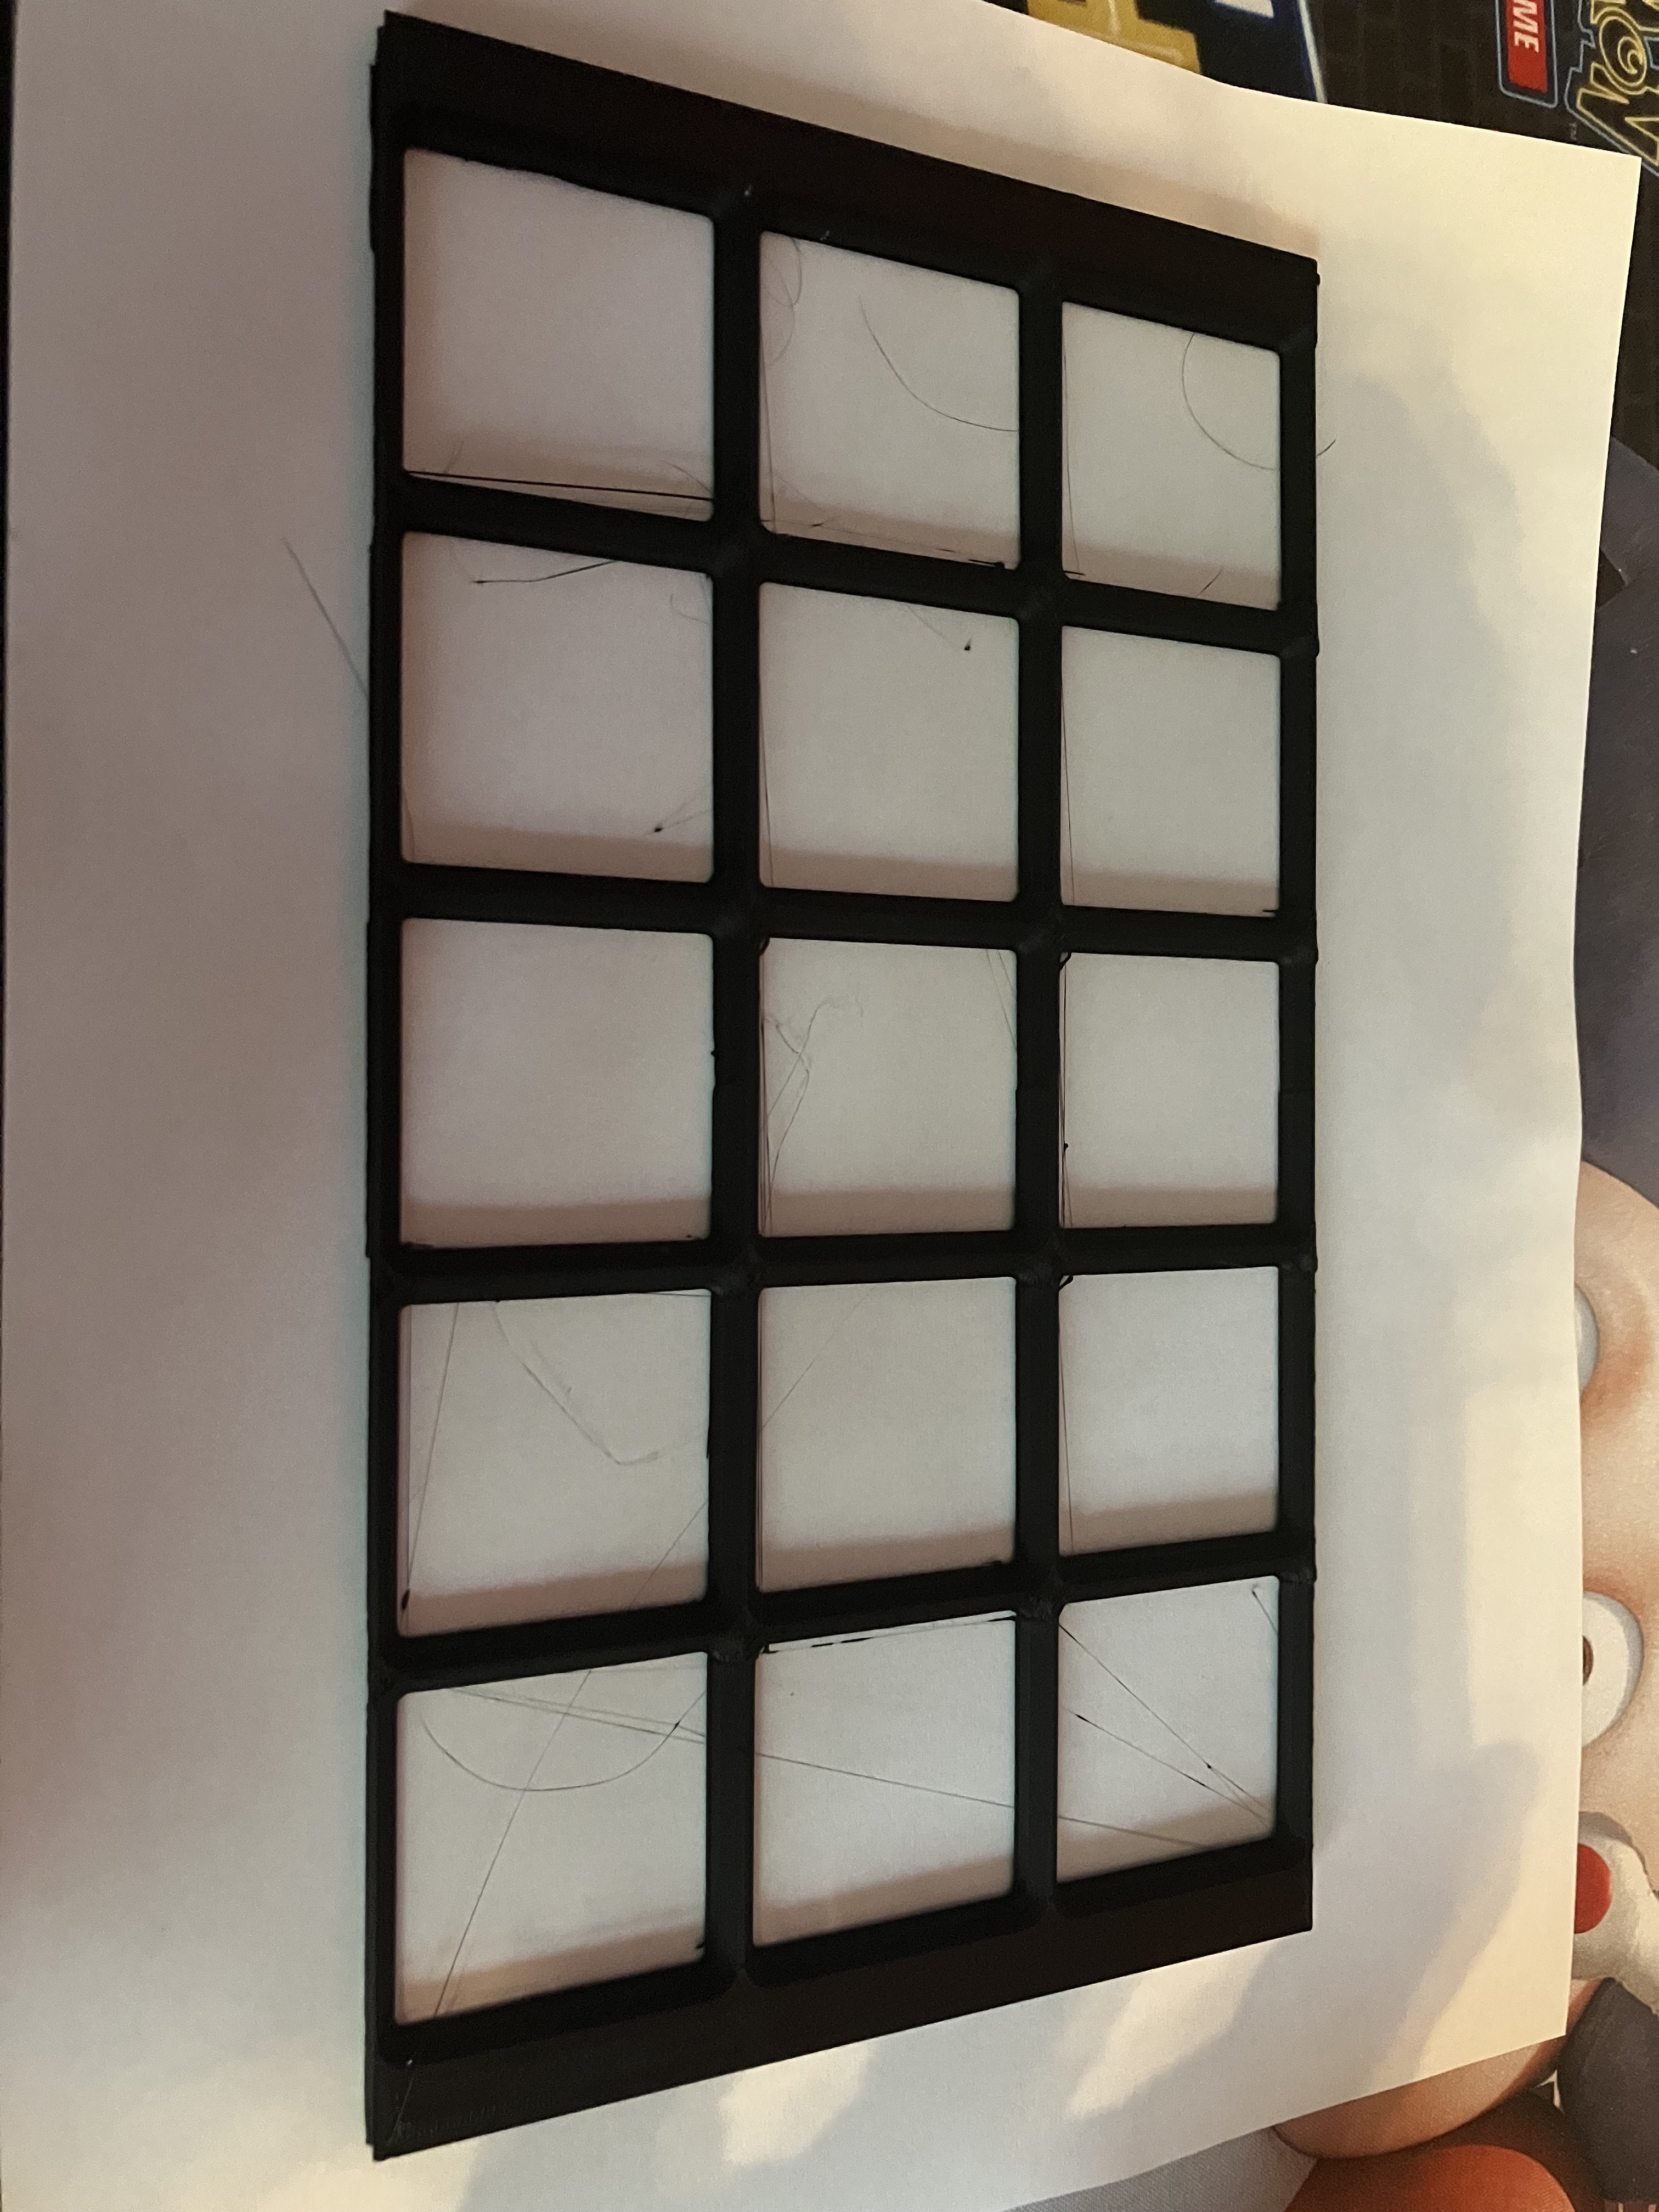
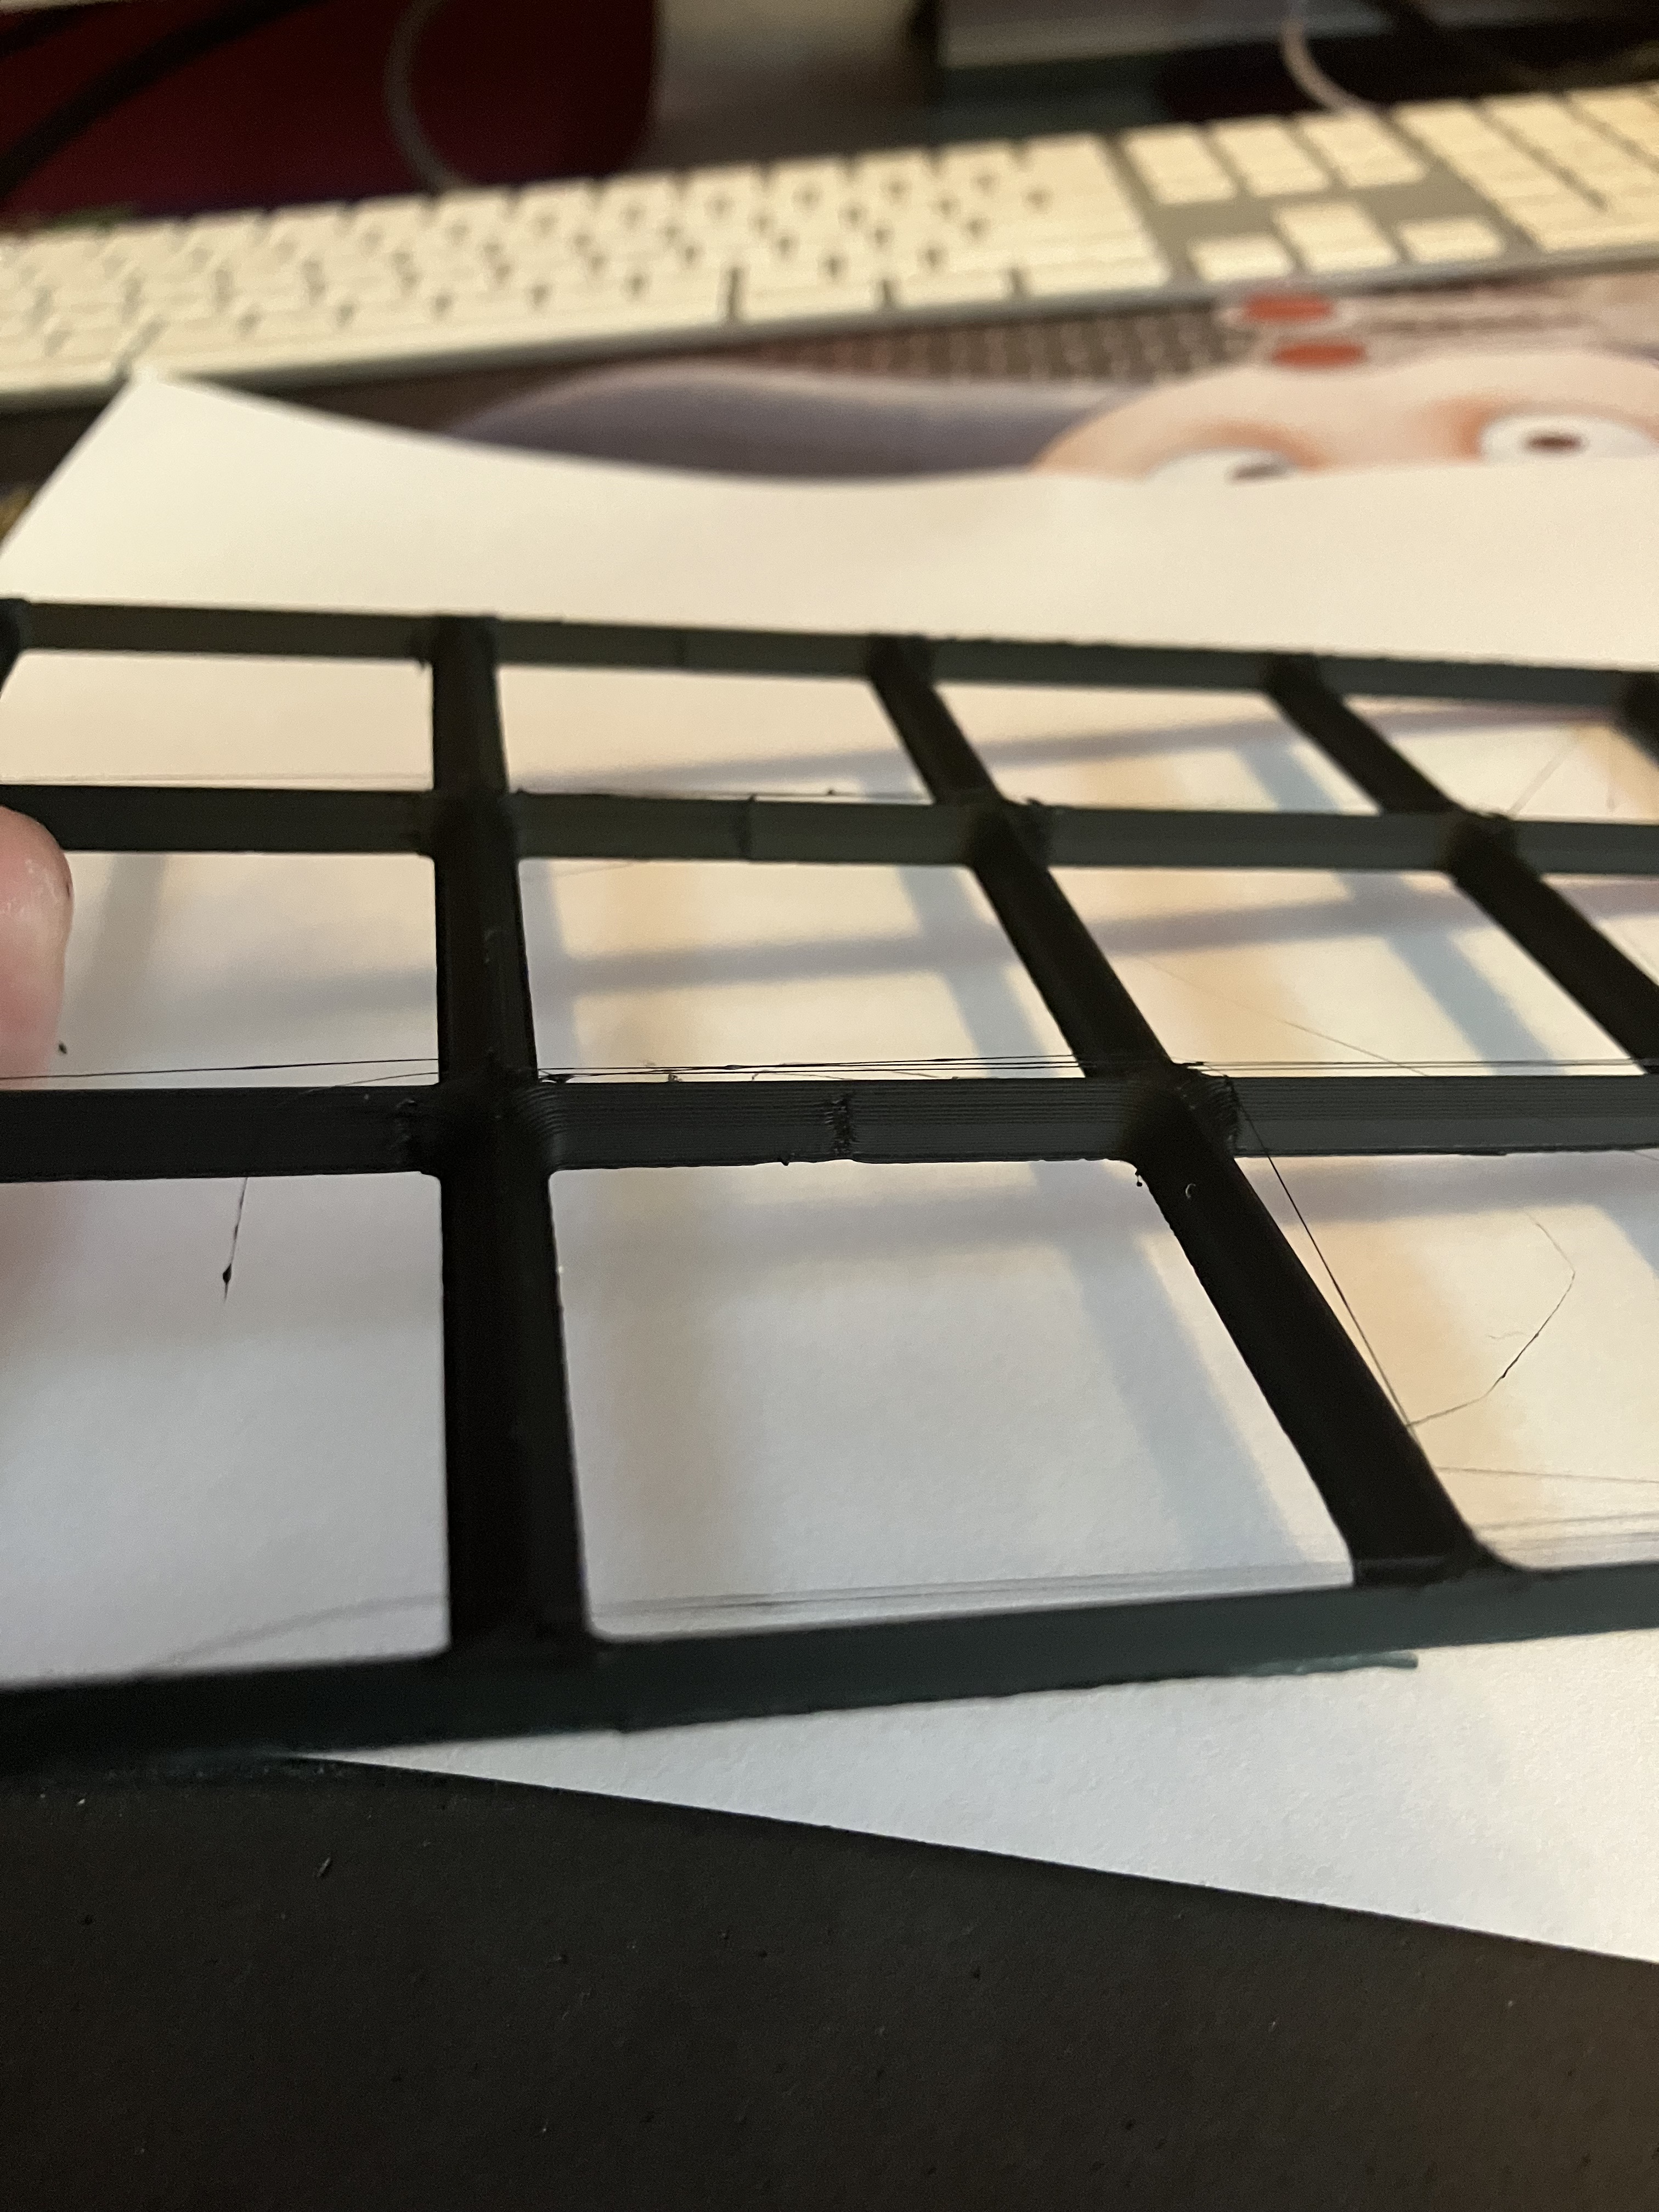
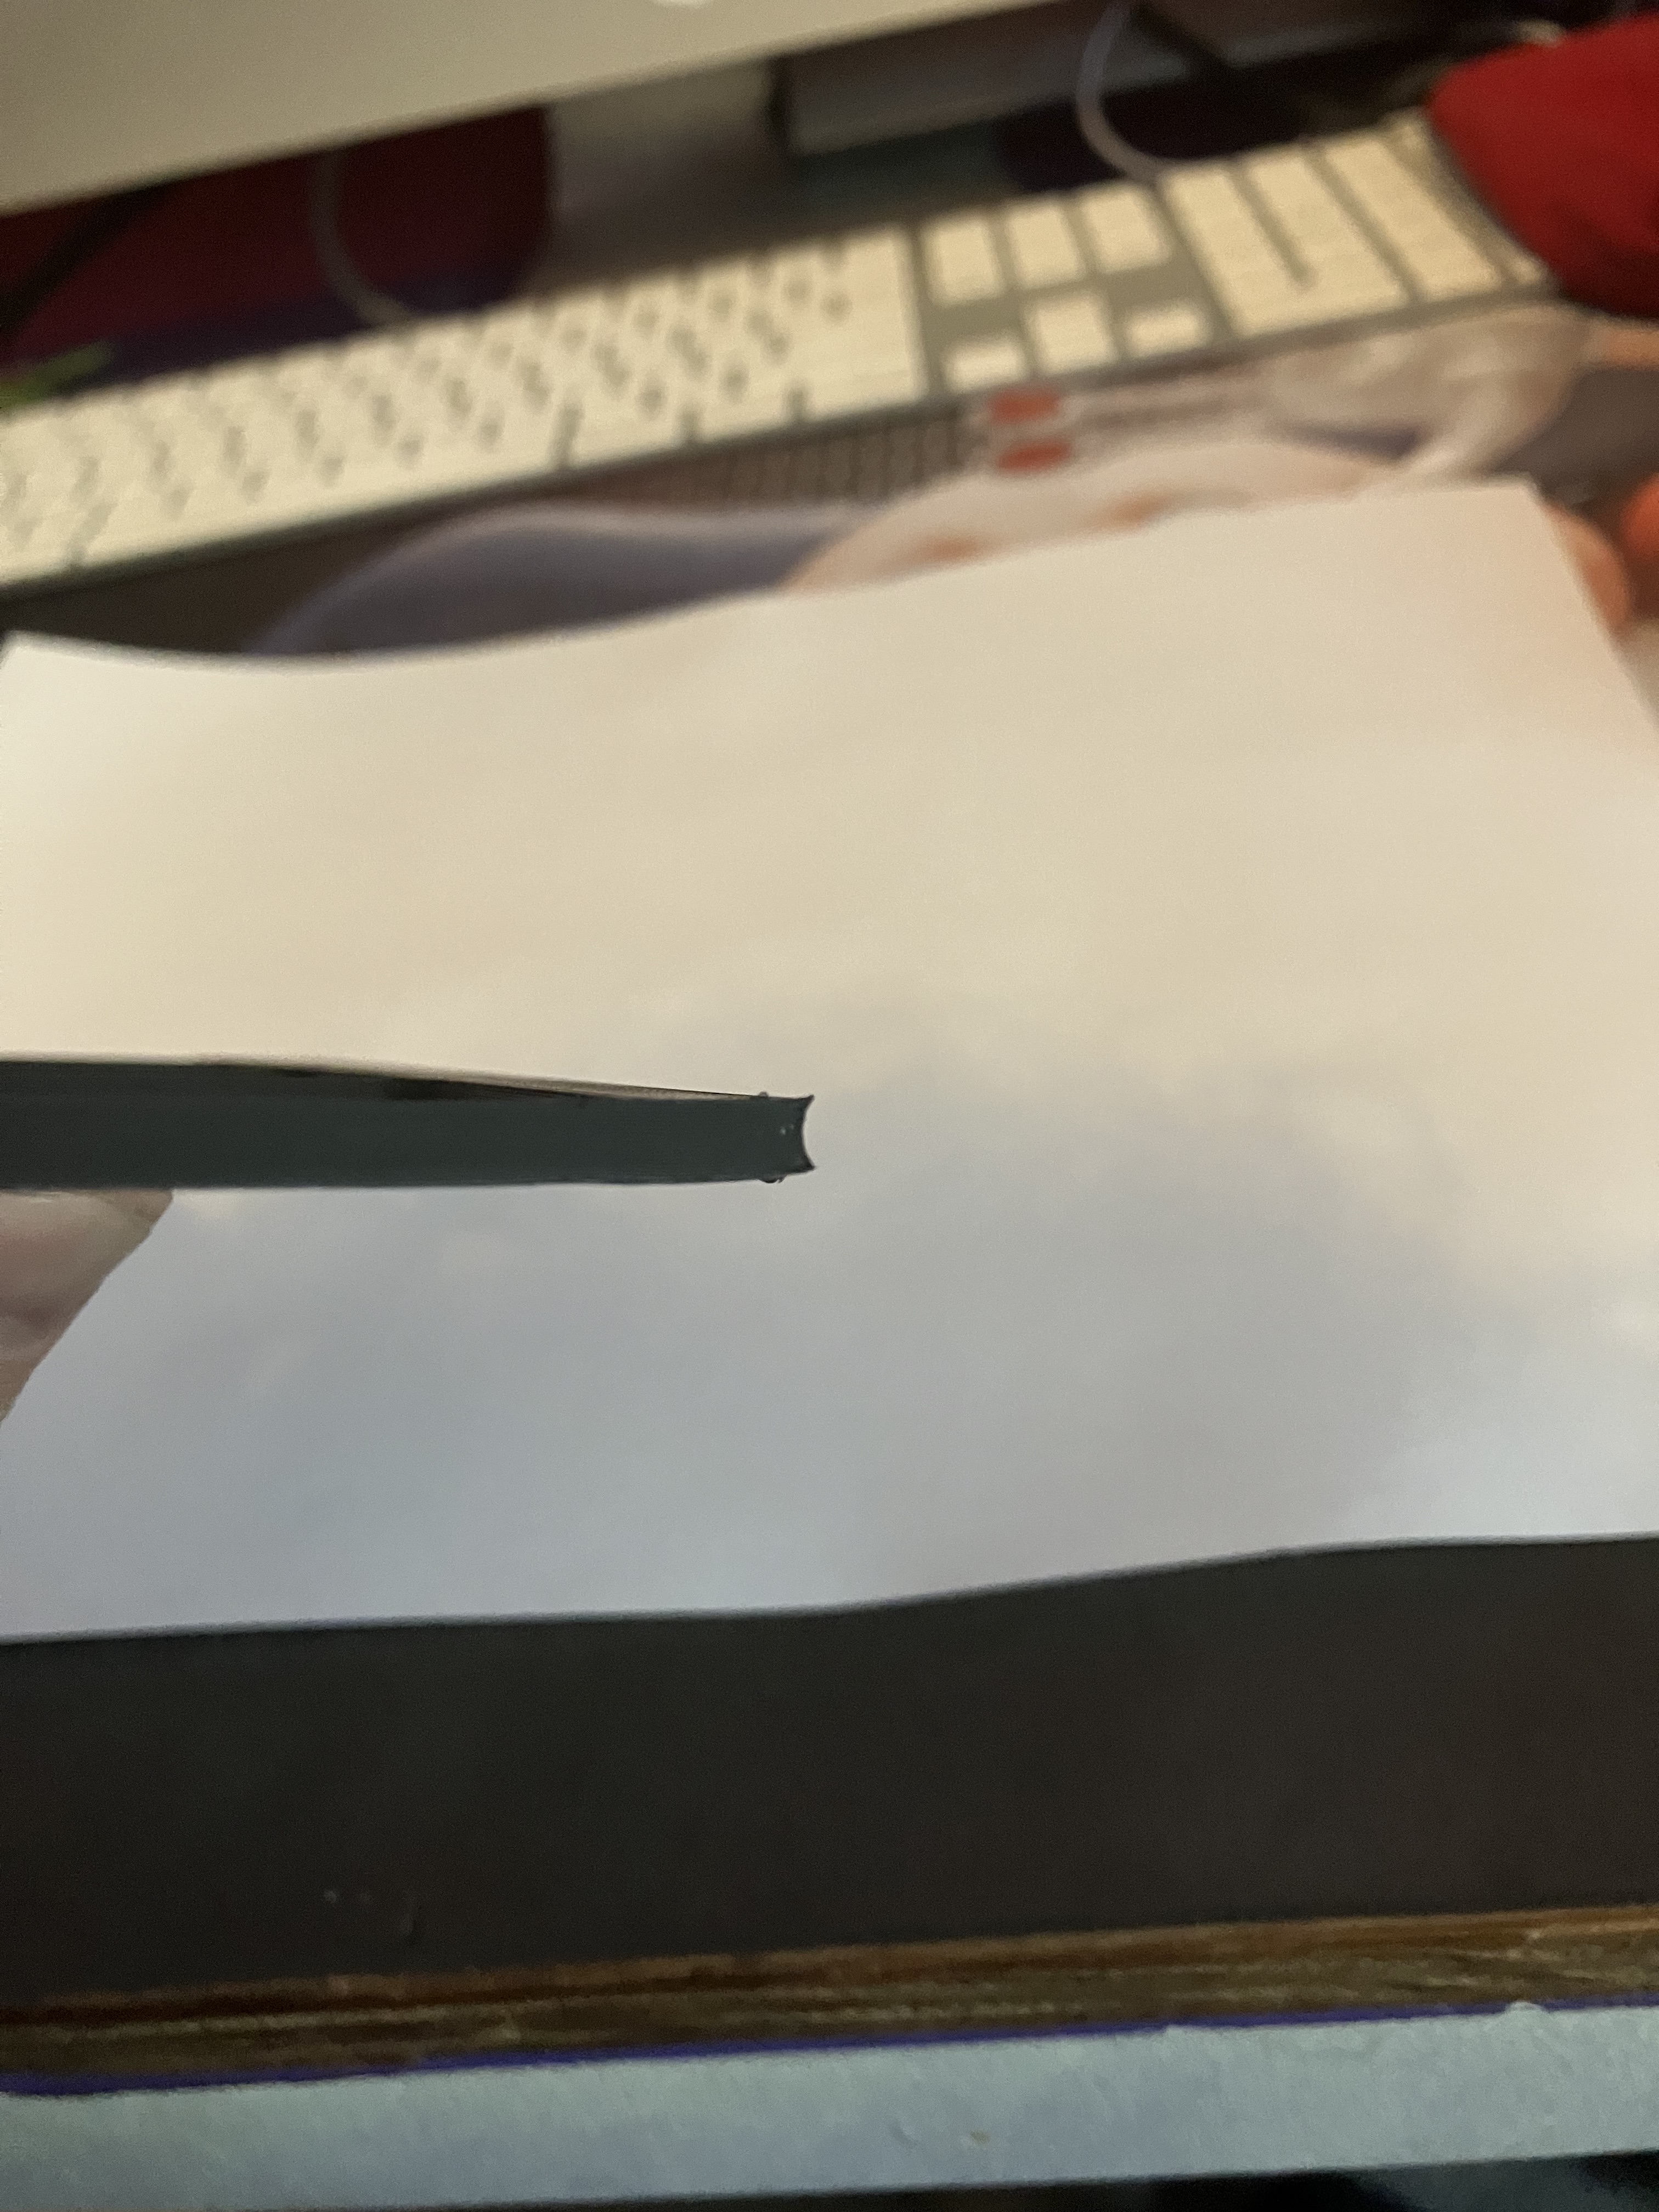
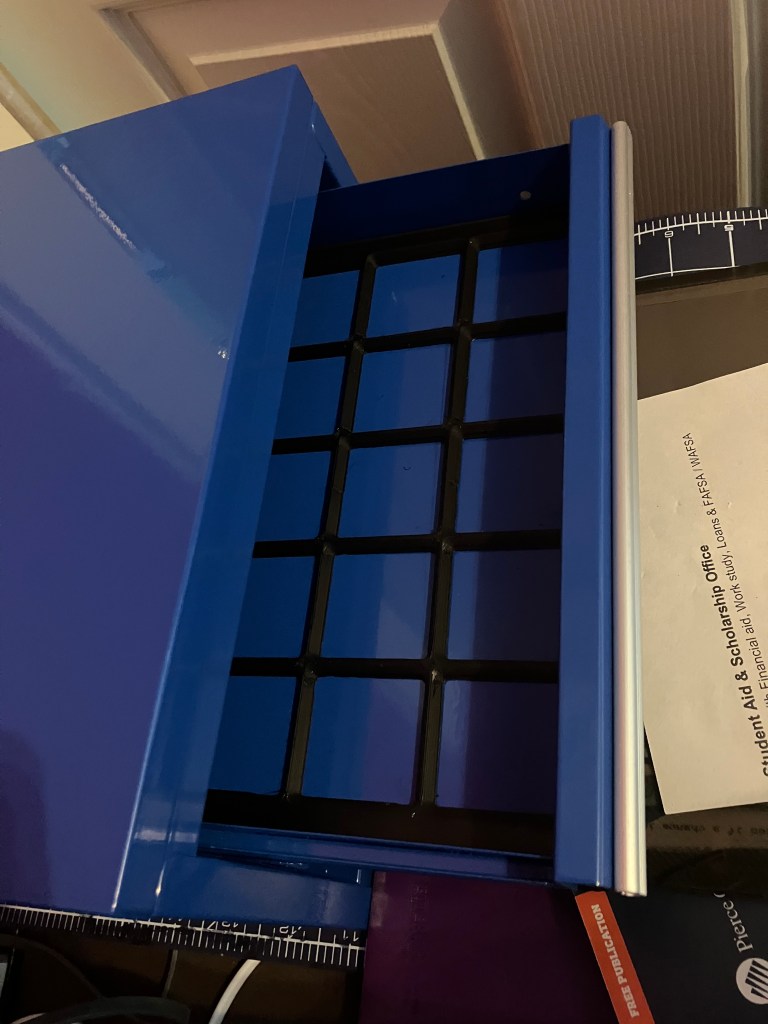
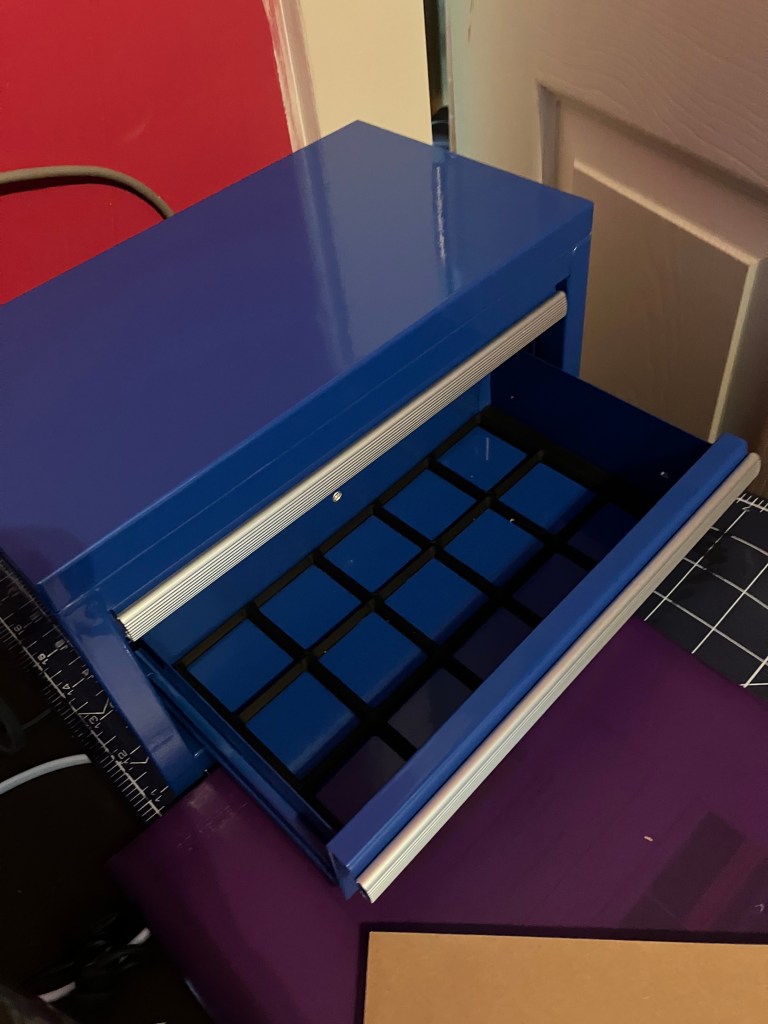
After knife trimming the brim remnants off of both, I got them to fit in the drawers—it’s a very exacting fit, and it helps to kind of push the corners down until they snap in. I hope that it is actually just a very exact fit and that the squares are not distorted…I guess I’ll see once I start adding trays to the grid.
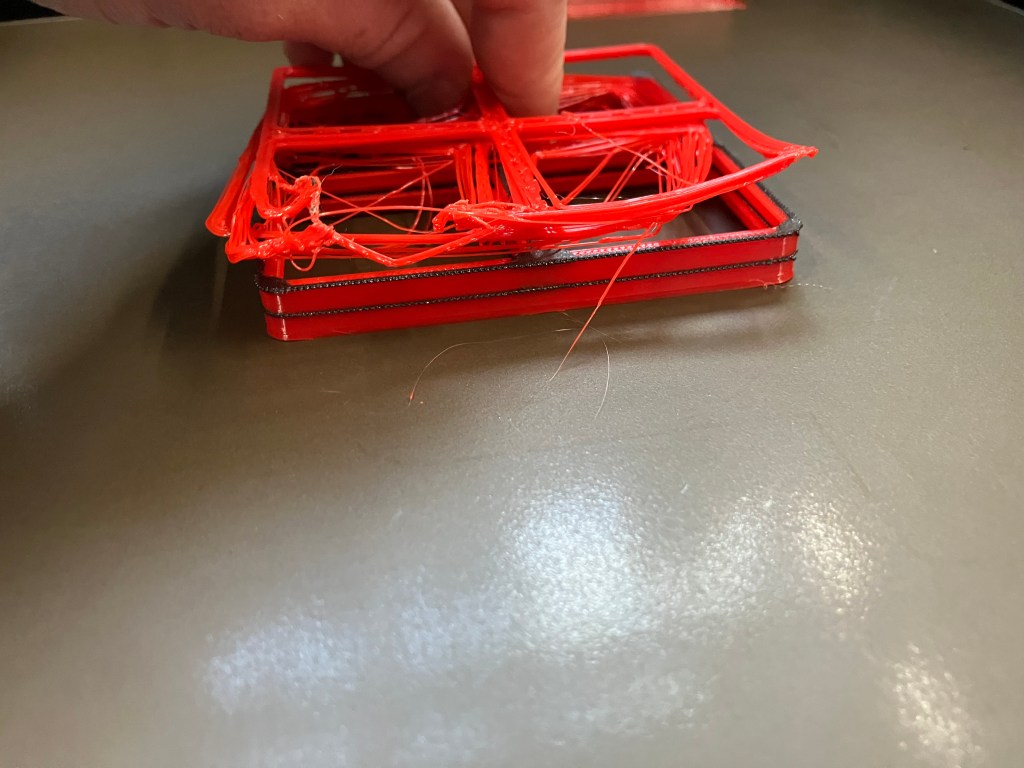
I sliced the top tray grid, and I’m trying Cura’s “super quality” (.12) layer height setting, with combing back on but retraction still off, to see if that helps. This print is 14 hours long lol, compared to about 3.5 for the other two—it’s also a much taller print so yknow it makes sense but whattarayagonnado. I hate to waste the filament since the other liners technically work, but I’m gonna test the new settings first on another grid for the drawers. It will be a good point of comparison also. It’s still 5.5 hours, so quite a bit of extra time, but less risky anyways.
4/17 We’blog
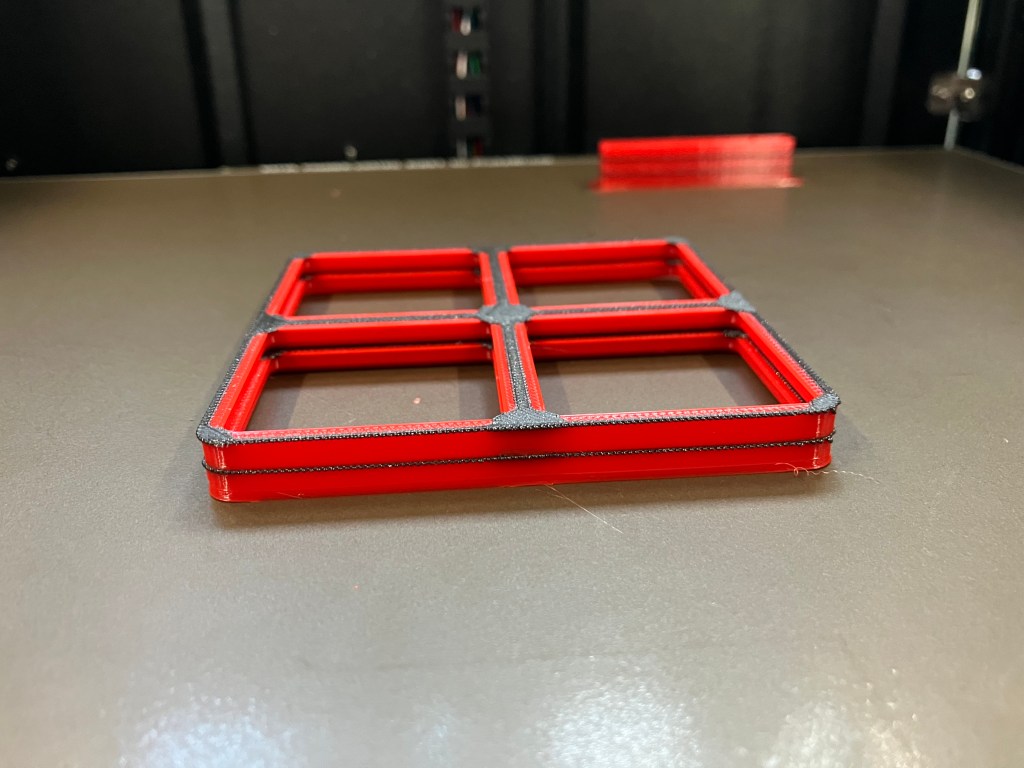
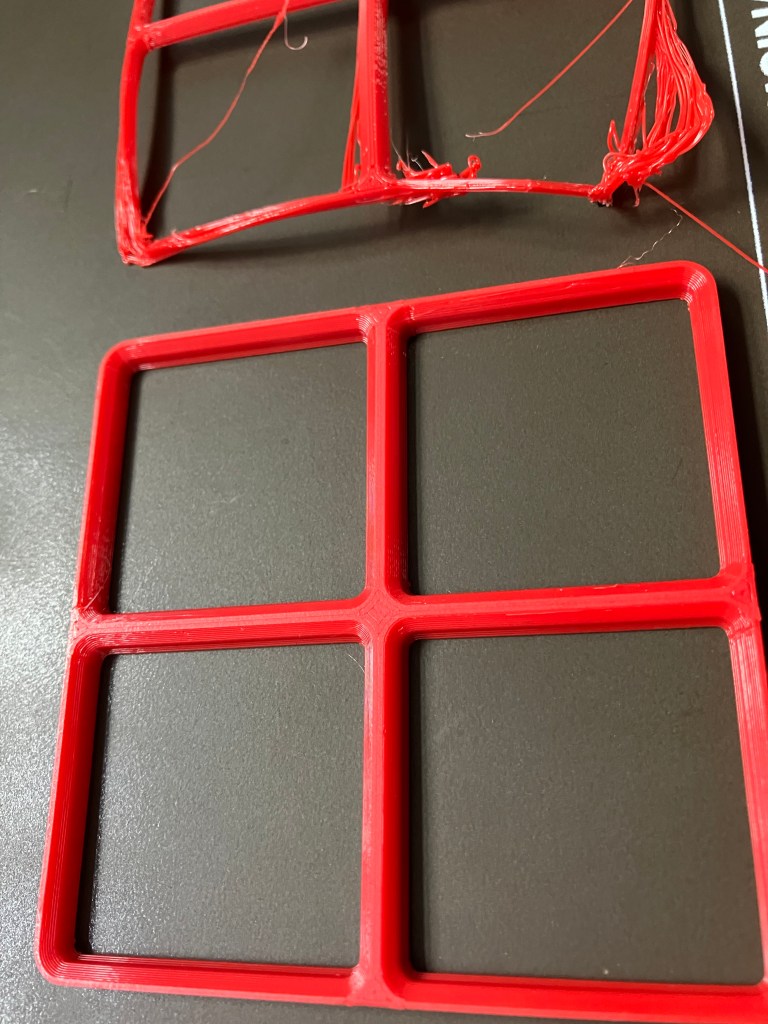
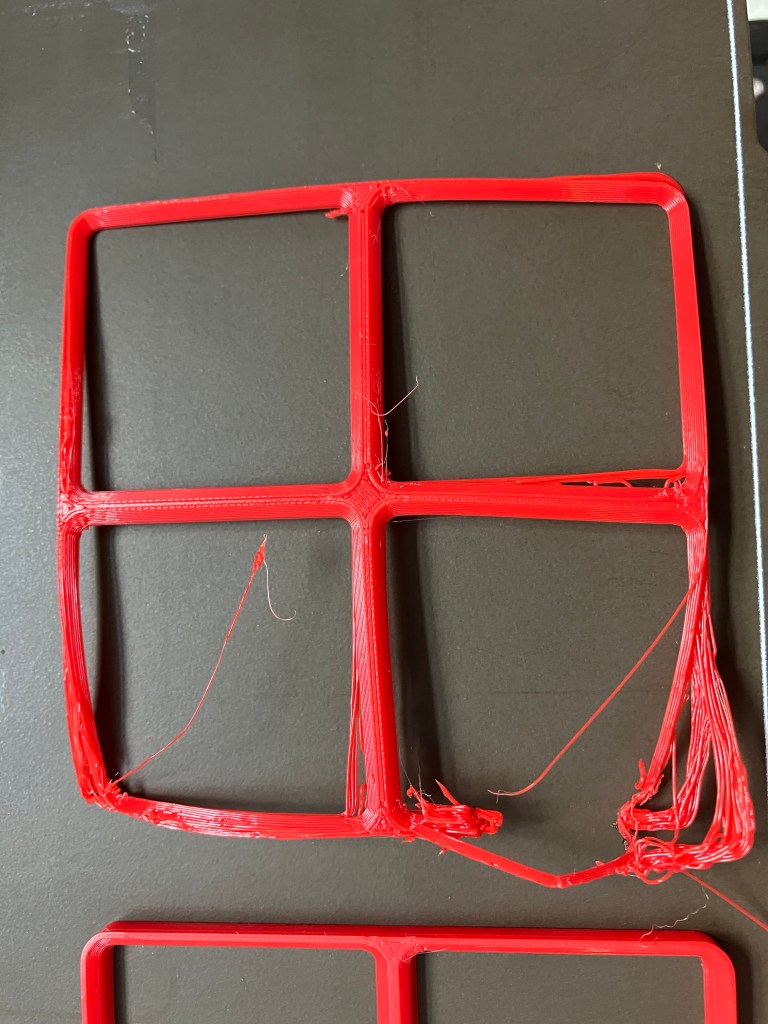
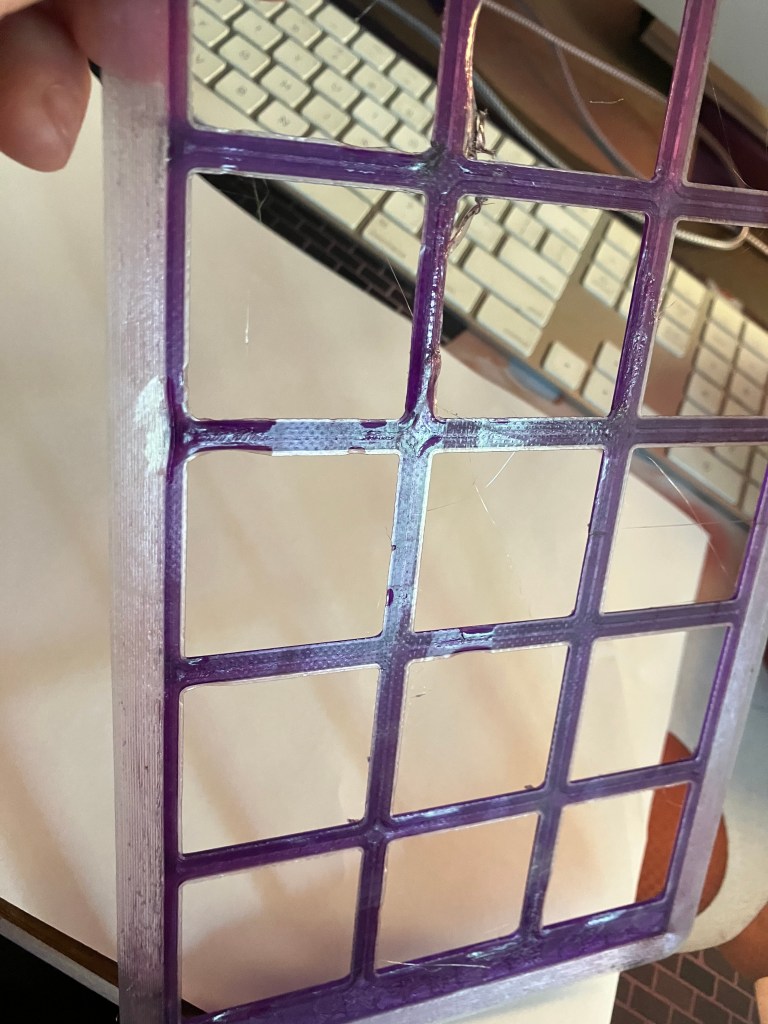
So the last grid print was wayyy worse. Except for the z seam, which does actually seem to improve at a higher print quality. Otherwise, the corners peeled so severely they took the brim with them, and there was significant lift on the bottom layer overall, which affected the quality for the whole height of the print in places.
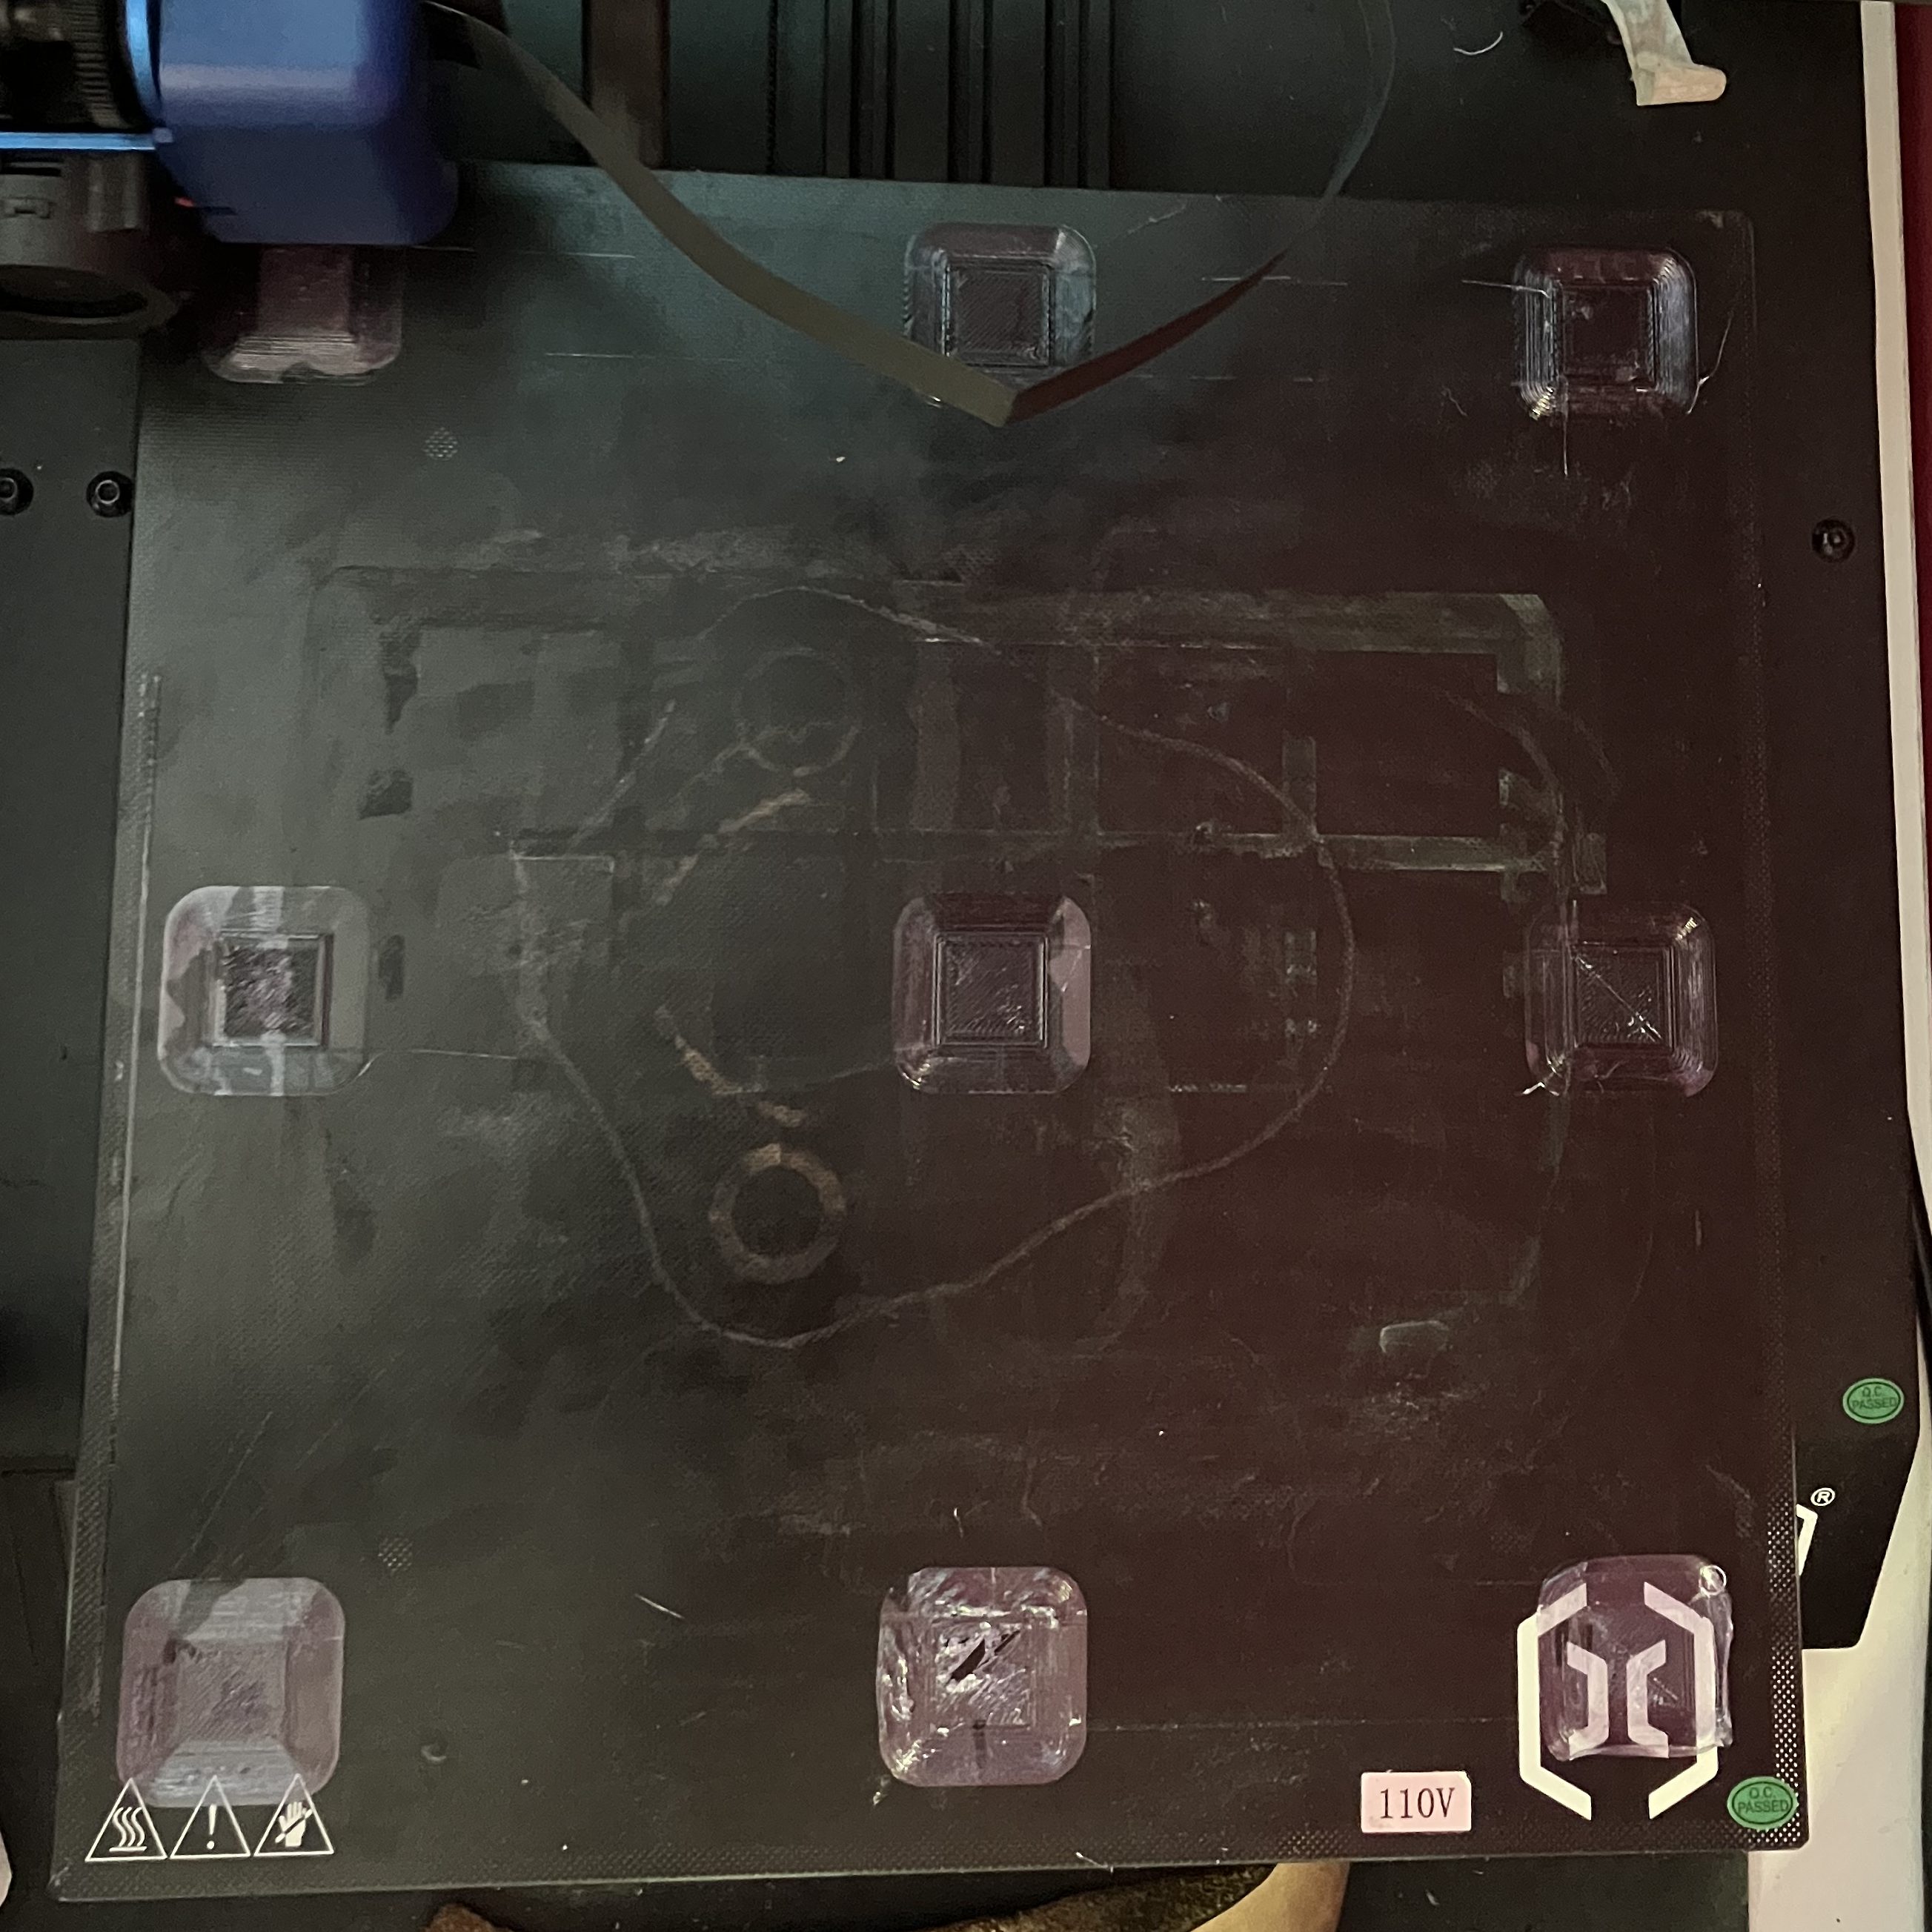
Reprinting, this time at the ‘dynamic quality’ setting with a layer height of .16 mm, but I’m also increasing the size of the initial layer from .2 to .25 mm, lowering the print speed of the first layer from 20 to 10 mm/sec, and changing the bed temp from 60 to 50 degrees C. I’m re-enabling retraction to cut the stringiness since it didn’t help much anyway with the z seam problems. I’m also adding a draft baffle around the printer for this print (a cardboard box on it’s third life). I likely need to dry my filament, since it’s PLA and it’s been open on the machine since December, but I don’t waaannnnaaaa so I’ll see if I can skate by. Apparently cura’s experimental settings menu also contains an option for printing a draft baffle as you go, but idk that is going to be much help and it will def be a waste of filament. So, not this time.
I also had a lot of build-up on the plate, so I thoroughly cleaned all the residue with alcohol wipes and re-applied a layer of glue. It’s possible the buildup of old glue in exactly the same print locations had contributed to the quality of this print diminishing so severely—next time I should also slightly offset it from its current position.
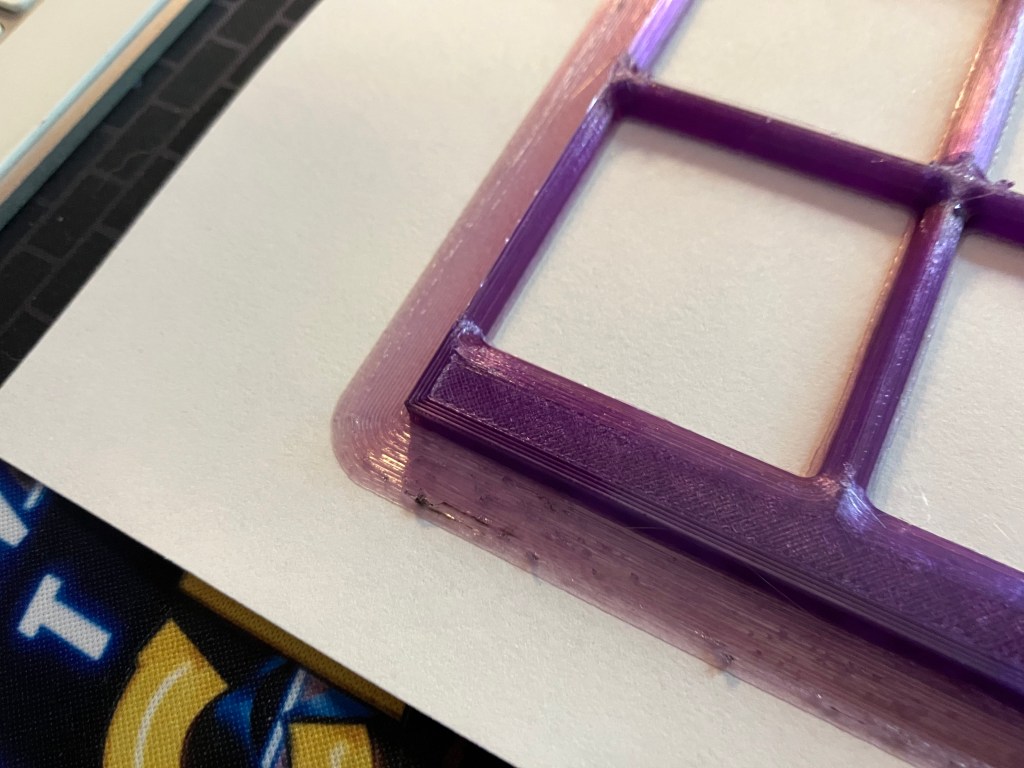
There is also a design consideration here, where sharp corners put a lot of tension on them to contract as they cool–it is recommended to remodel a 3-5mm d corner on models, which is good to know and true to my experience also. I’m continuing to use a brim, which is supposed to help for the same reason.
Update, later in the evening
honestly the best print yet, but the front edge and corners are STILL slightly peeling up and it’s really annoying. I’m drying my filament now. Although this doesn’t seem to be a flow issue at all, except for maybe the z seam problem. Interestingly, the print is kind of stringy again even though combing and retraction are back on, but whatever.
A fun problem is that it is recommended to dry filament at about 110 degrees Fahrenheit. My oven doesn’t go that low. My toaster oven doesn’t go that low. Currently I have my toaster oven on ‘turbo’ mode (ventilated), at the bottom of it’s ‘warm’ range, with the door cracked a couple inches, and an oven thermometer inside to track the temp, and I’ve gotten it down about to the right range. I read a recommendation to use the heated bed to dry filament which seems handy but also hazardous. 3D printing continues to be equal parts great and the worst, so what else is new.

4/20 W’Blog
it’s dry.
Update: planning the grid layout for the drawers
A gridfinity square is 42mm. The standard drawer size is 560 x 480 mm, which will accommodate a grid of 13×11 squares, or a total grid area per drawer of 546mm x 462 mm.
Based on the build volumes of our available printers, there is no printer that can accommodate the short side in a single plate, so I think I will divide this area into 4 quadrants to print. I need to research, however, how to make sure these sections line up with each other while allowing grid boxes to saddle the divides between plates. Maybe an interlock using the border spacing on all the sections to help it be more snug in the drawers? Funnily enough, my home printer, an Artillery Sidewinder X1, seems to have a bigger buildplate than any FDM printers but the Prusa XL at the lab. So it’s not necessarily a downgrade to run some prints at home. I got some PETG to work with at home, so I can run some tests.
It would be nice to be able to print 4 identical and symmetrical sections, but that’s not going to be feasible if I want to maximize the grid area, because 13×11 won’t neatly divide without honestly an annoyingly complicated construction process. I assume. Gridfinity :: Unofficial wiki | Gridfinity seems like a good resource to get into and see how people have solved this problem.
Currently I am thinking I will need 4 models/pieces per drawer. Since the grid isn’t evenly divisible in either x or y, I can’t get it down to 2 pieces without having a staggered intersection, which seems annoying.
Unit A: The largest unit will be 7×6 squares, or 294 x 252 mm before any outer spacers. This can only fit in the Prusa XL.
Unit B: 7×5, or 294 x 210. This can only fit in the Prusa XL.
Unit C: 6×6, or 252 x 252. This will just barely fit in the bambu, with no spacers (only 4 mm clearance)
Unit D: 6 x 5, or 252 x 210. This will just barely fit in the bambu, with no spacers (only 4 mm clearance on the long side)
Another option is to reduce the size by 1 square in each direction. The downside is that this loses 23 squares per drawer, or about 1/6 of the total squares (out of 143), which is pretty significant. What this would get is:
- 4 identical and symmetrical 6×5 pieces per drawer, or only 1 model to create, which is much more stackable as well
- Could fit on the bambu, with no spacers included, and avoid using the prusa XL and its problems
- Could model spacer strips instead of including with base grid, of 1 unit width + spacers for a precise drawer fit, to use on the front and 1 side, which would get around the square loss
I think this is what I will try first.
This generator seems a good start for models. It is doing exactly what I wanted with narrow strips, basically. Plus connector points. I’ll test it out.
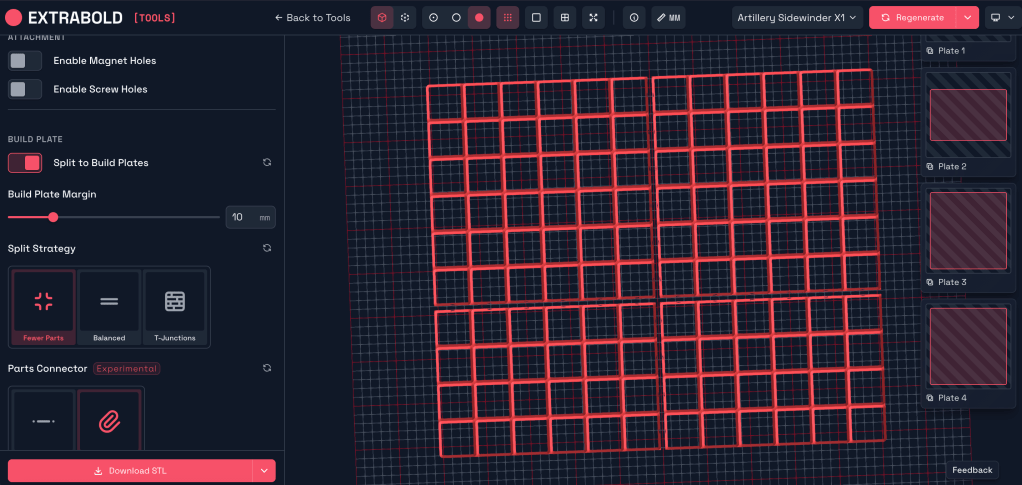
546 x 462 is the grid area, compared to 569 x 495 precise internal measurement of the drawers, which is a margin of 23 mm W x 33 mm D. Extrabold Tools lets you enter a margin that you can add to the printed grid, so that’s cool. Downside of that is it kind of cancels out having a bunch of equal squares…there will still be 6 distinct parts in this configuration. It also lets you choose how you want to split, based on fewest parts or a ‘t-junction’ split based on staggering the joints for stronger connections. It’s still 6 parts either way, so I may go for the T-junction split.
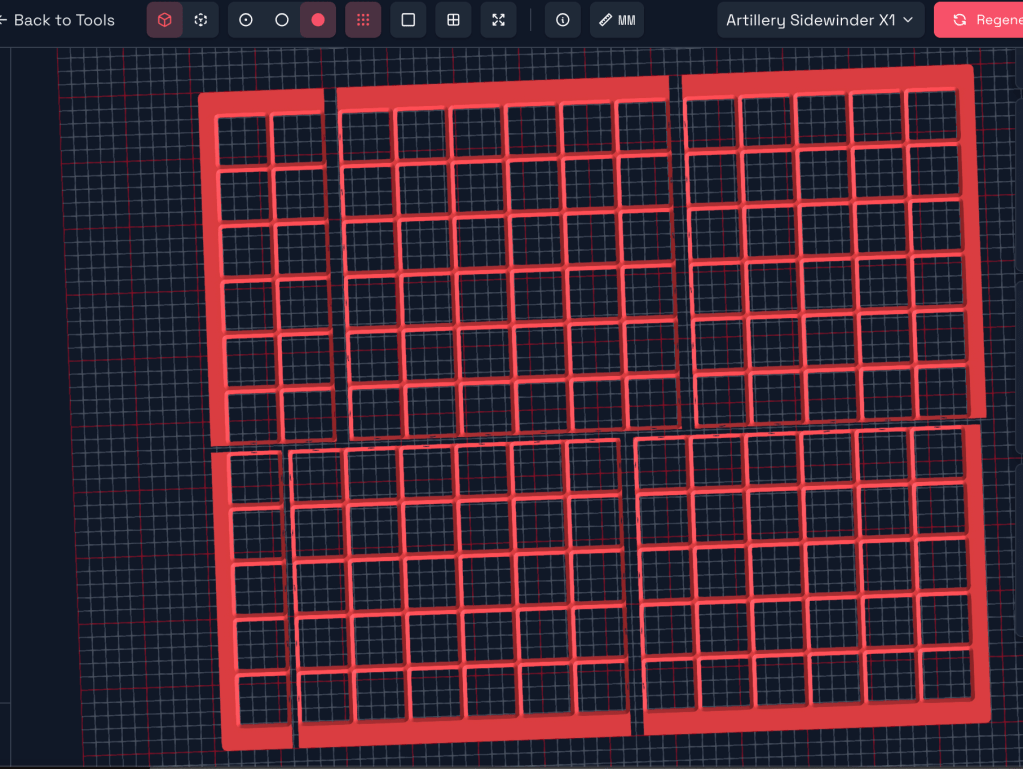
For the bambu though, this makes 10 separate parts, as opposed to 9 with the ‘fewer parts’ setting.
I also mocked up what this generator will do with a 12×10 grid, with a larger ‘margin’ size. The 12×10 grid has dimensions of 504 x 420, out of 569 x 495 drawer space, leaving a margin of 65 W x 75 D–this is actually too big for the margin entry, which maxes out at 41 mm.
So, with some fiddling, I think I might be able to kind of trick it into making me the models I want across a couple different files.
First, this is the 12×10 grid optimized for the fewest parts on the sidewinder. 2 shapes, 4 total parts, but in practice it’s 4 separate models because of the clip opening positions.
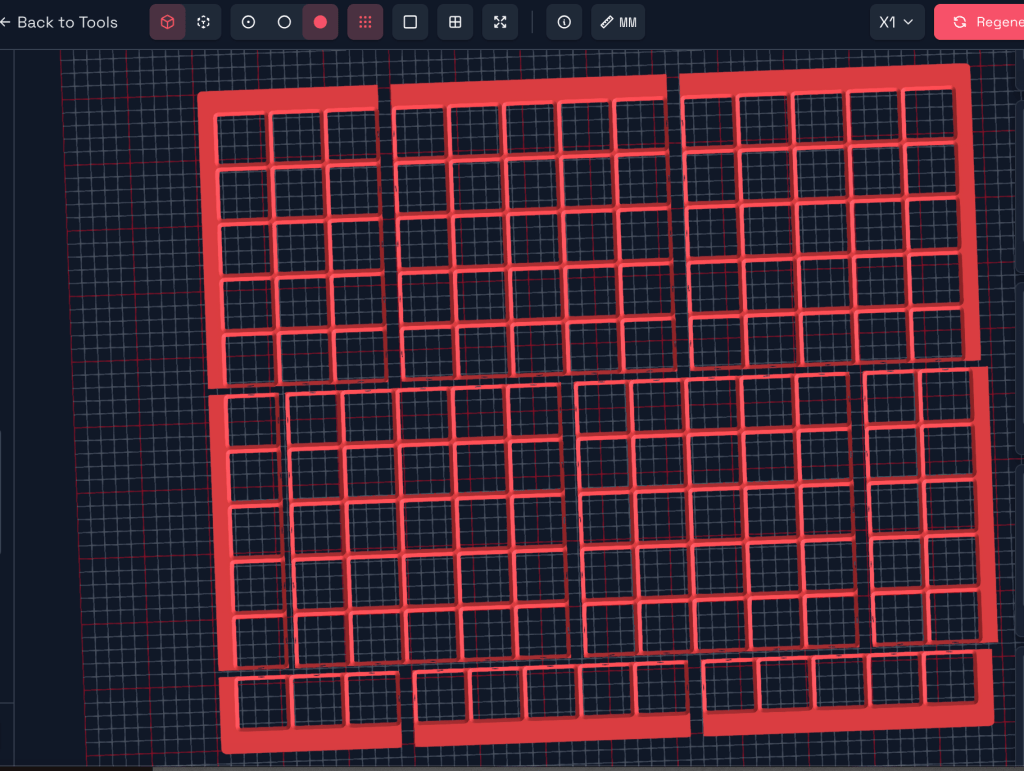
And here it is optimized for bambu with fewest parts, 6 distinct parts and models for 2 different shapes.

But THIS is bambu optimized for ‘balanced’:
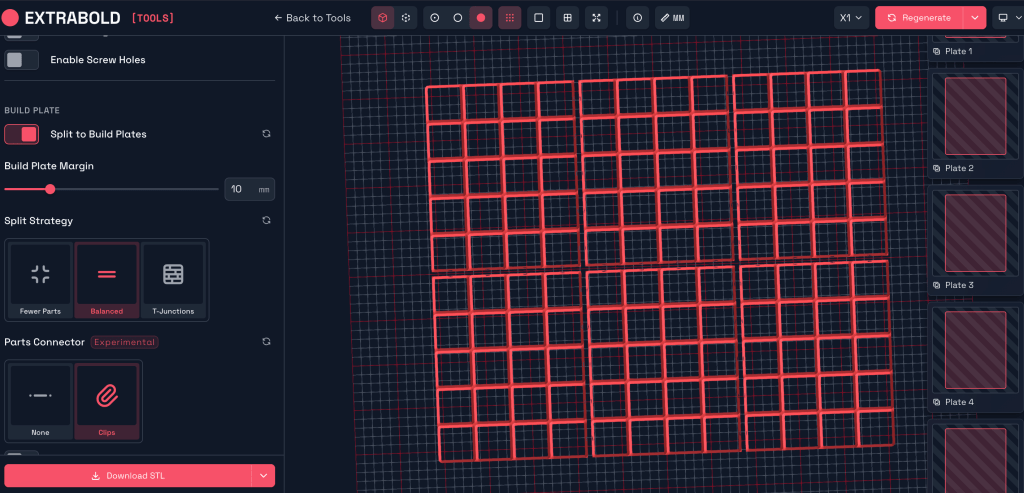
That’s right: 6 units, but only 2 models and 1 shape. 6 4×5 grids, one model with connector spacings for a middle spot and one for a corner spot. This definitely has the most interchangeable parts and repeatability for stacking during printing. It doesn’t incorporate any margin spacing, though.
I think by playing around with the settings, I can make it generate a 4×5 grid with connector slots all the way around, and another file to make 1 square wide strips that can connect to it. The connector locations populate on center for each square on the grid edges, so it should be compatible.
The only way to change the build plate size is by selecting a different printer. So I need a printer with a build plate of more than 168 x 210 mm, but not much more. the 3DI Base Printer seems to be a good option.
4/23 Wlog
I am still waiting on petg filament that was supposed to arrive Monday, and on being able to use the bambu at the lab, since yesterday it was in use for the program expo and on tuesday for some reason it had been unplugged and shoved into a corner, and by the time I had it set up again I was out of time to get my file set up. I have also been finding it very frustrating to use the slicers on the lab computers, since they need new versions or plugins that we can’t install without administrative access. It’s been an annoying week.
I’m working on a model bin for one of my mini tools for my mini toolchest project as a demo for building boxes. I have a short list of tools to expect to go in my assigned lab toolchest, from Stephen and Nate:
- Allen wrenches
- Set of parallels
- Vise wrenches
- Deadblow hammer
- 2″ soft and hard jaws
- Set of 123 blocks
- Calipers
- Loose Boxes
- Boxes for insert
4/27 WeLog
Managed to print several parts in the lab on Friday in the Bambu printer. It has a frustrating habit of needing to be recalibrated between every print to not fail, and even then, it was failing a lot. Stopped trying to optimize and just put together a file with the margin parameters of the drawers, set for the bambu build plate size, and went for it.
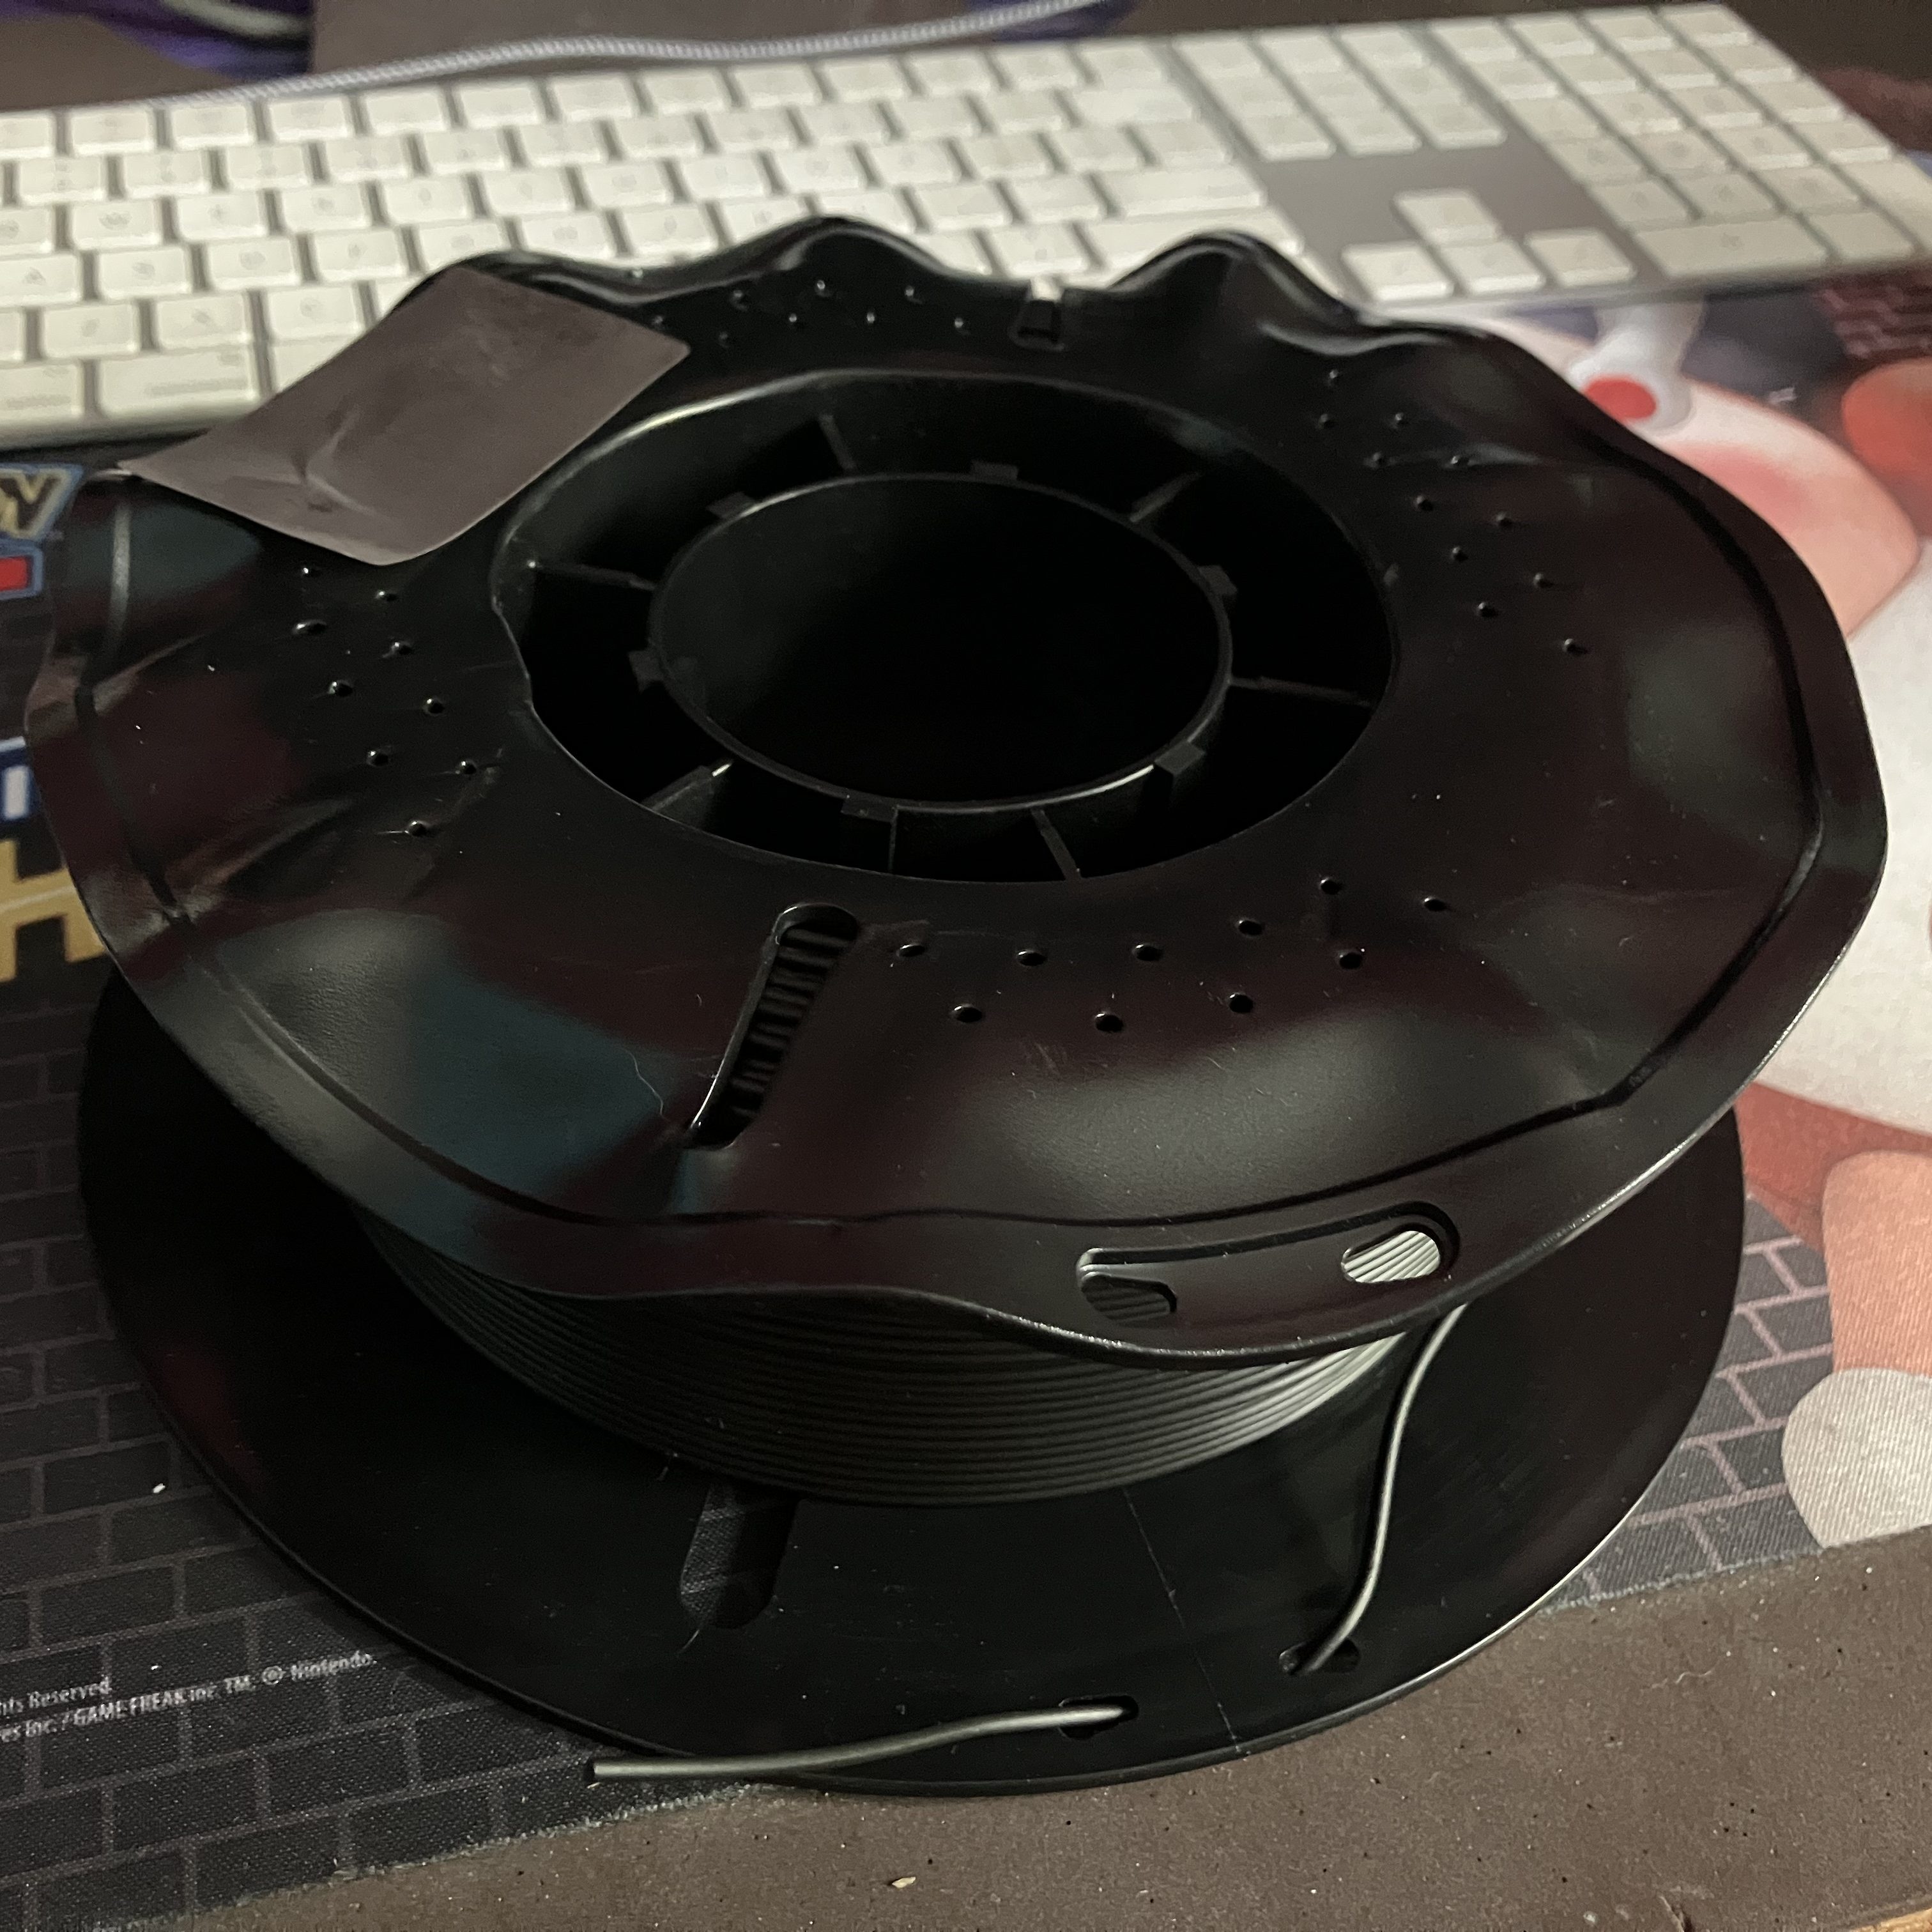
Gave up and canceled my filament order and reordered from a different supplier. I’m running a test print at home now. If it goes well, my first real piece will probably be a reusable filament spool so I can respool my PLA lol. The Artillery uses a roller bearing spool holder that requires a spool that isn’t all warped to hell.
As I’m working on my CNC Mill certification test, I am coming up with some other suggested tools to keep on hand in the tool chest.
- Drill chuck
- disposable gloves, asst. sizes
- temp waste basket for hazmat/flammable
- brushes for cleaning chips off stuff? (air gun can be used also)
I also think it would be cool to have some kind of vertical holder for a clipboard, notebook, or laptop, to allow these references on hand without taking up too much tool cabinet top space, which is a useful staging area for vises etc. and necessary since there is no other bench space nearby. Also to keep those items clean from chips and oil without having to be moved or used with dirty hands. Otherwise I think the top should be clear, except for maybe a loose box to keep misc parts from rolling around too much, to have something to take to the tool cabinet for multiple bits, etc.
Stephen introduced tooltrace.ai to us, I’m going to experiment with generating some boxes using that.
Donovan gave me some good advice on settings for petg for the bambu–increasing the nozzle temp (trying 250 instead of 230), lowering the height of the first layer (.16 instead of .2), and making sure the bed temp is set to 70. It also seems to help to keep the door open during printing. I resliced one of the grid pieces that just failed on me and ran a full round of calibrations, so we’ll see.
Update: still didn’t work. We’re gonna try a flow rate calibration tomorrow.
4/28
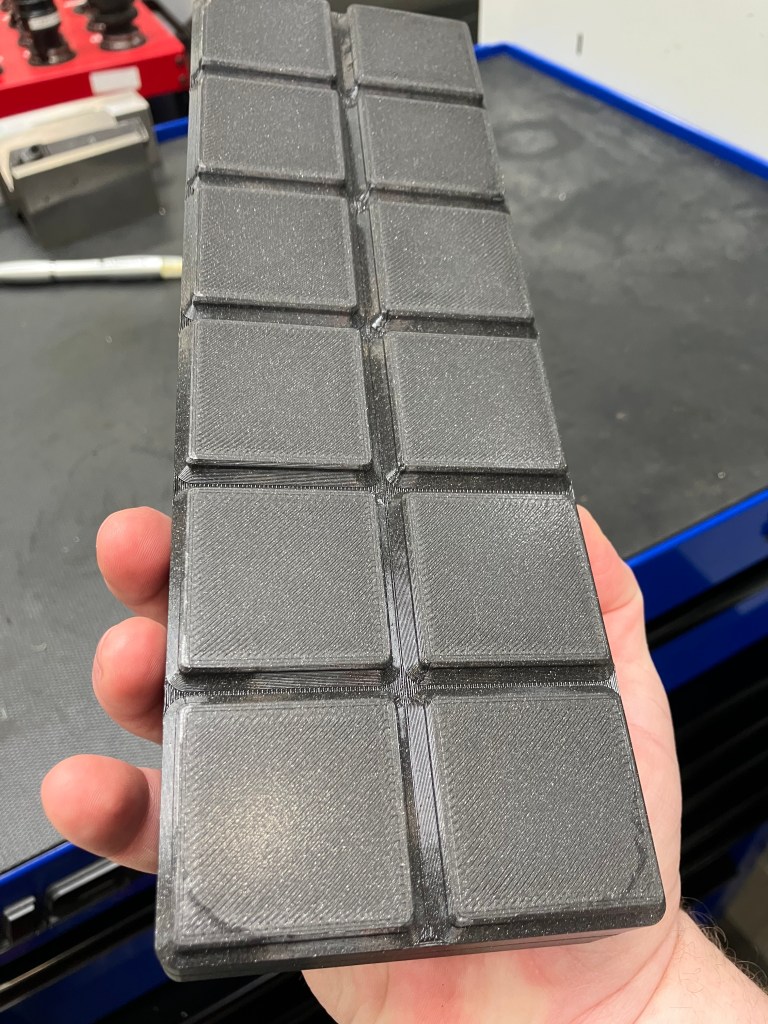
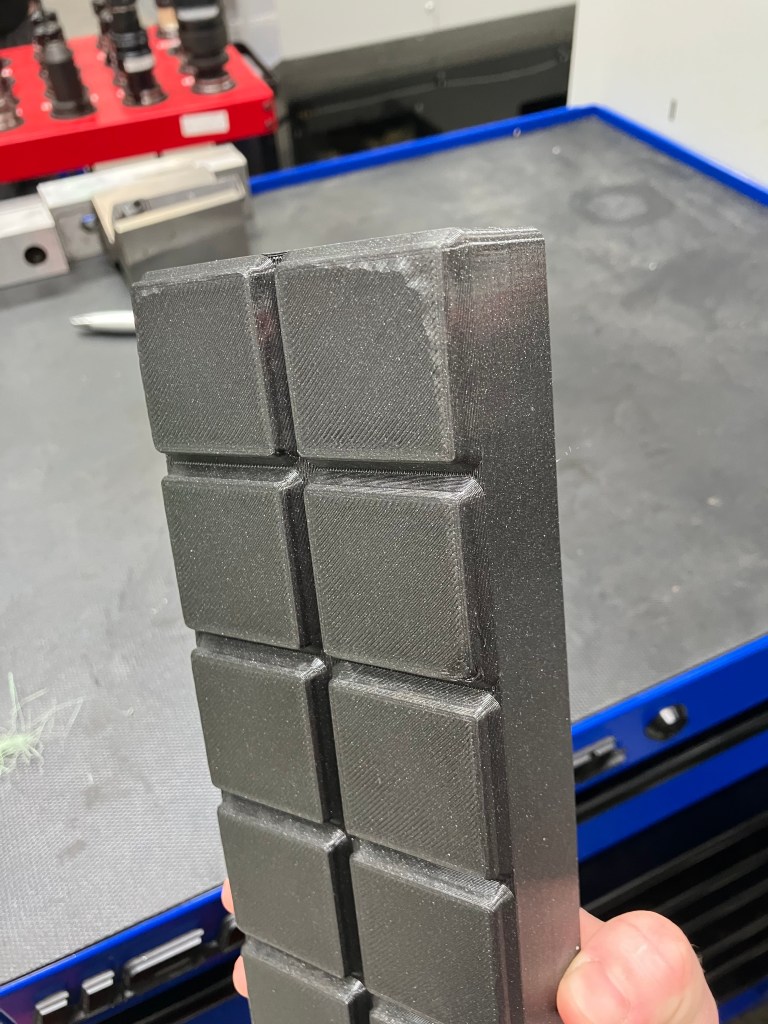
Checked on my tester home PETG print this morning. Honestly better than I was expecting, but some of the same issues I had with PLA. It didn’t warp as badly, but it was pretty stringy and blobby, and came up off the build plate slightly at one corner and at a few of the intersections of the grid, especially at the perimeter, even with a fairly wide brim–which makes me think that without a brim, it wouldn’t have stuck. I also noticed the brim doesn’t peel off as easily as PLA, I have to really carve it off with a knife.
Overall, I’m impressed with the results for a first print with a new material. Can def be dialed in more. I’m going to start by following some of the tips here.
First, I cleaned the nozzle thoroughly, including under and inside the shroud, using a paper towel and then a piece of scrap leather. I don’t have a brass brush handy in my office, but I think that will do for now. Next I did an extrusion test, 100 mm at 25o C just to see if there seems to be any clogs. All looks good, but there are still some black flecks in the filament, so I did an ‘atomic pull’ as well. It def cleared some more black residue, but another 120 mm purge afterwards still had the occasional fleck in it. Annoying, and good to know for the future, but doesn’t matter now.
Based on the consistent positioning of my print areas (the front edge) and the test strip the printer goops before it starts printing, I think I need to relevel my bed, which is the most hateful exercise known to modern man. Starting with a calibration print. We’ll see how that goes.
Next up will be printing a reusable filament spool. Thingiverse yielded this, which the comments all said doesn’t actually fit most refills. Not relevant for my use, but since i’m intrigued by the idea of buying refill packs in the future instead of wrapped spools to reduce waste, I’d rather make a more usable model. The comments led me to this, which is specifically sized by brand. I’m just gonna print the first one off the list, for now.
4/29 Blog
Here’s the outcome of that calibration print. I forgot to uncheck the brim setting, which tripled the print time, but yeah. The bed needs to be leveled. Worked on that a bit and now I’m reprinting the calibration test, with no brim.
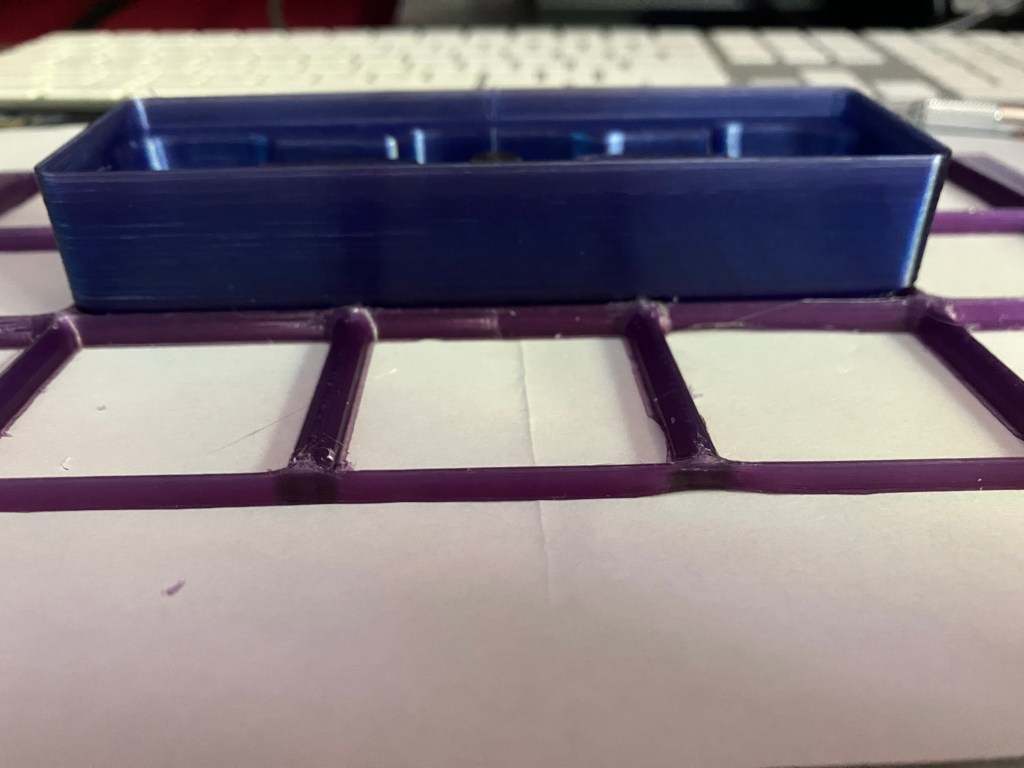
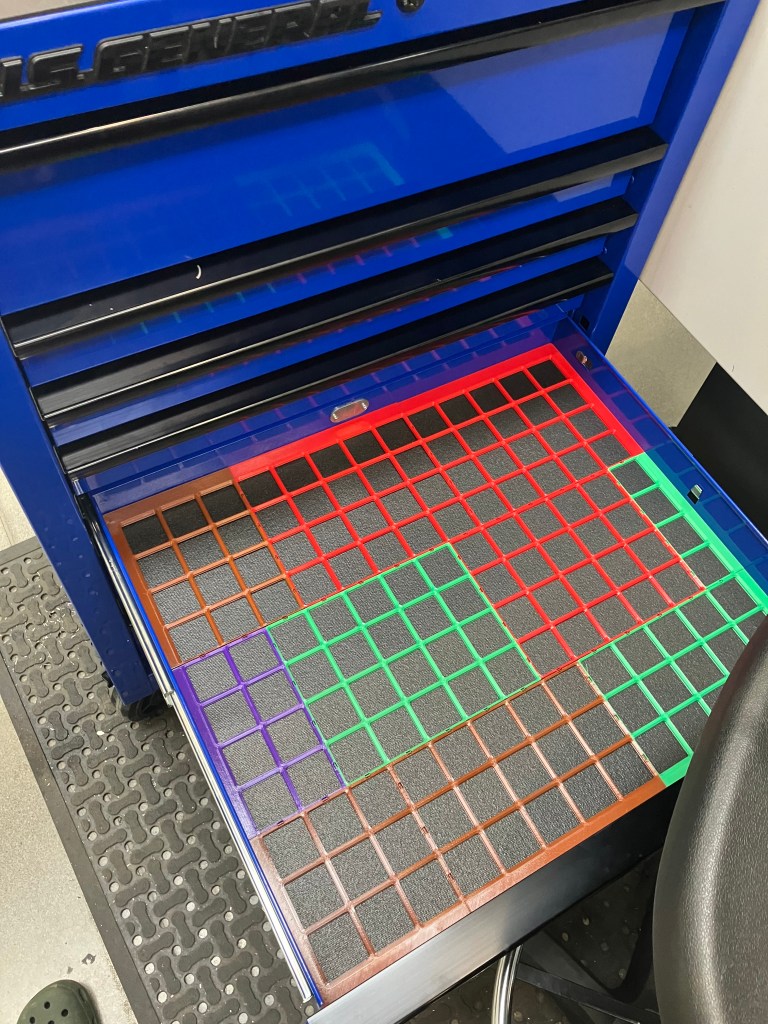
In other news, with a combination of the bambu x1 carbon (teal), prusa core one (purple) and prusa xl (glitter black), I managed to print a full drawer of grids, finally. I also set my first box, for two sizes of mill vise wrenches, to print overnight (it was 14 hours), so we’ll see how that goes.
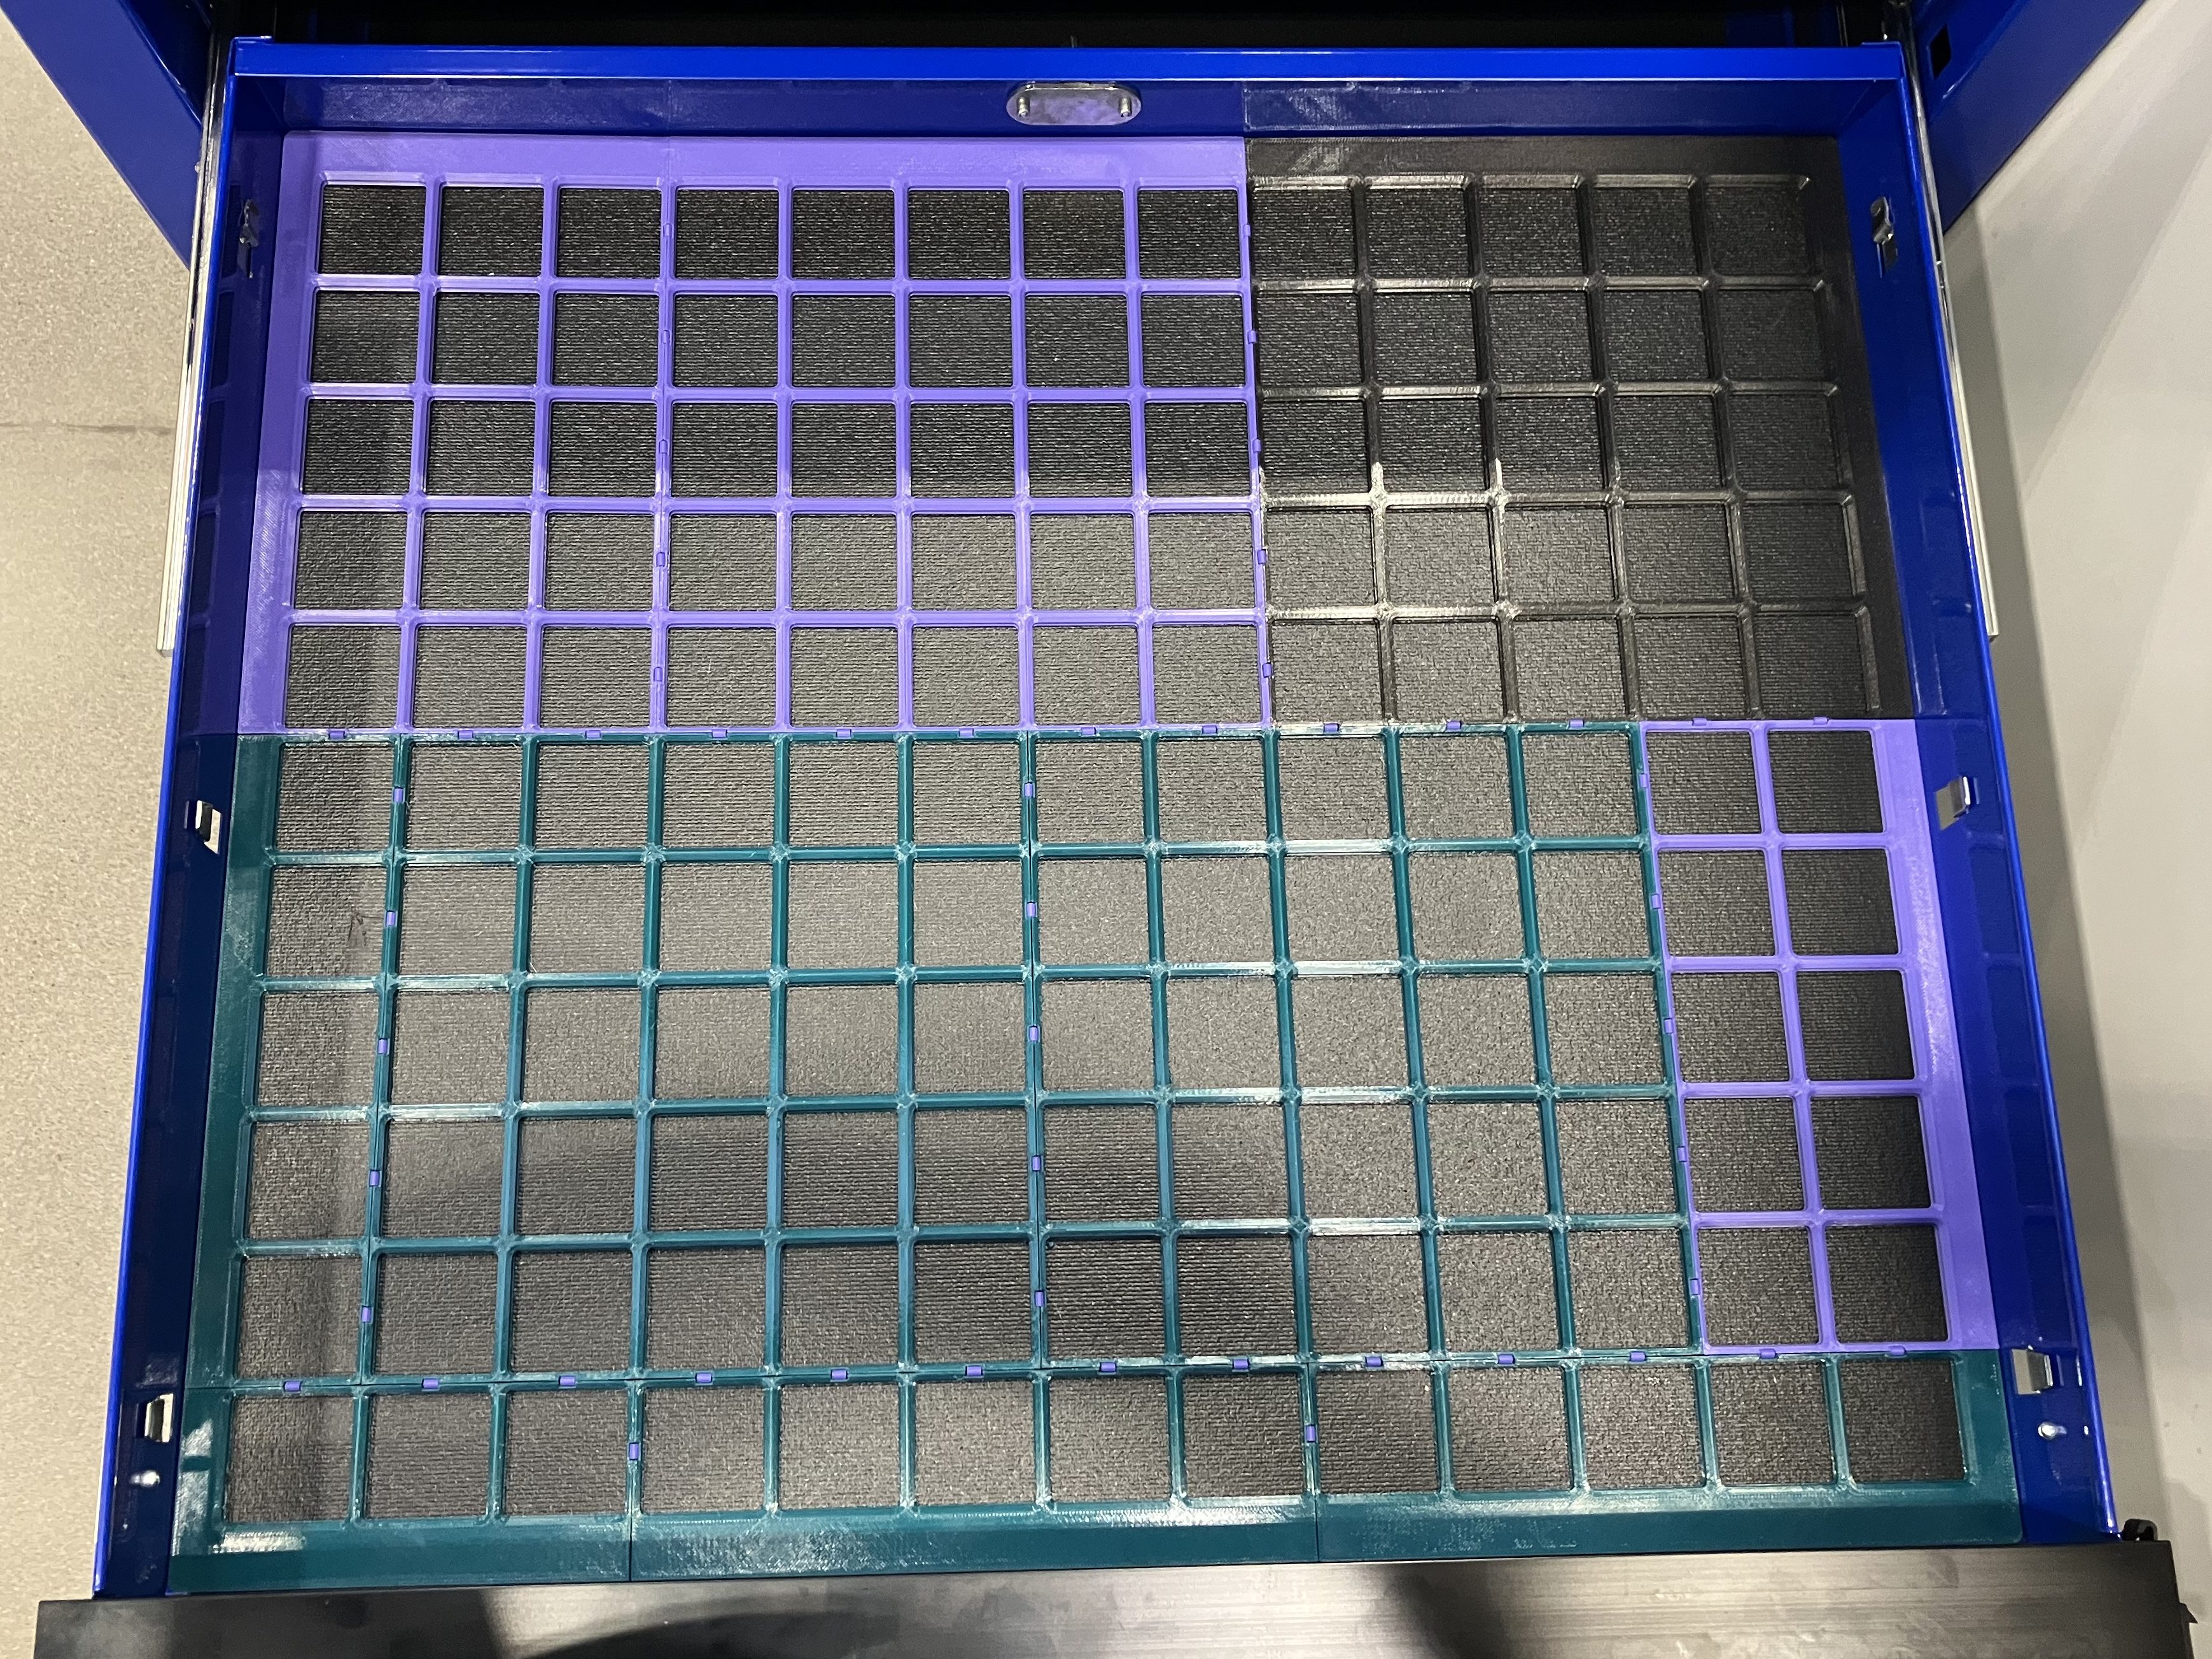
It fits pretty much perfectly, which is satisfying, but with the Bambu’s problems (we still havent been able to do a flow test) I need to reconfigure for another printer. I’ll probably reconfigure for the prusa core1, because those seem to be most consistently available and functional. Only 1 piece was too large for it (the upper right corner, in black) so hopefully it won’t be too much of a reshuffle.
I’m a little annoyed in general that we have a vacuum former fully capable of making these formed trays way faster and with much greater material efficiency than 3d printing them. But that doesn’t really fit into the whole grid ecosystem very well.
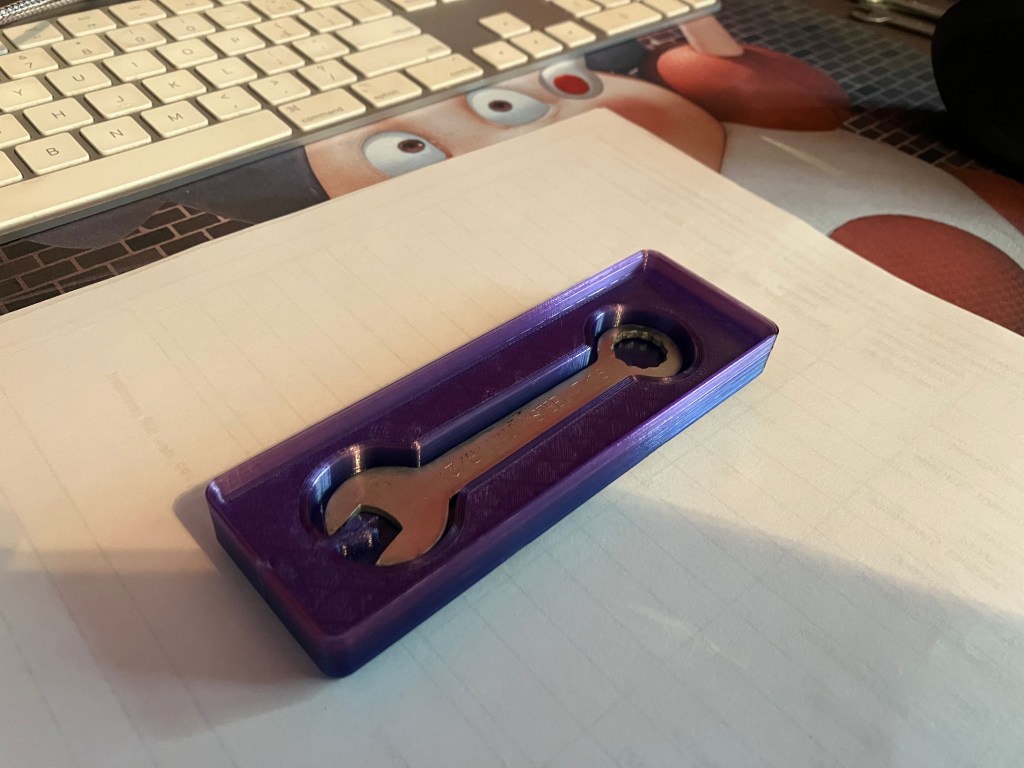
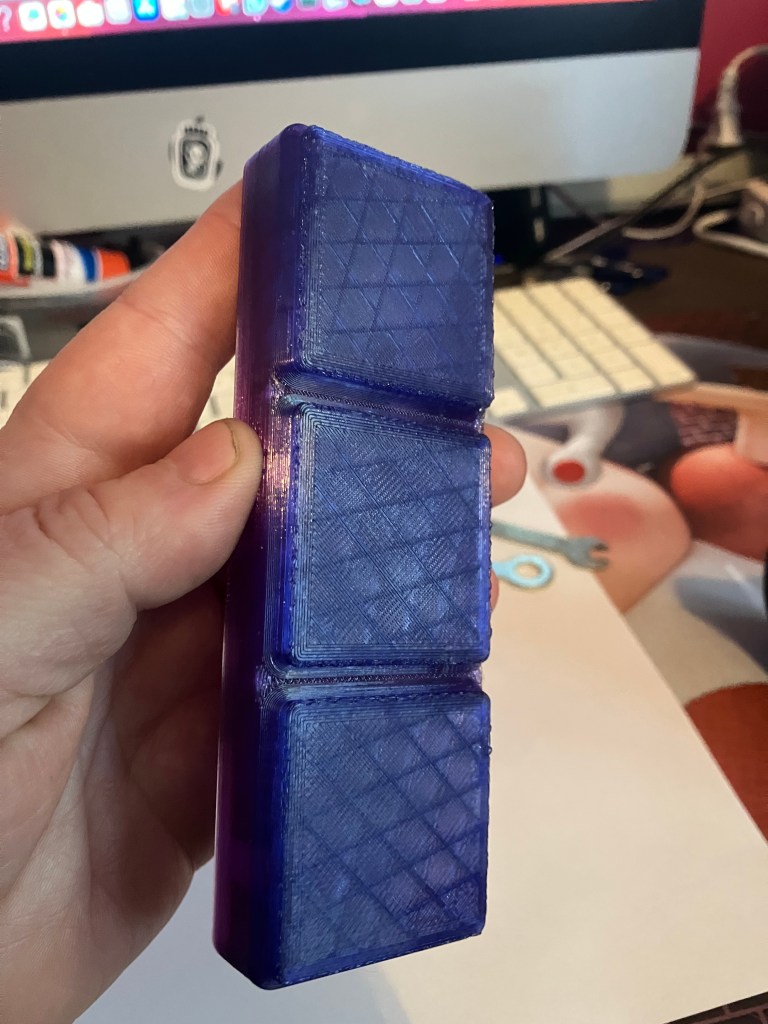
Anyways, tooltrace.ai has some reasonable ways to adjust the box. For the wrenches, I needed a depth of at least 1.5″ to make them stackable, so I made the overall box height 2″. I am setting that as the standard for my boxes I think, so that the whole first layer will be consistently stackable across multiple individual boxes, which is not strictly necessary but seems like a best practice.
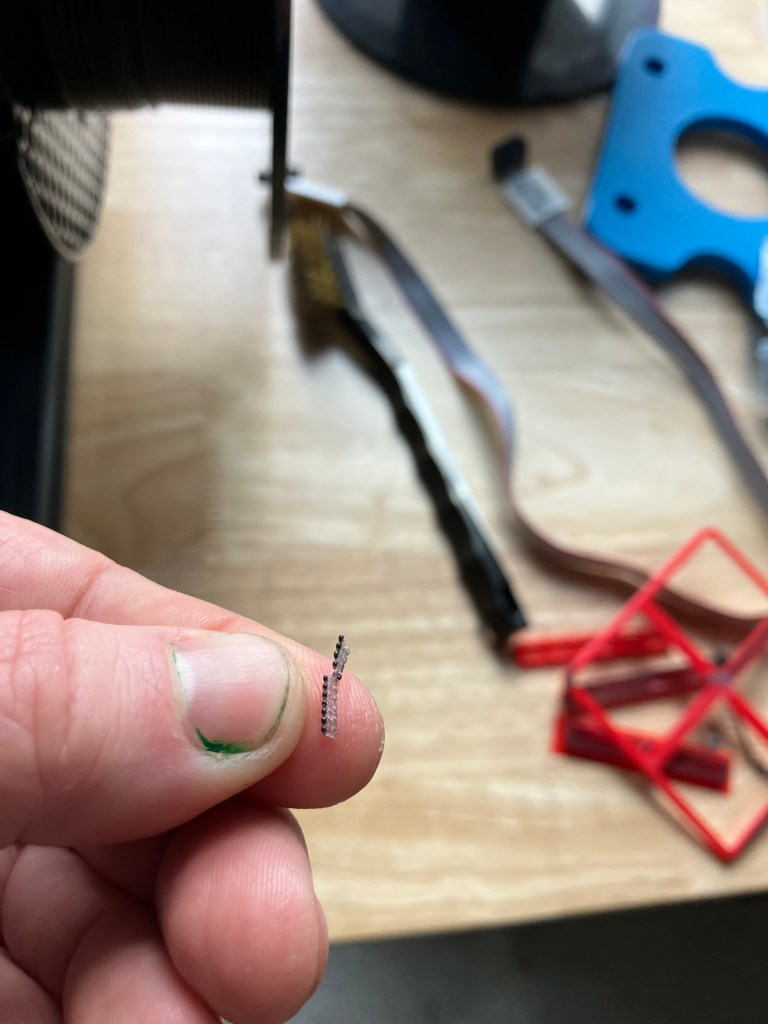
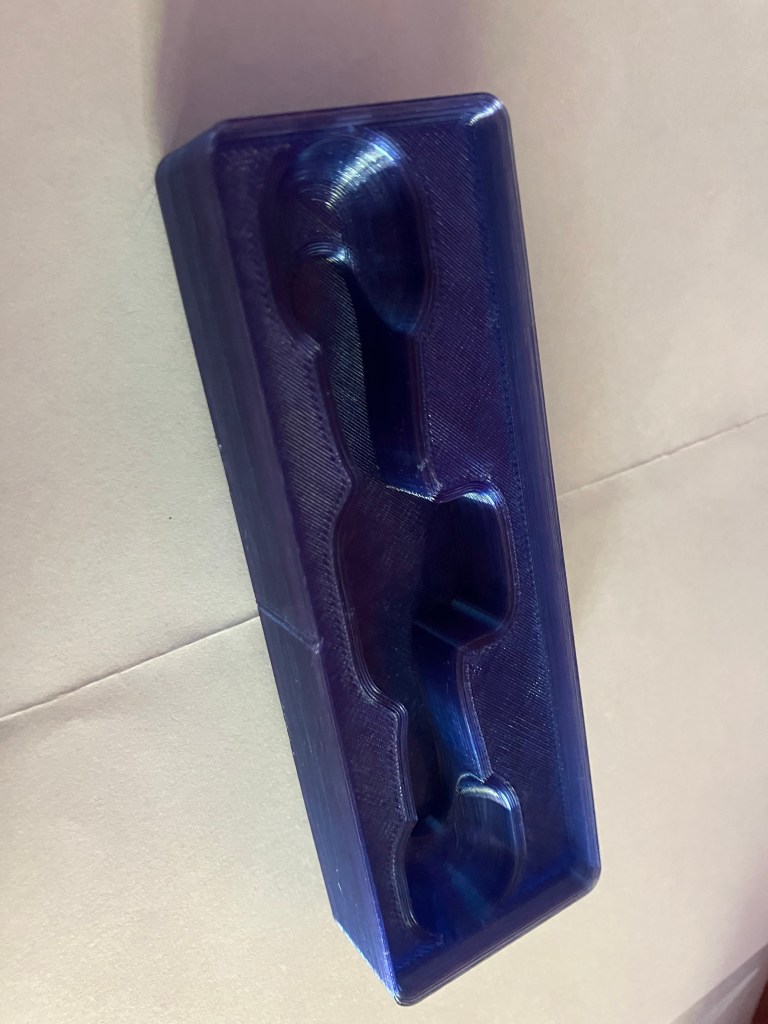
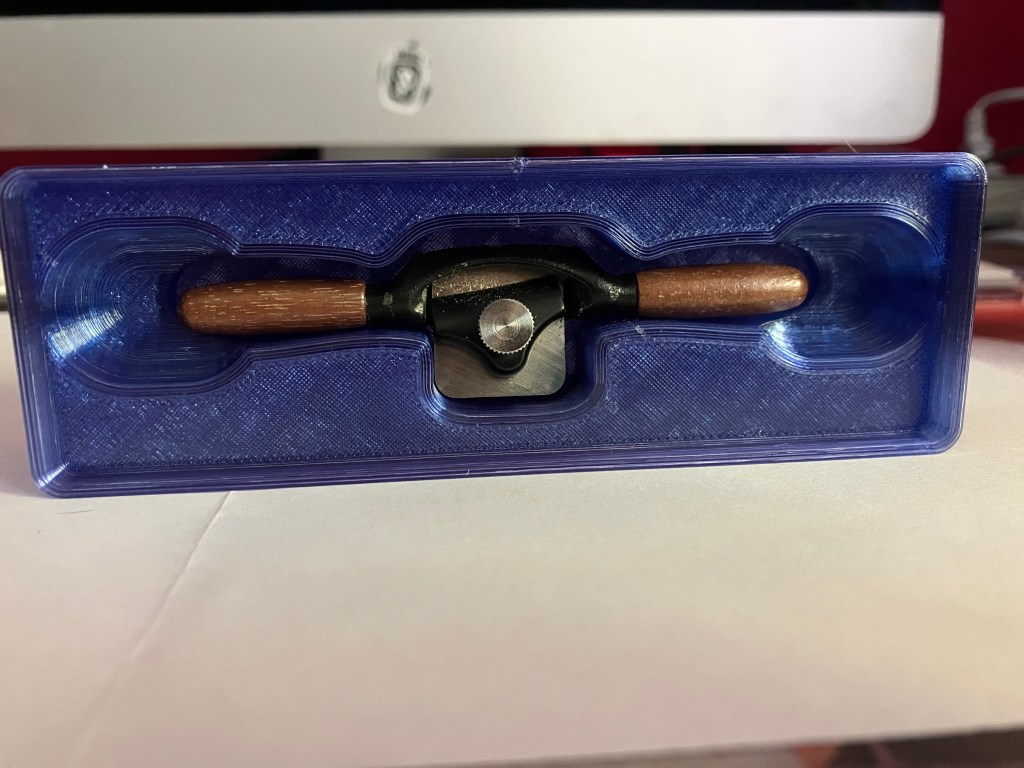
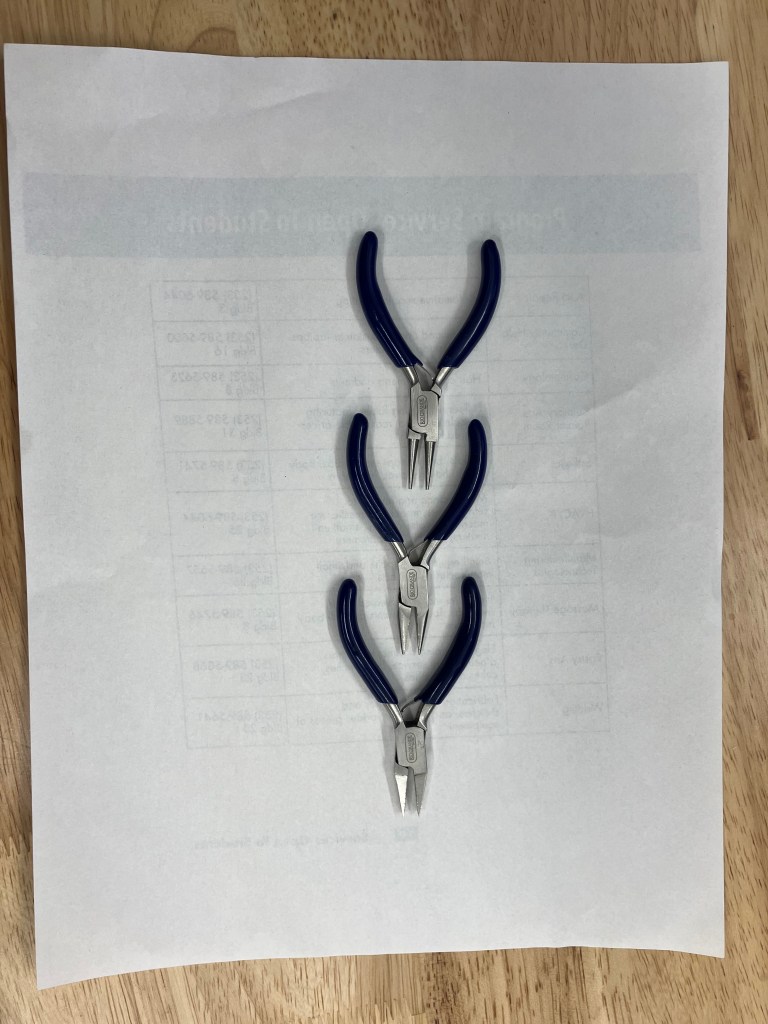
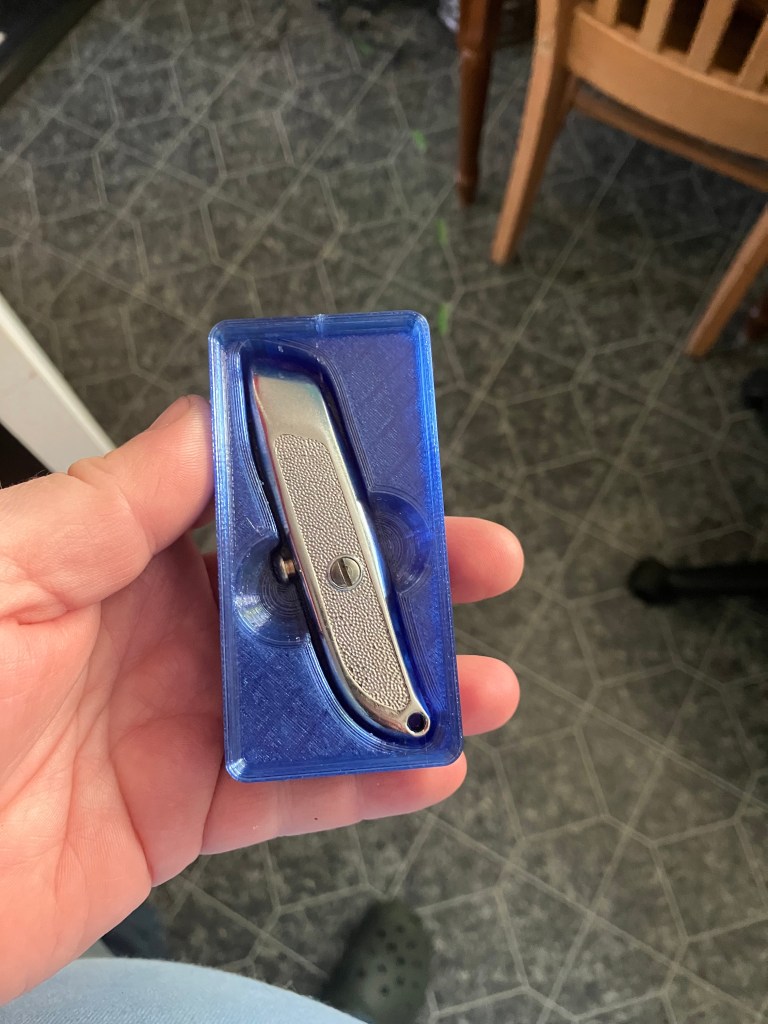
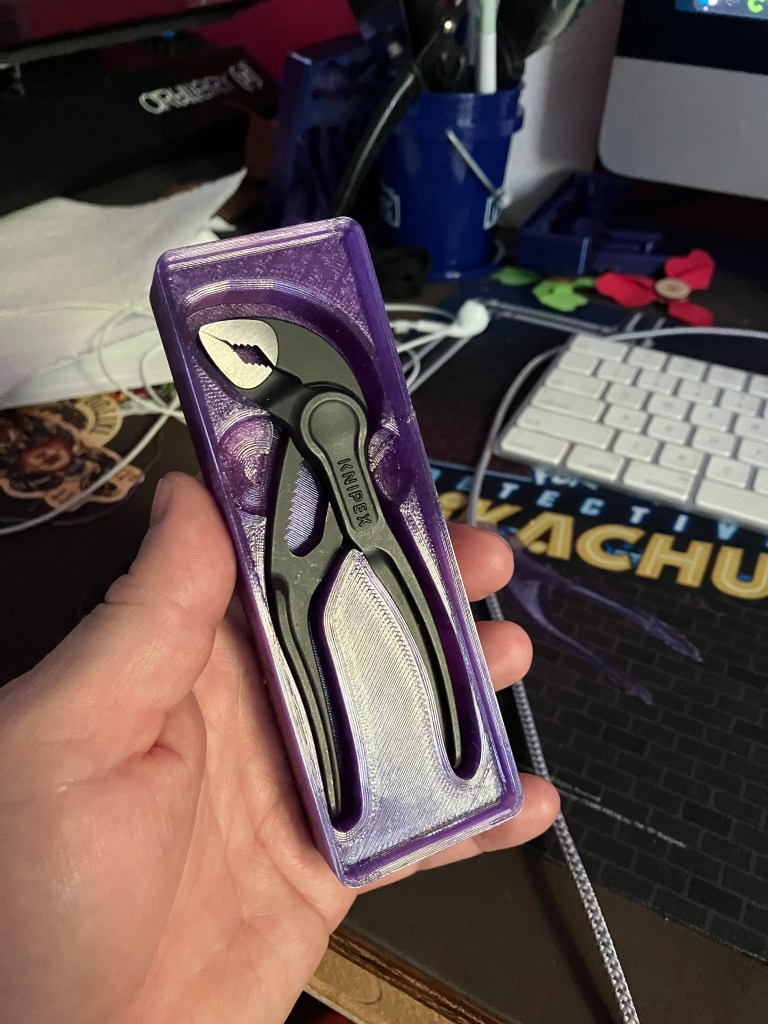
For my mini toolbox, I am first focusing on my most prized mini tool: this functional miniature spokeshave.
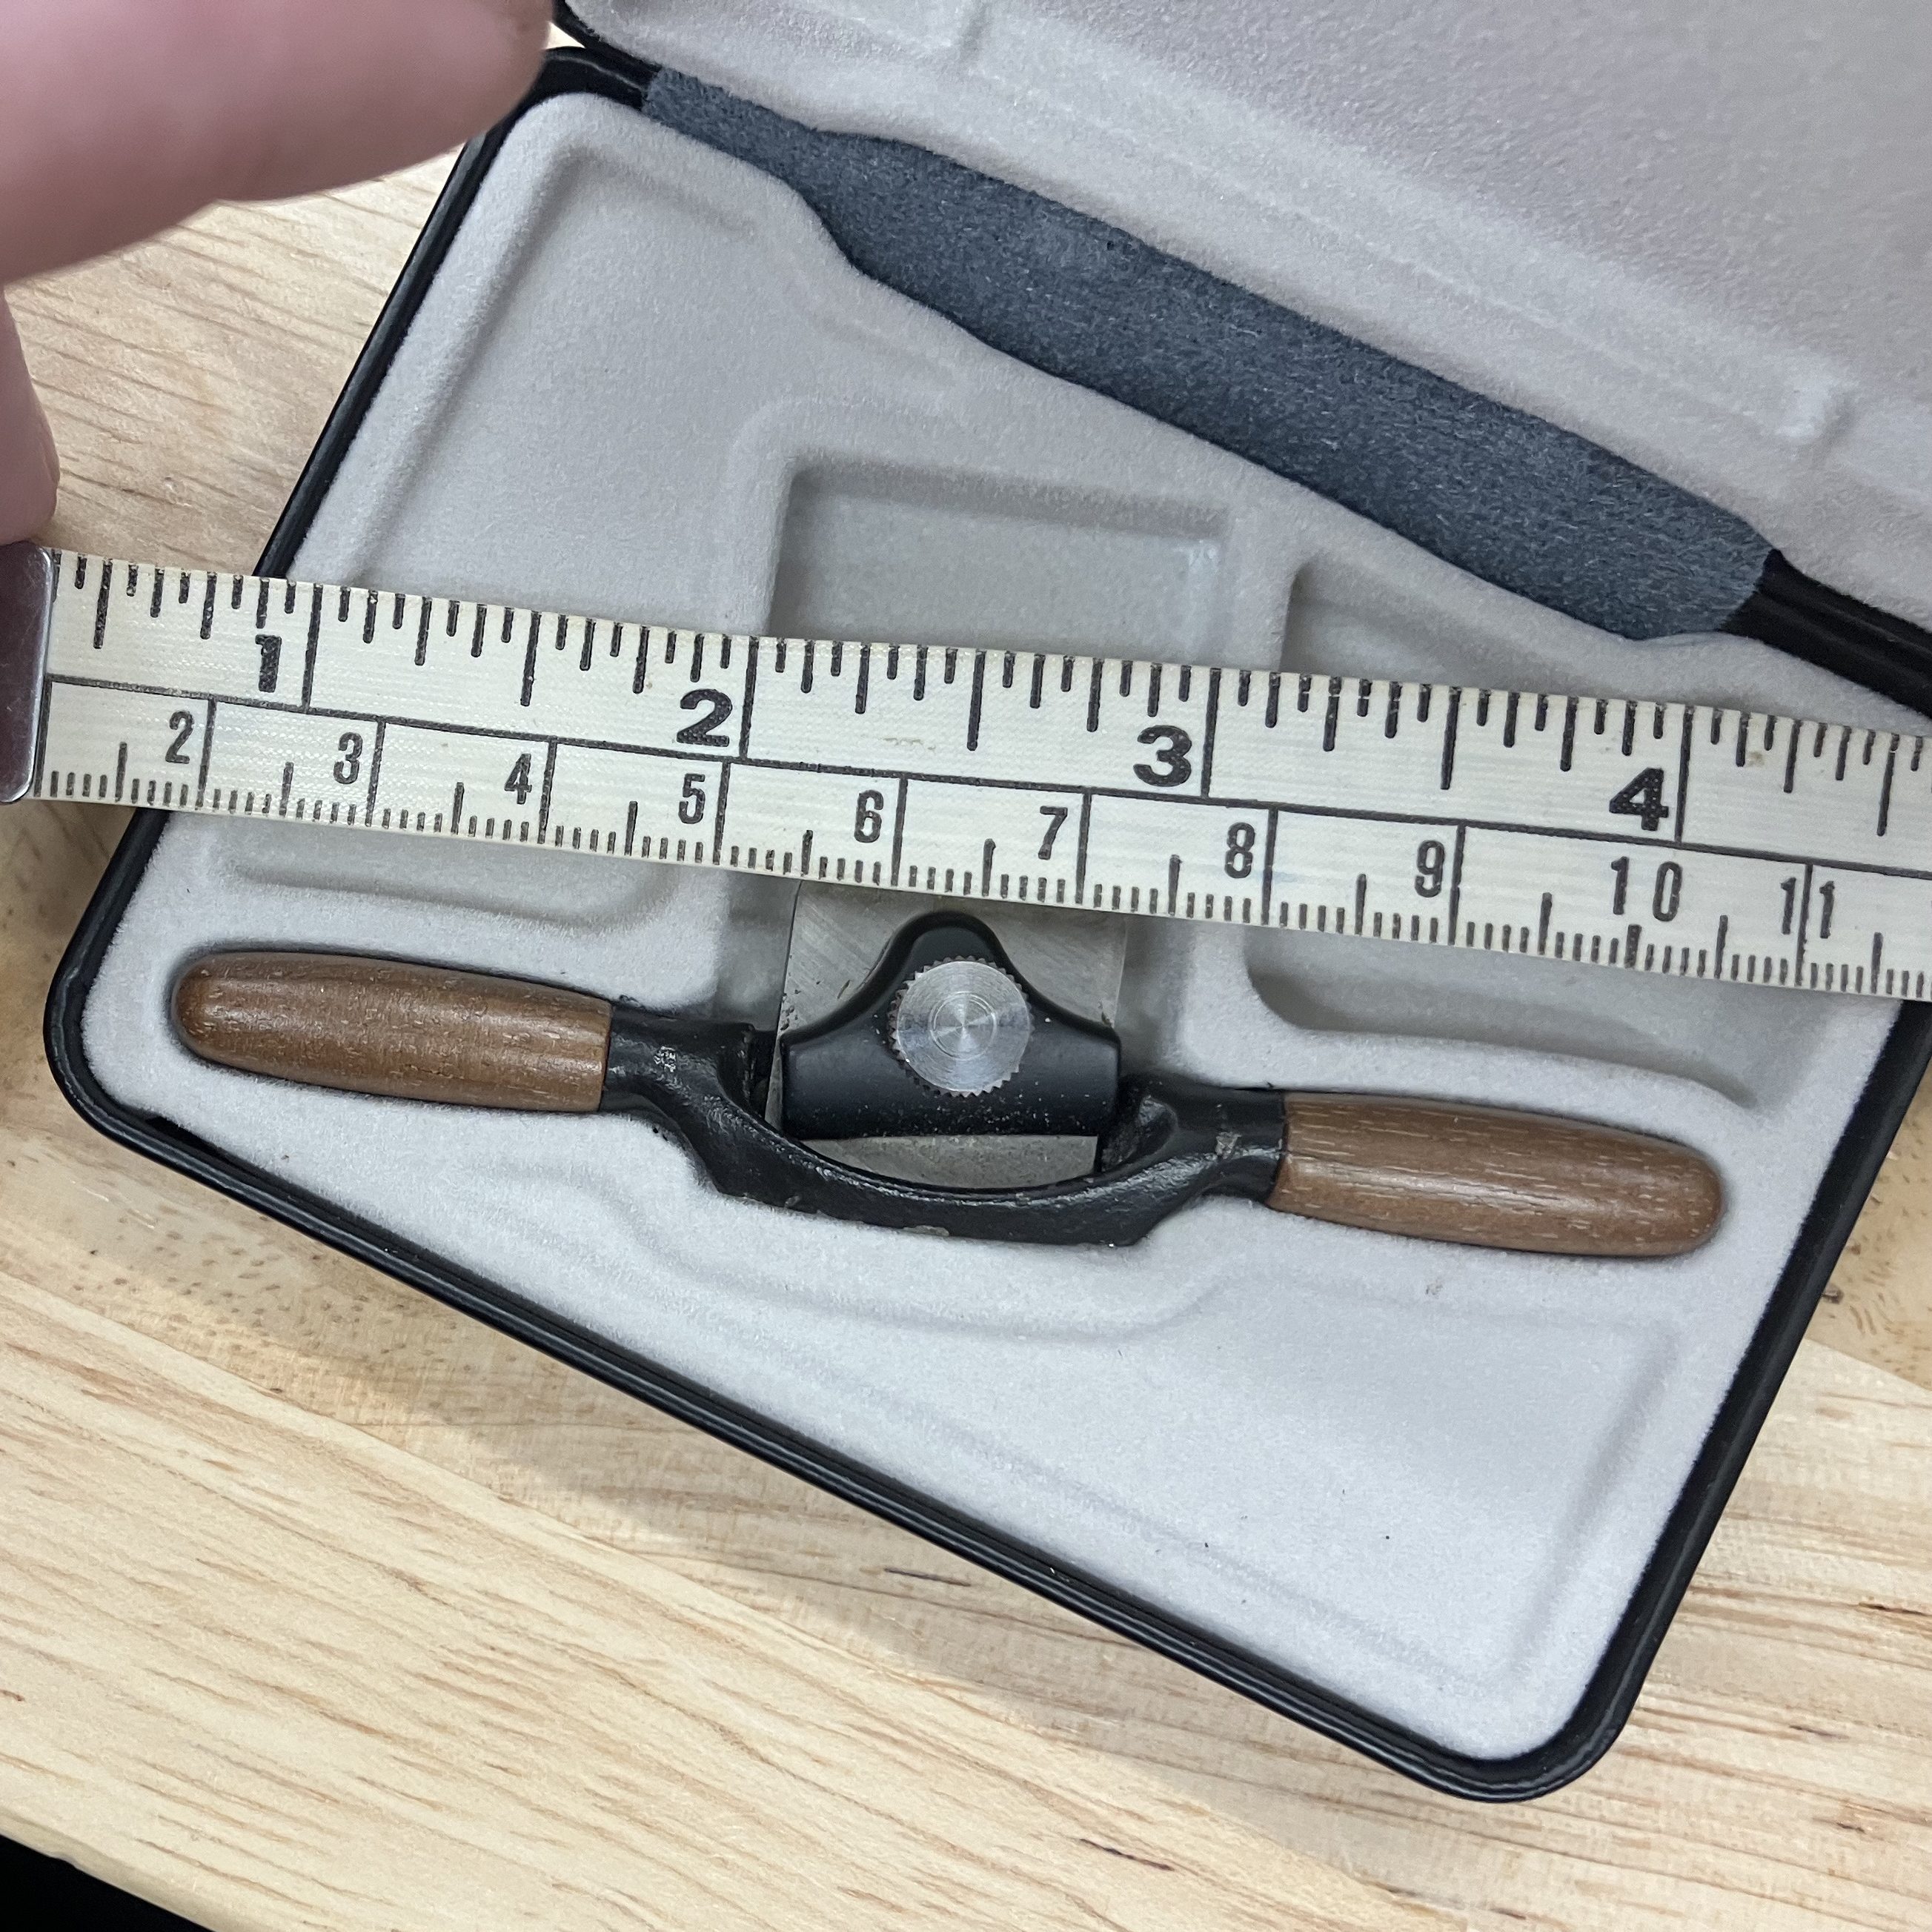
The top drawer of the mini toolbox has a depth of 1—1-1/4″, so I will aim for standard box depths of 1″.
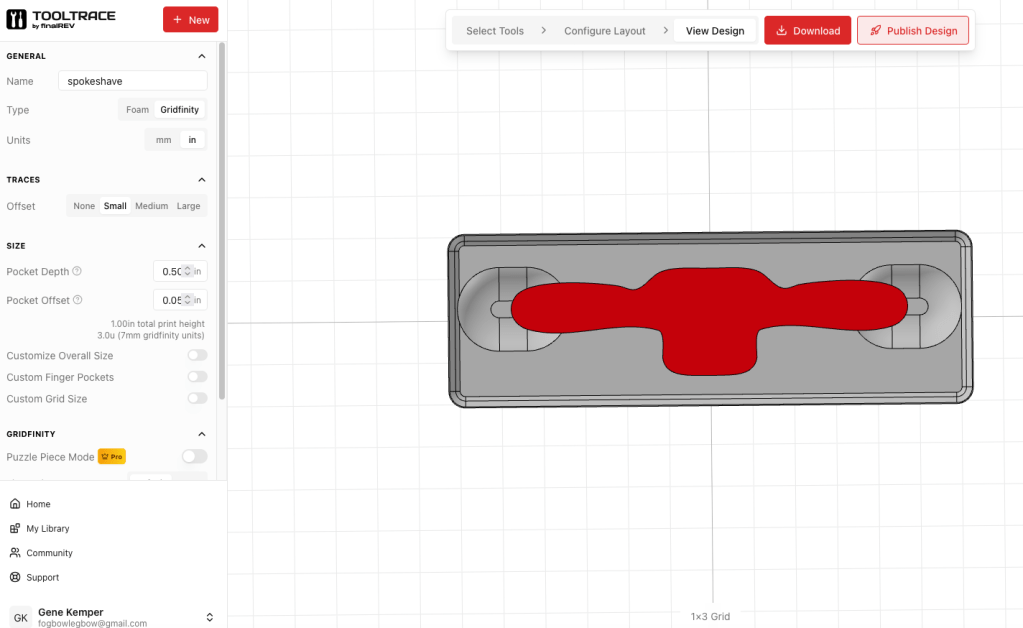
So, we’ll see how this goes. Should be about a 4 hour print. Unfortunately I can’t remove the lip without paying for the pro version, but I was on the fence about that anyway cause the flush-faced version might be hard to grab for reorganizing.
Update later: big vise wrench print failed at lab…looks like it had a layer shift a few millimeters up and spagghetified. I think it’s probably just too big. I’ll have to size it down, but for now I’ll do a smaller wrench box.
4/30 Log
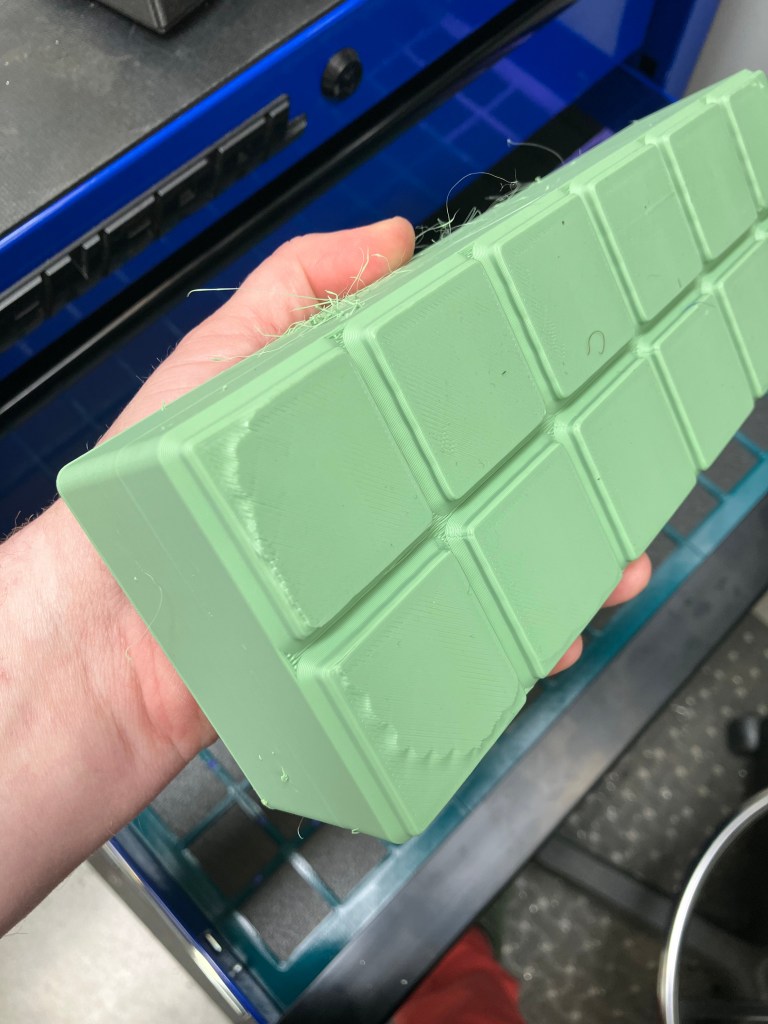
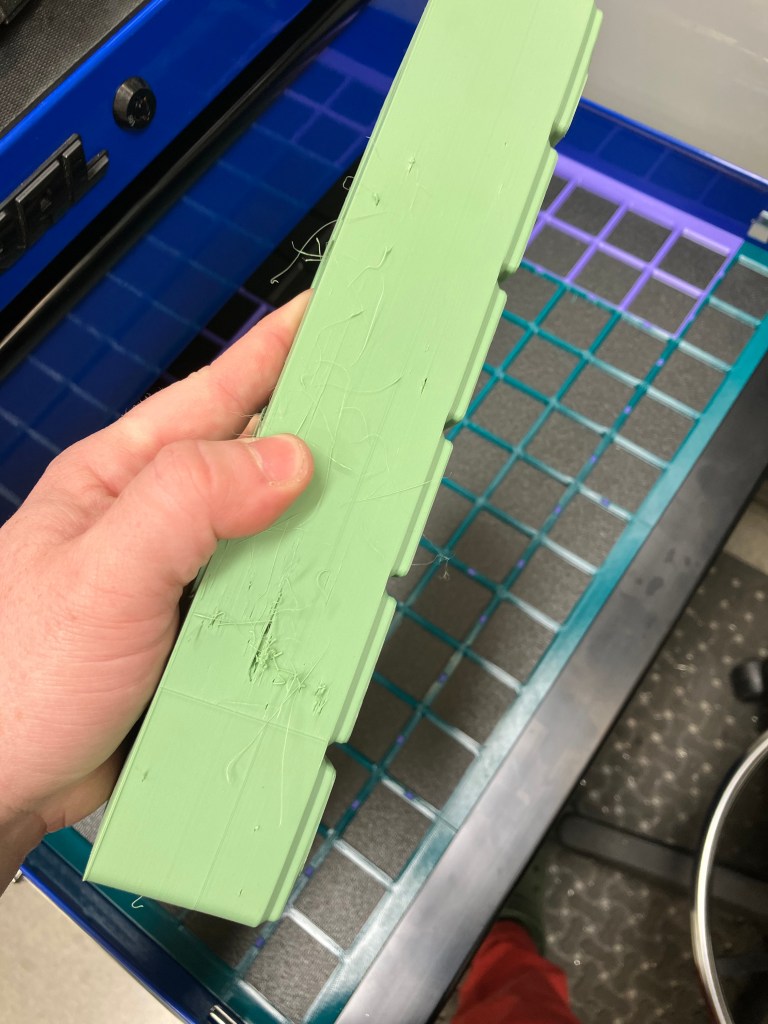
The home print of my mini spokeshave holder was a success!
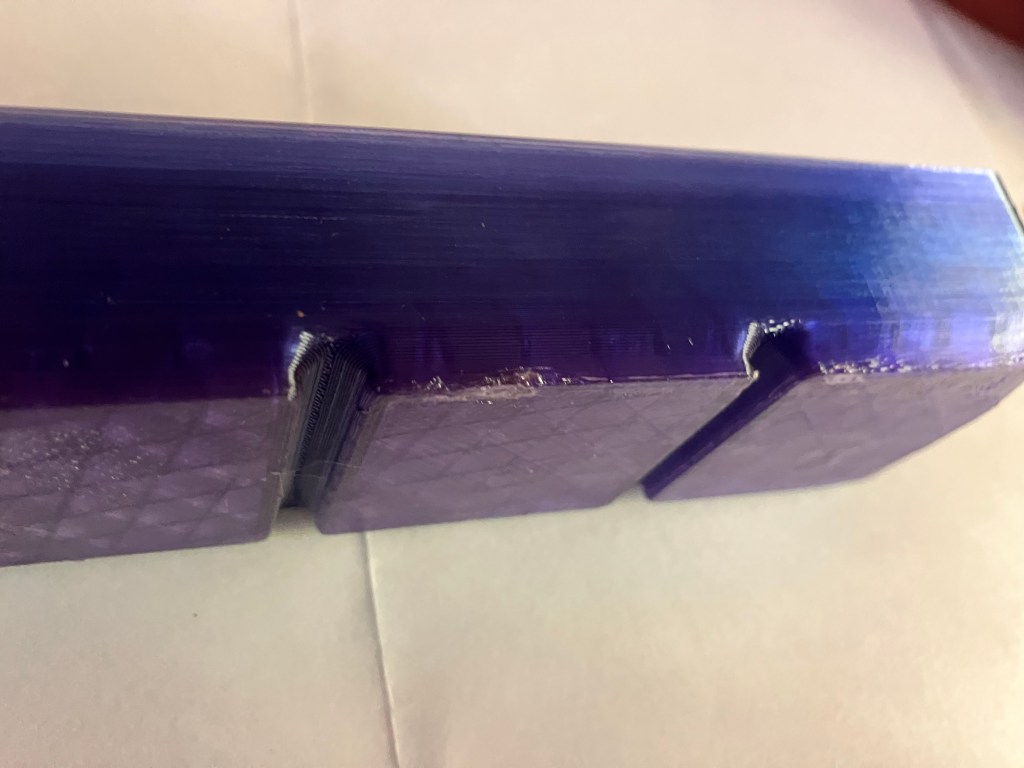
Issues:
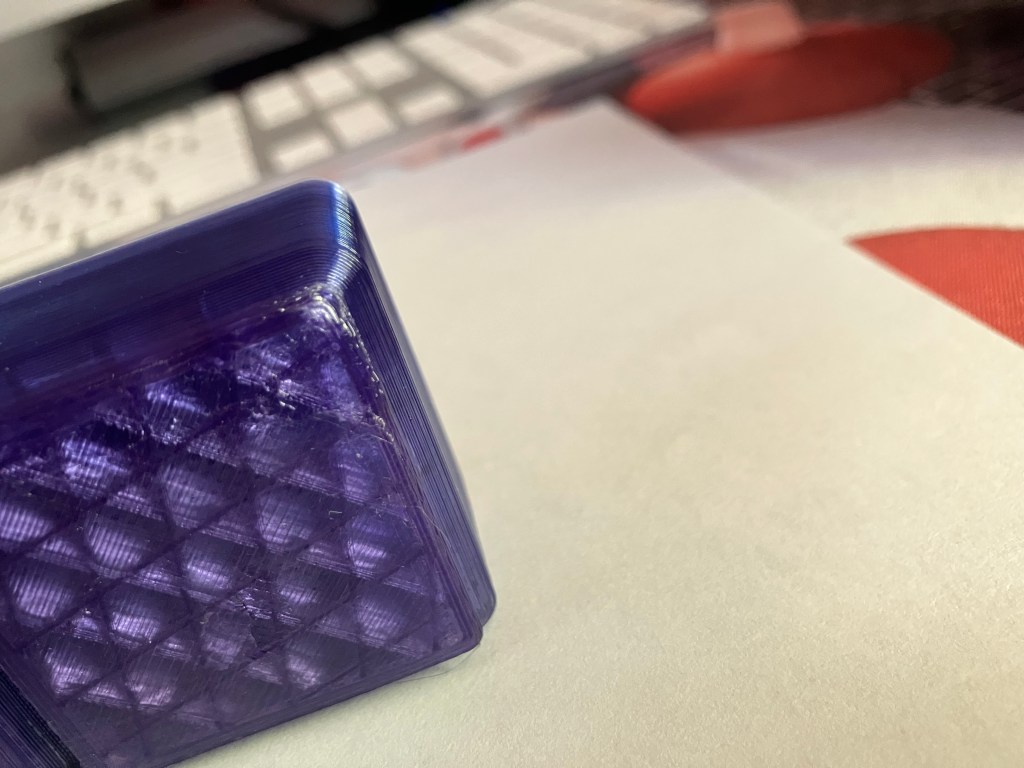
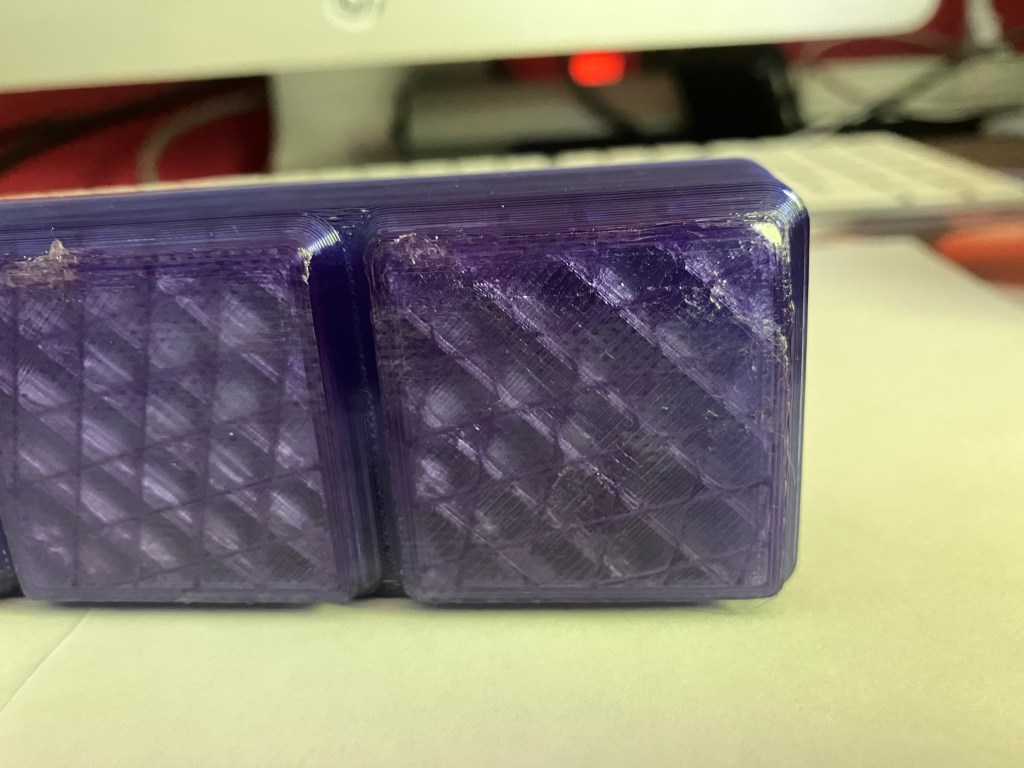
- Still having some first layer/bed adhesion problems, that warped a couple corners, but the print still stuck. Did require some trimming though. Annoying, but I think at this point the issue is with the bed itself being worn/not perfectly flat.
- It doesn’t really need the finger holes, because it’s possible and easier to lift it my the screw instead.
- There’s a lot of slop, probably fine for a normal sized tool but really makes the little guy rattle around.
Solutions if I do a reprint:
- Tooltrace.ai generates by default stls of both the overall body of the box and the tool silhouette. So, I can print the tool silhouette a layer or three thick, and use it as a template to trace onto felt or leather or something to make a padded layer for the bottom of the box well, to reduce the rattling and protect the tool.
- Can eliminate finger slots, which probably won’t make it small enough to only need 2 squares, but nontheless would look tidier.
- Stringing seems to have resolved, but I can research some printer-specific bed adhesion solutions
- I printed the box without a brim, but I saw a setting in Cura before that lets you put a little space between the model and brim to make it easier to remove, so I might try a brim to cut down the warping. Ultimately that’s more trimming than what came from the warping, though.
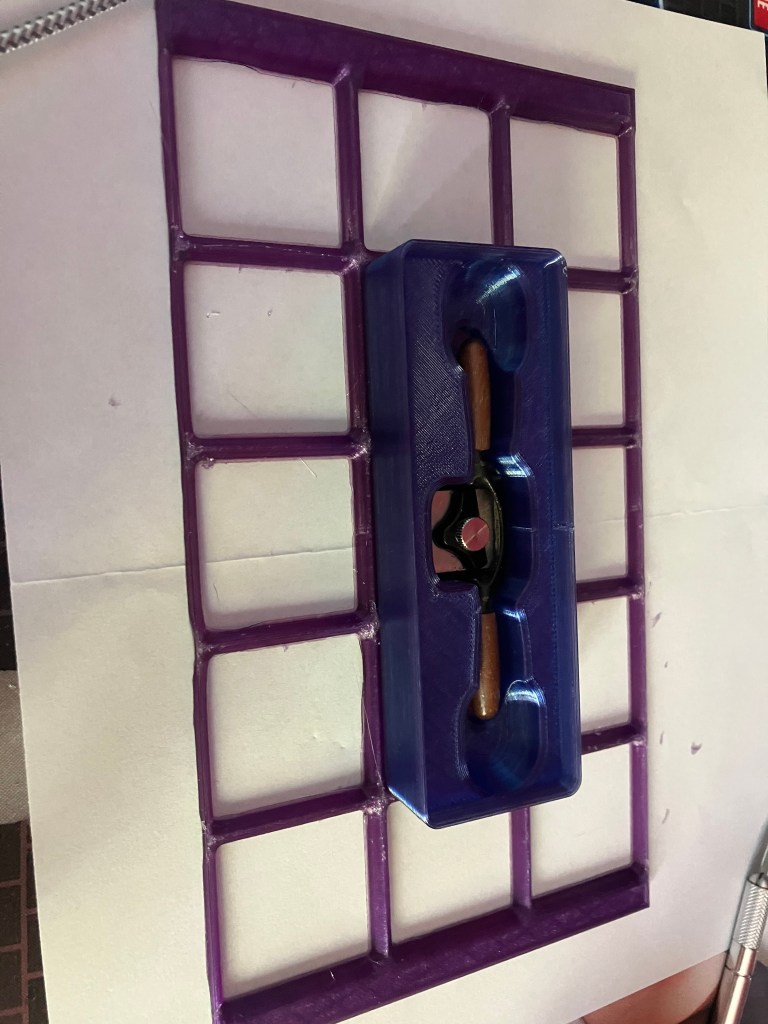
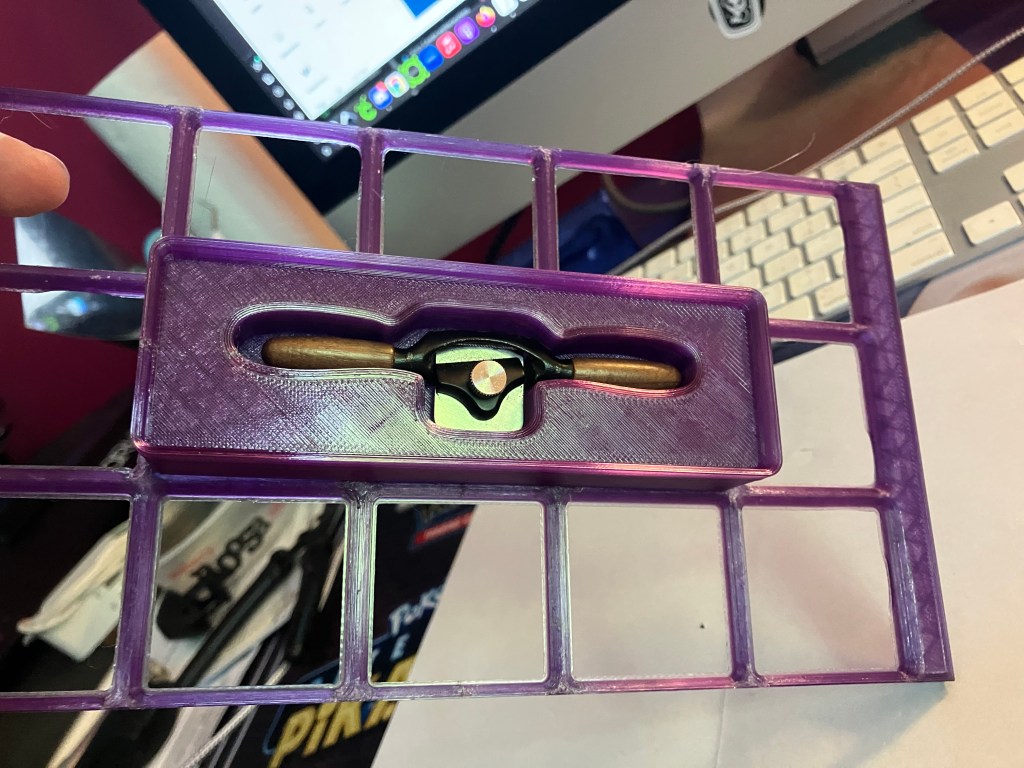
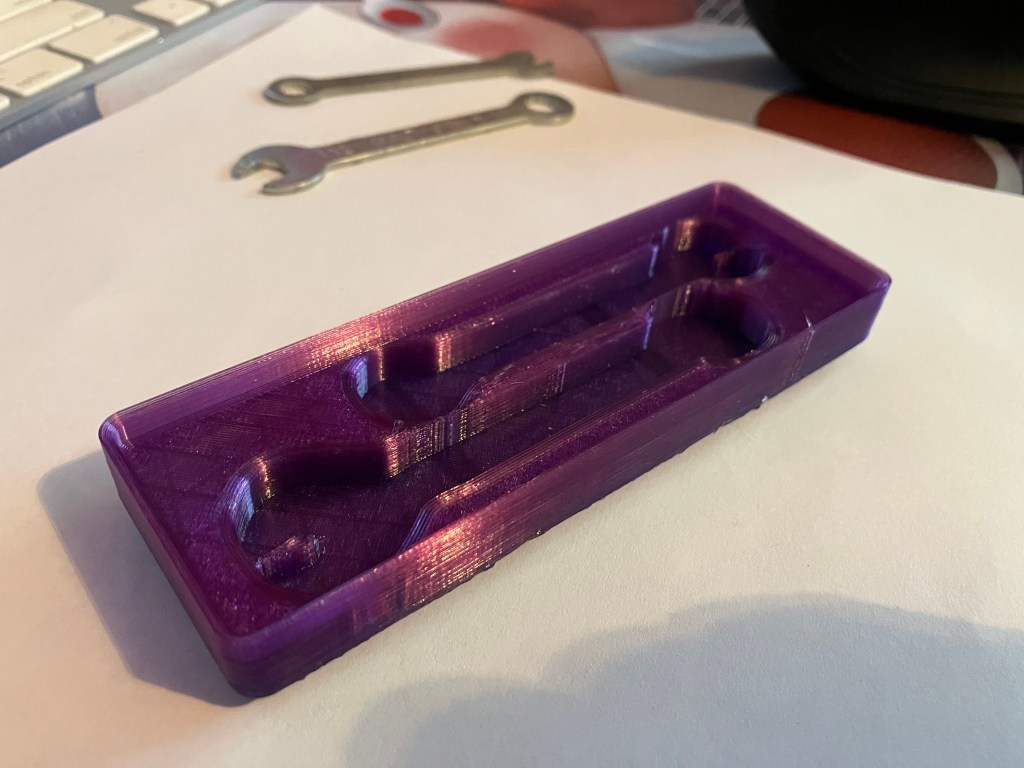
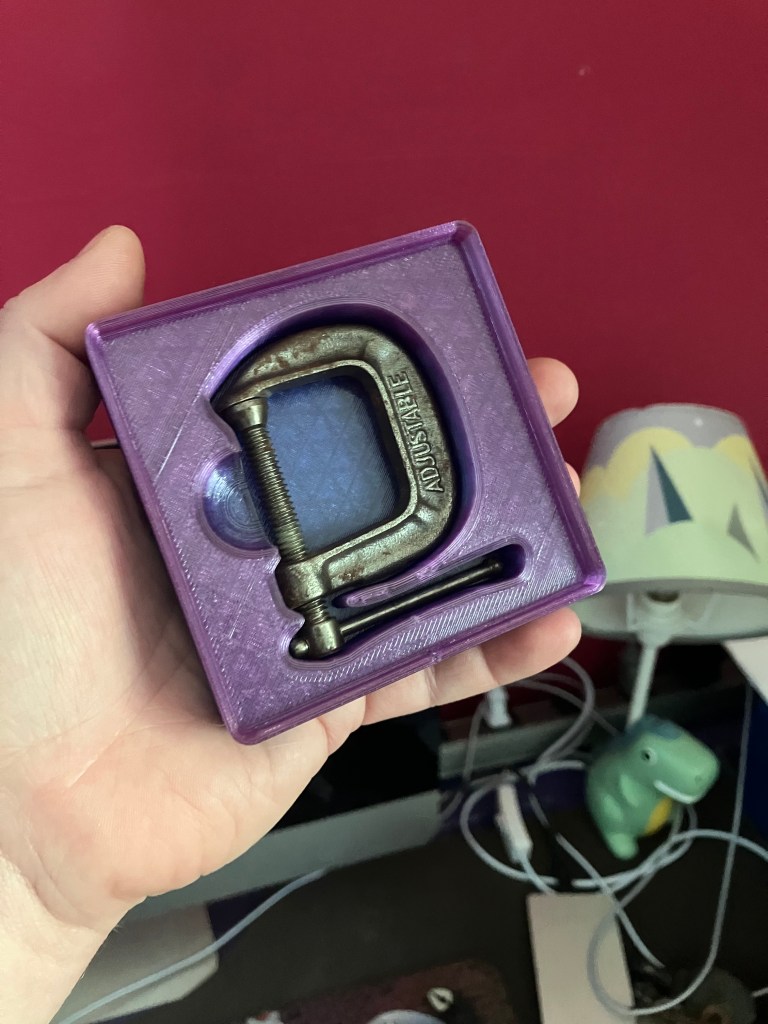
Update later: unfortunately the small vise print at the lab was a failure–it ran out of filament partway through. Good news is, the vise handle seems to be a good fit, and there is no problem with the box itself. In fact it’s pretty functional as-is.
5/1 Weeeb
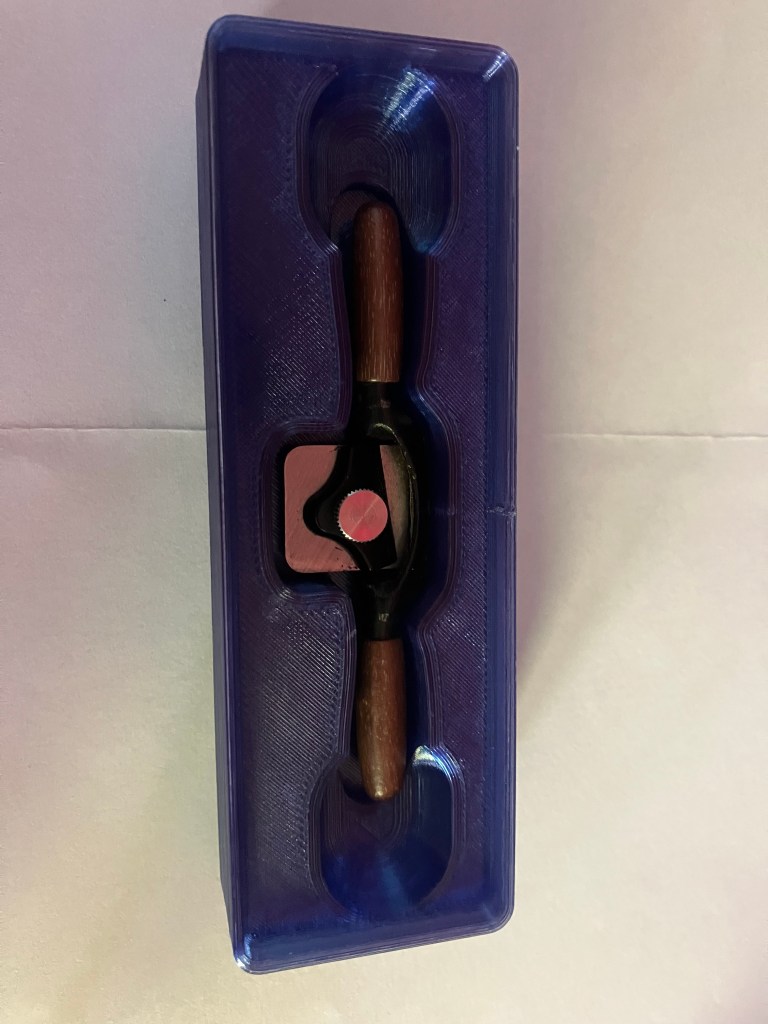
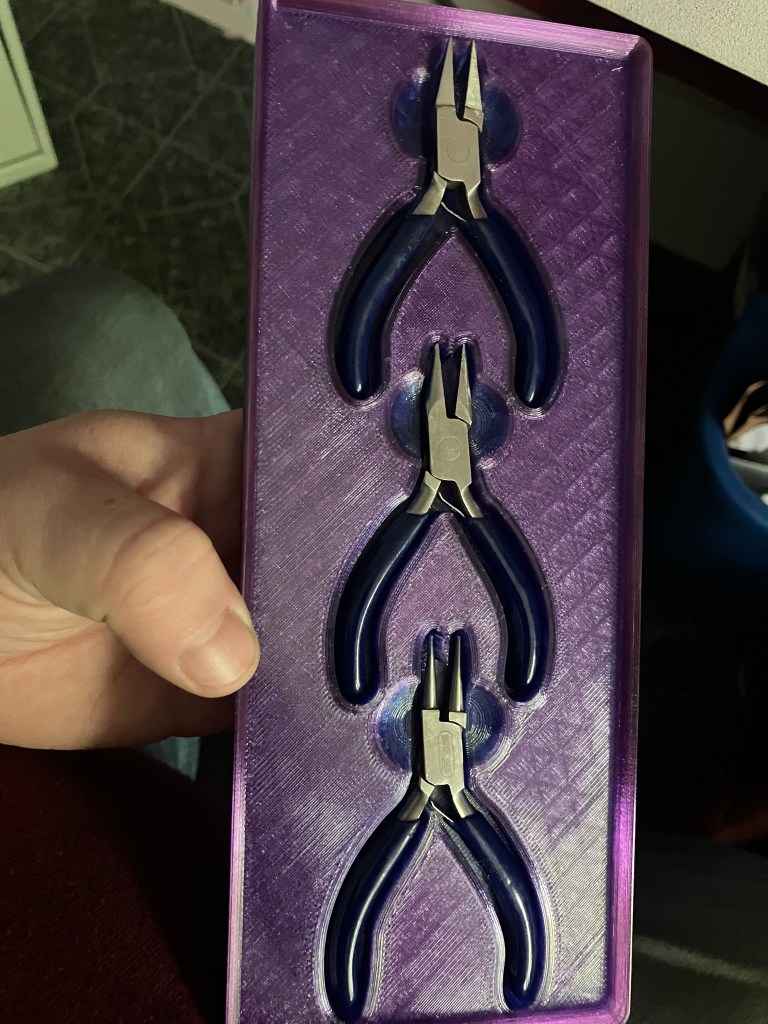
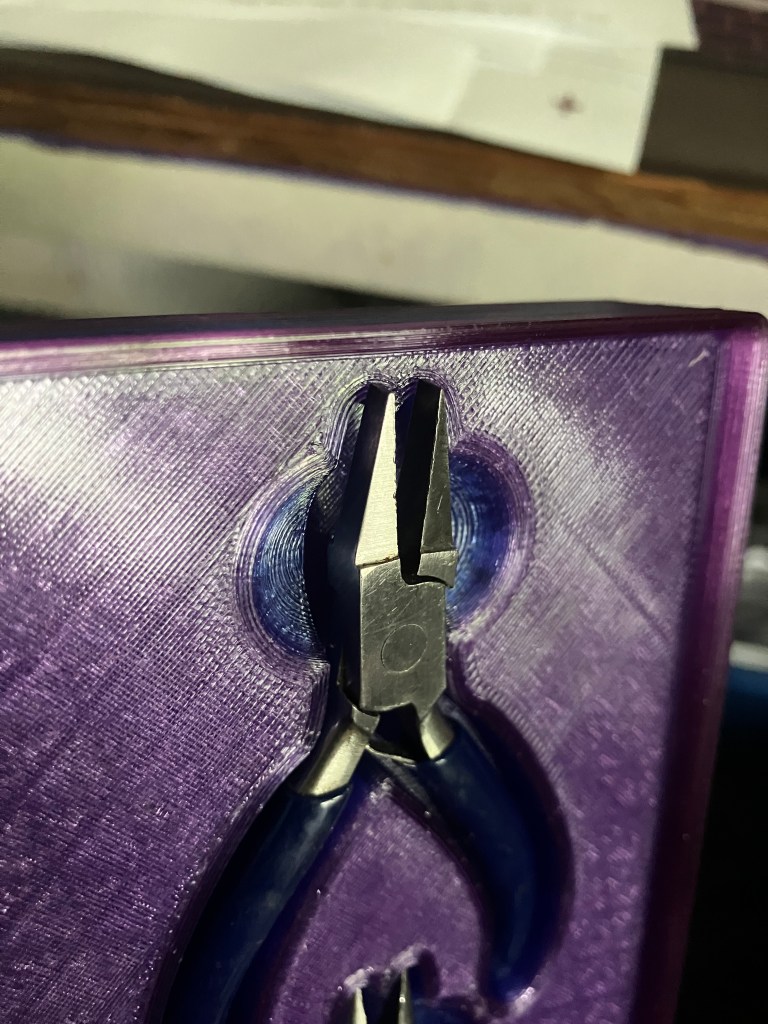
I’m very happy with how the second version of my spokeshave box came out!
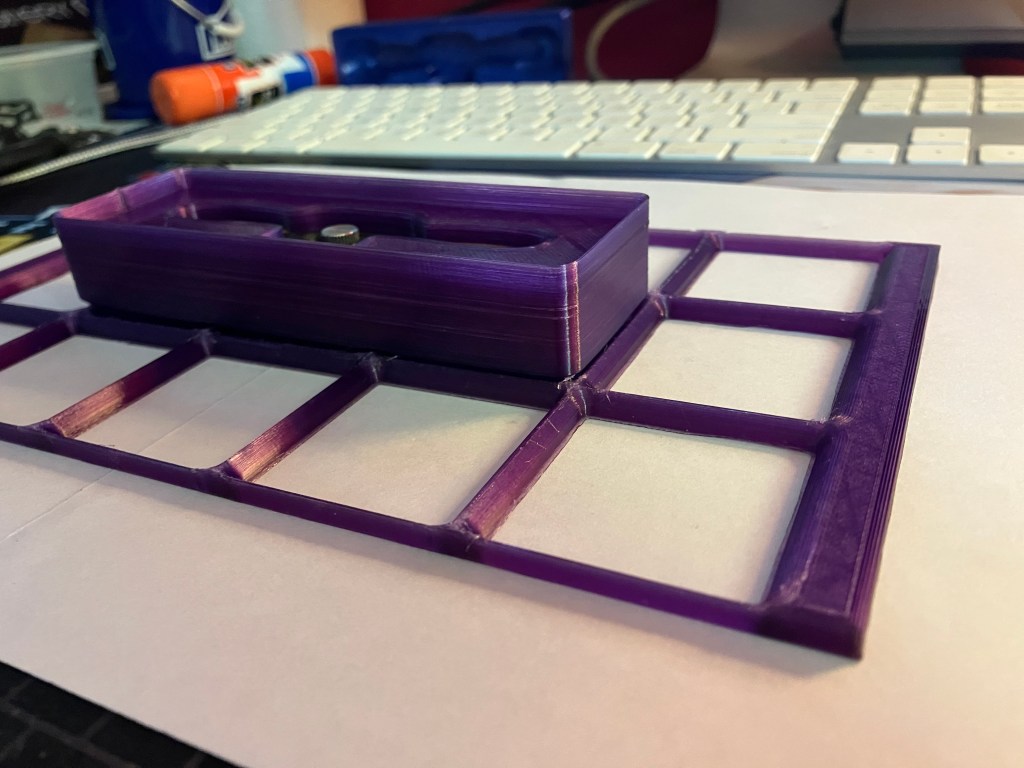
Still having some corner peeling. Oh well. I’m trying a baffle again for the next print to give it a little more heat, see if that helps.
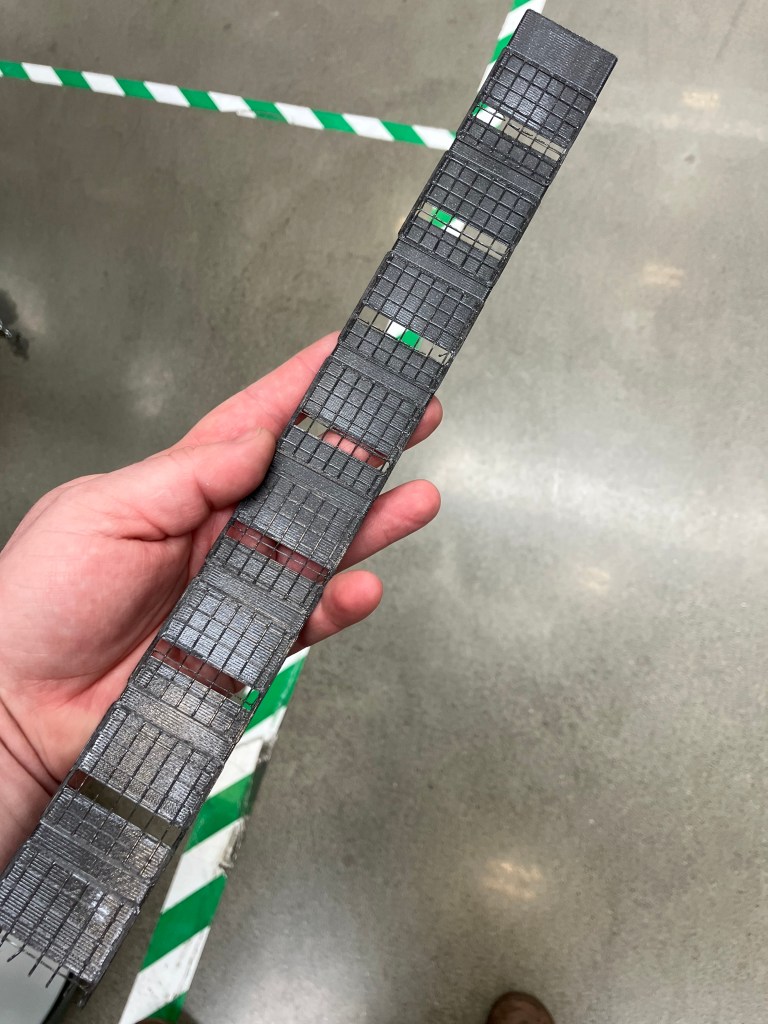
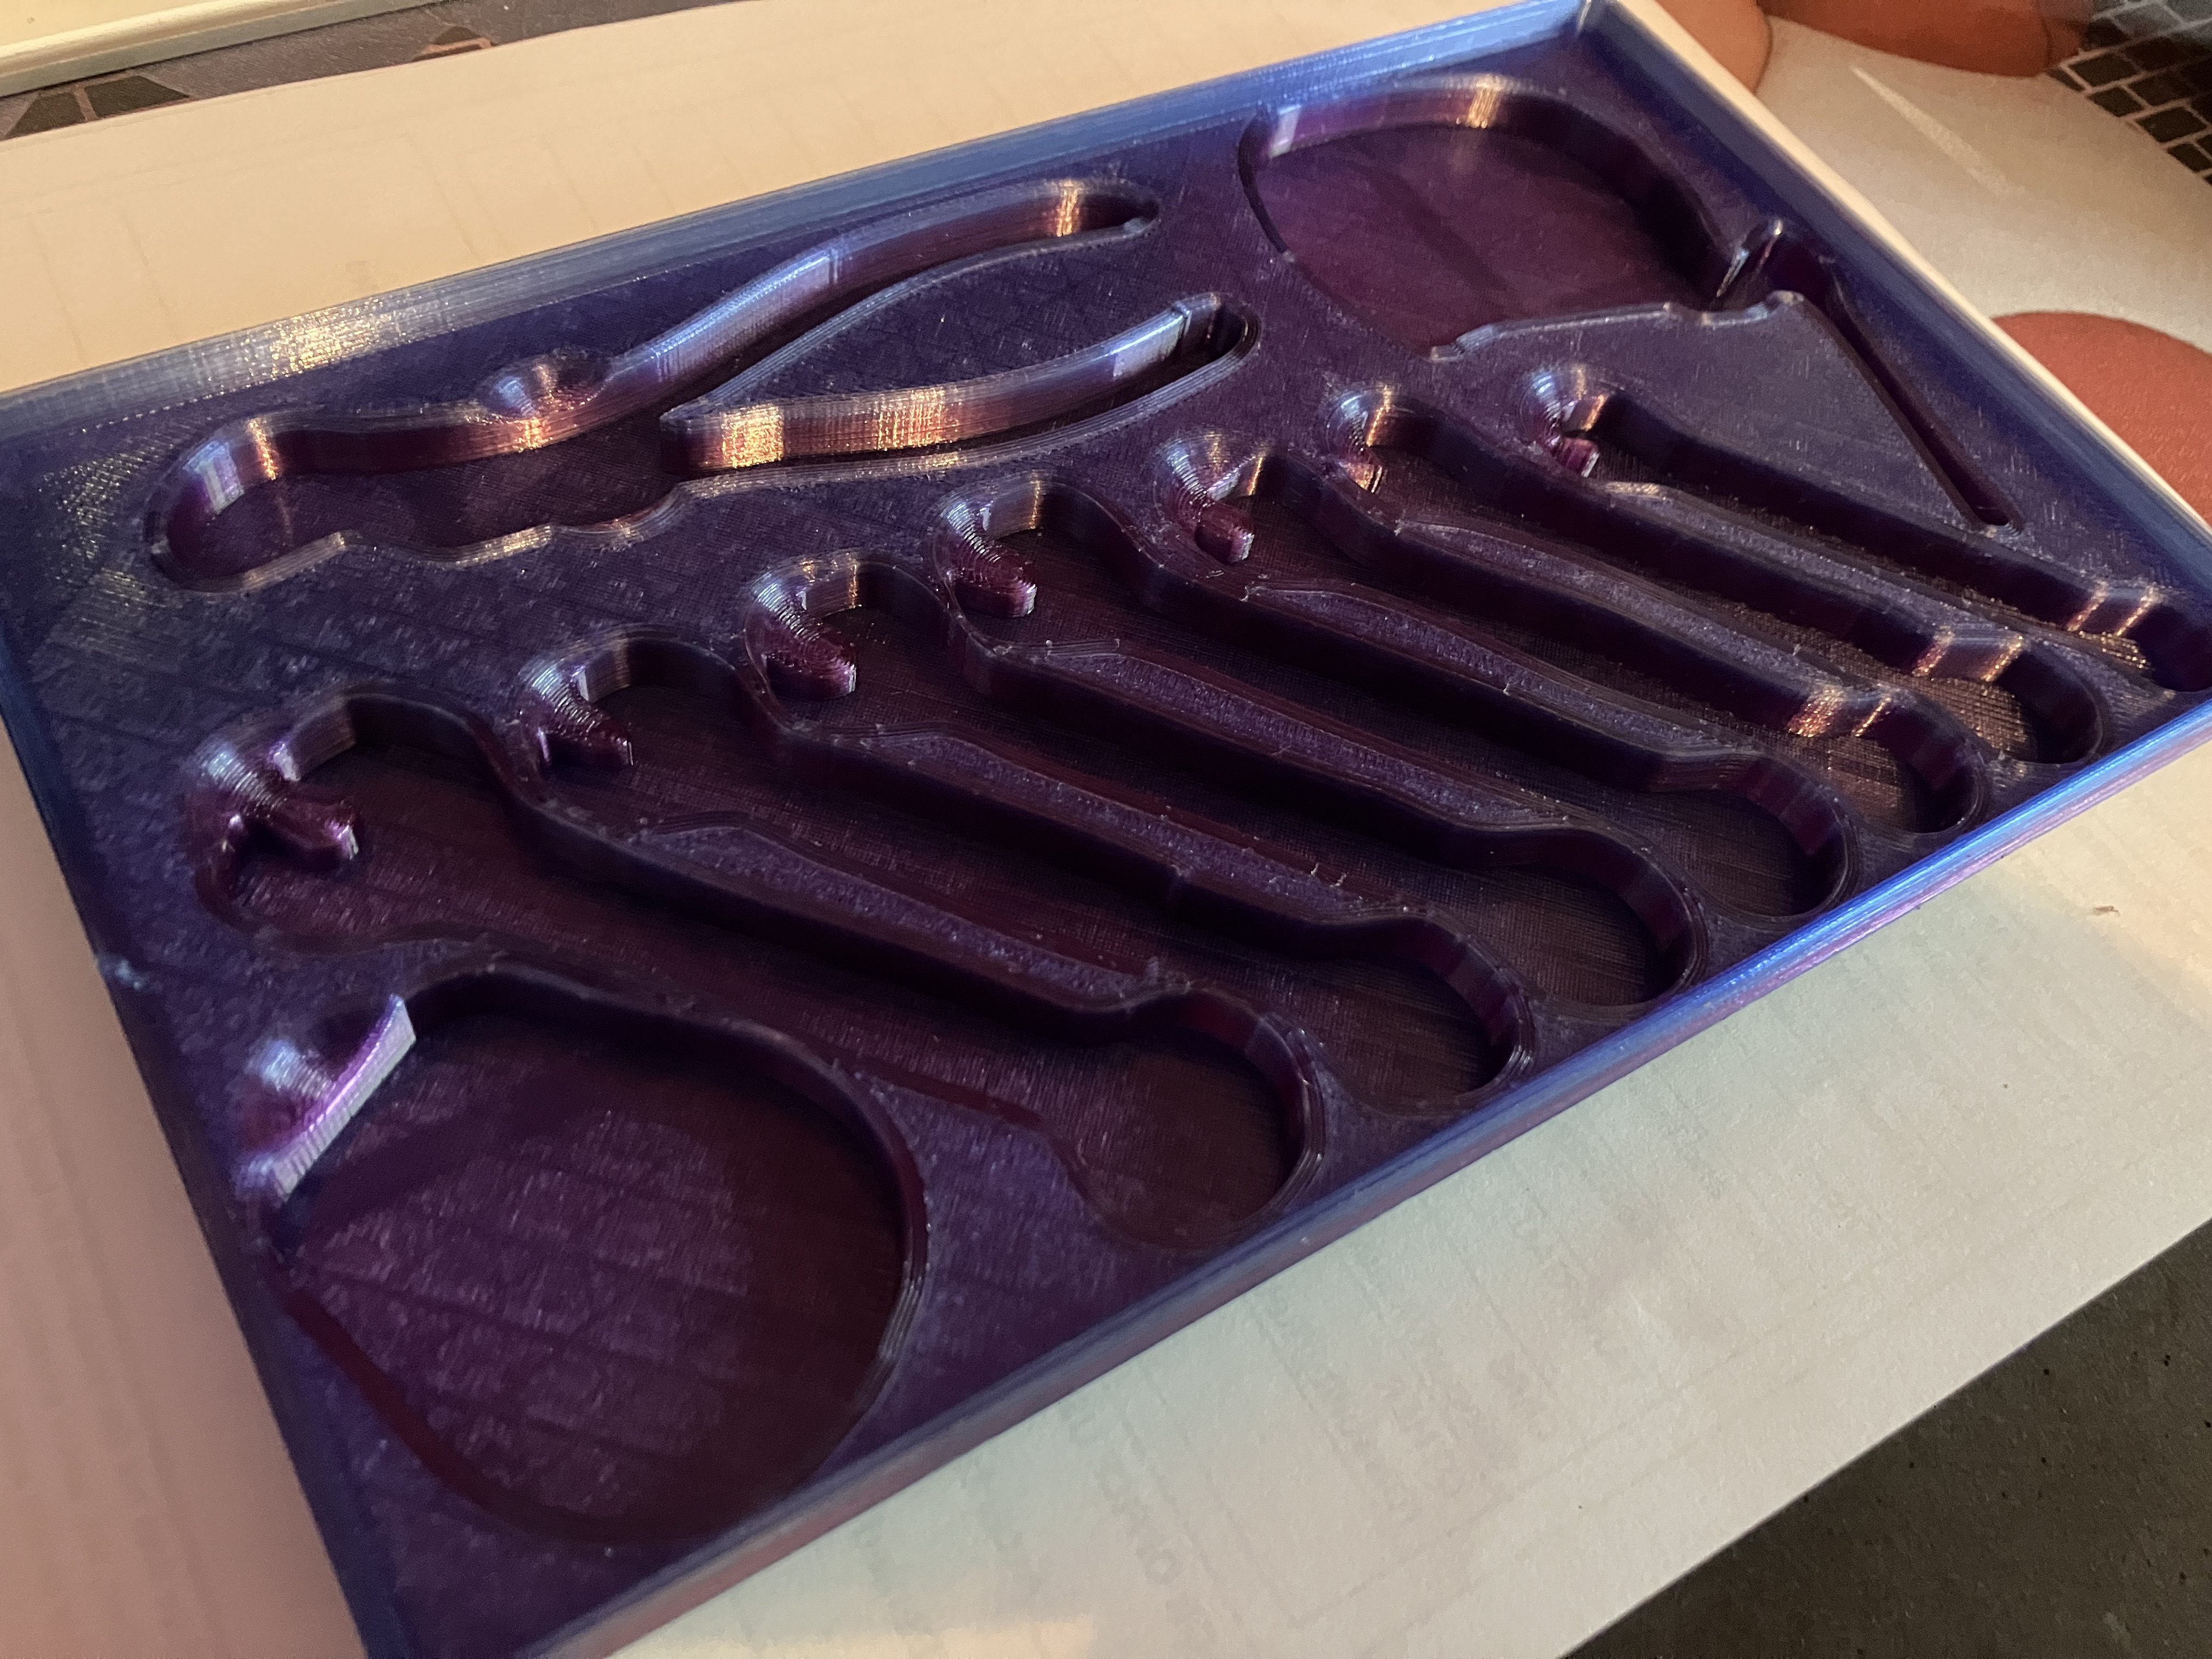
Next up is my first multi-tool box print. This one is a full tray of my mini tools for my mini toolbox. It’s a 16 hour chungus, but I shaved 4 hours off by making it as short as possible instead of standardizing it to 1″ height like I planned. I figured since it is a full tray print, it doesn’t really matter if it is actually stackable anyways.
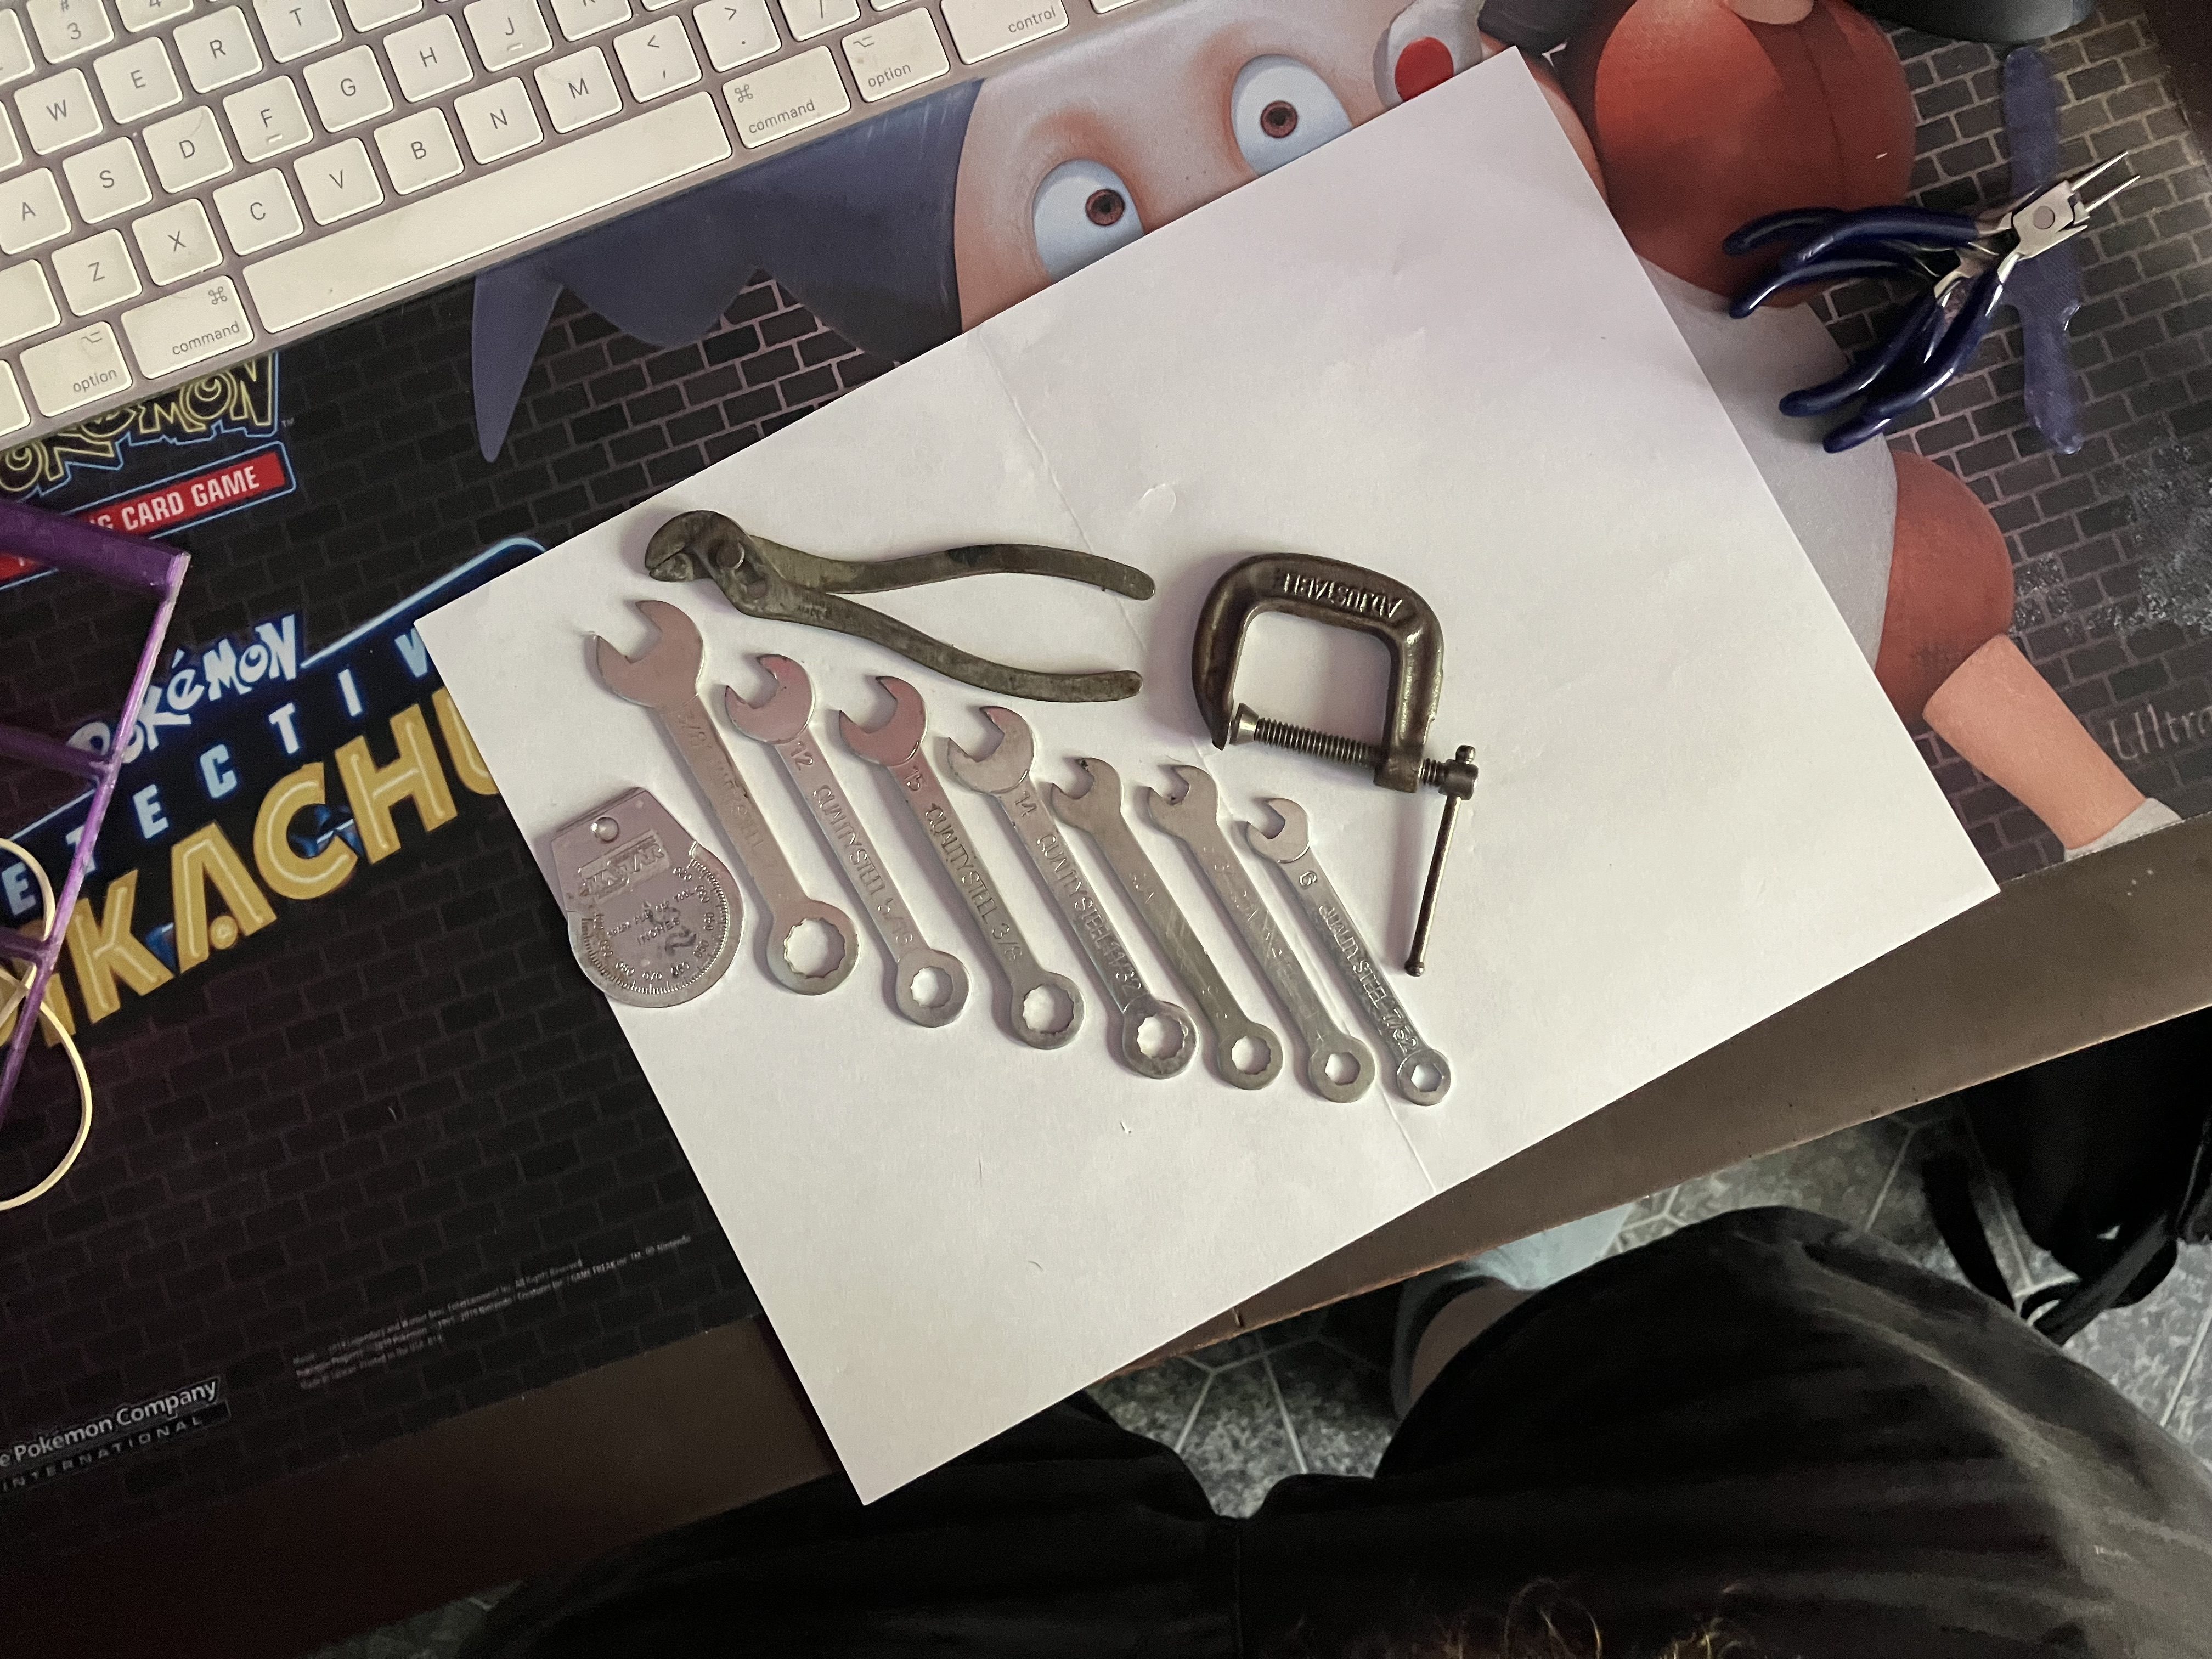
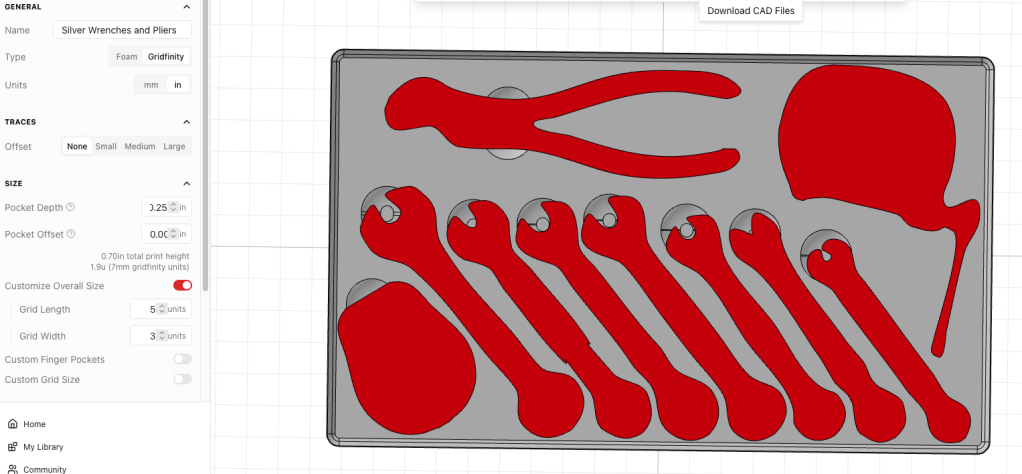
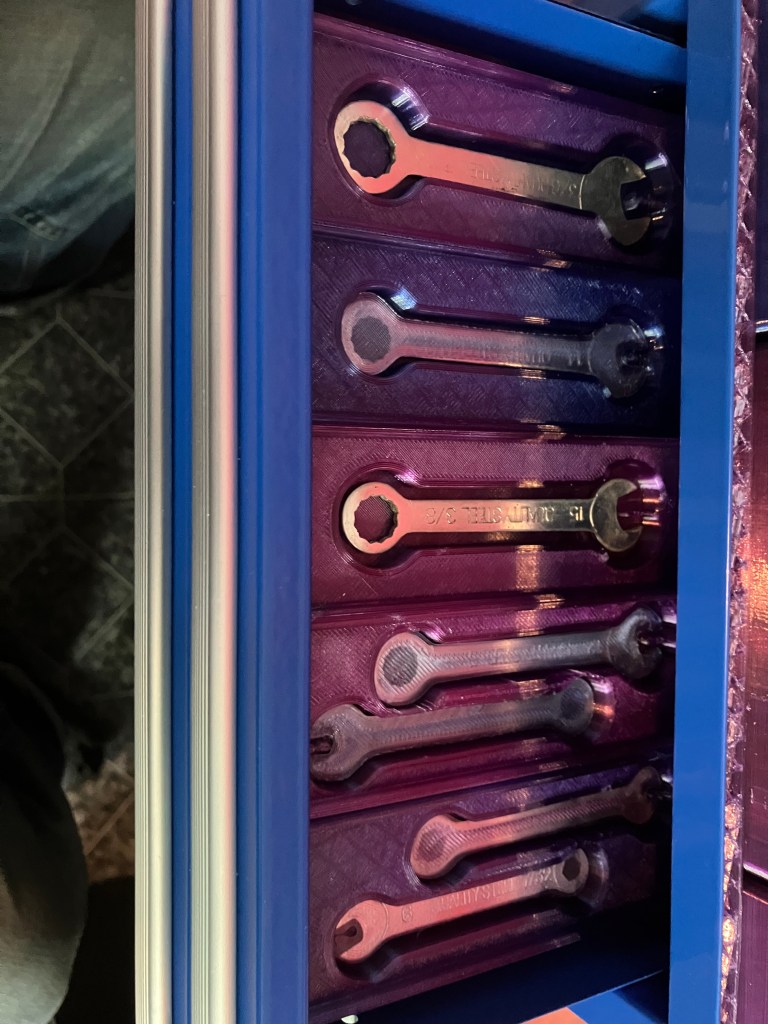
I’m not really happy with how the details of the wrench heads weren’t really captured, but unless I want to pay for pro (I don’t) or manually edit them in fusion (I don’t), it is what it is.
The pockets are all going to be too deep, but I can pad the bottoms with a lining material. I kind of wish what it generated was a box with a lip, an insert with an open bottom, and then I could sandwich a single piece of felt or whatever between the box and the insert and the lip would just allow for whatever that variable thickness is. Maybe there’s another generator out there that does this, or maybe that’s a different fusion project.
5/6 Og
Unfortunately the tray was a failure. It printed beautifully, and not a single tool fit. Turns out adjusting the offsets to “none” is a bad idea. It will be a space sink, but I’m going to have to isolate my boxes to 1 or 2 tools for tools at this small scale. When I tried to add back small offsets, nothing fit anymore.
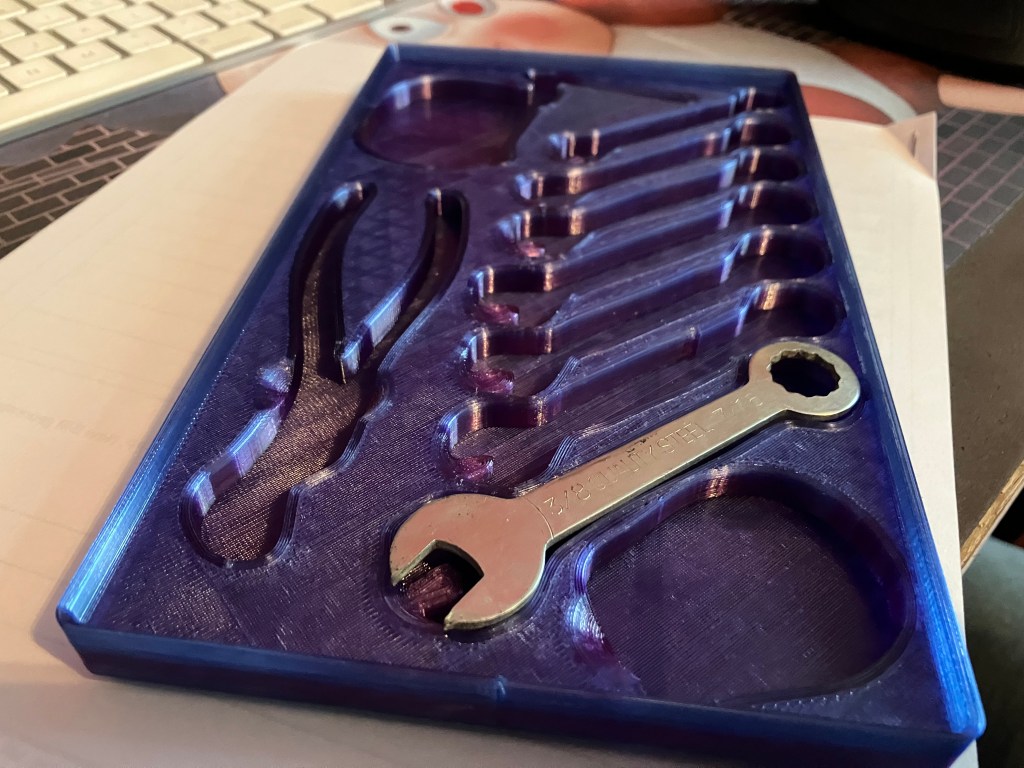
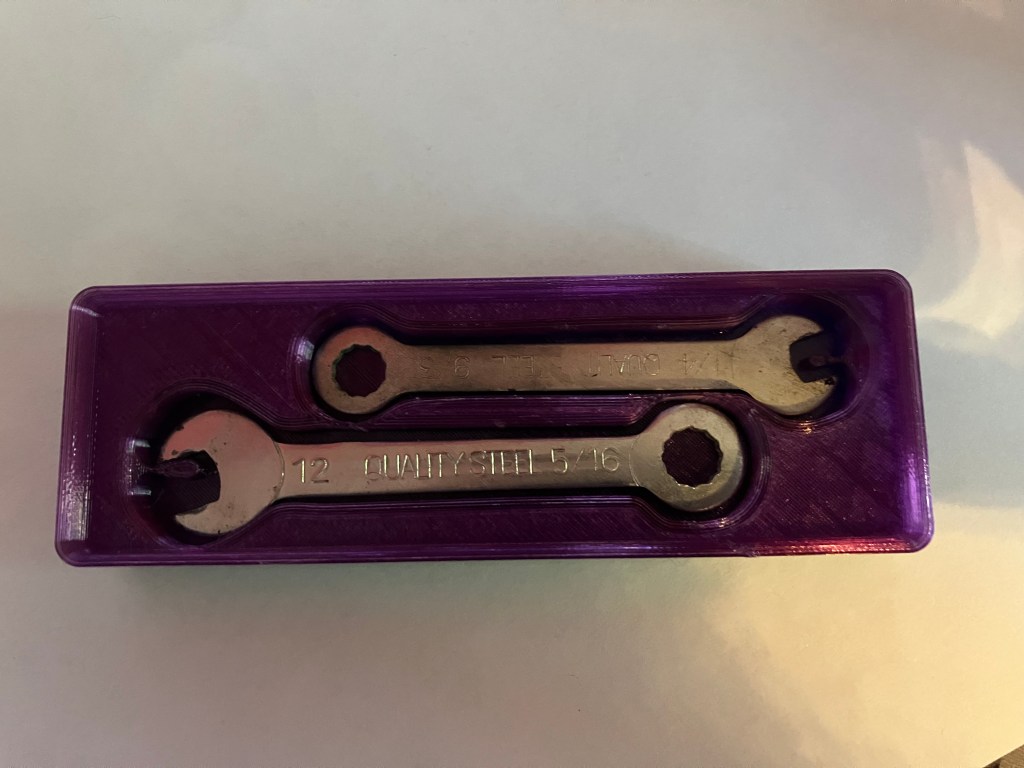
A new toolbox with only one wrench has done well, so that’s what I’m working with now. If I could just halve the offset distance, I wouldn’t have the annoying slop I have now. But I think even in pro I can’t fine-tune that. It might be worth experimenting with other generators. Or not, idk.
Progress is continuing on printing the grids for the cnc mini mill toolchest. To try to streamline the process, I’ve uploaded all the plate files to my google drive and made gcode files for the prusa core ones for each plate so I can grab whatever USBs are around and use them to load up various printers when I’m in the lab. I overheard Nate saying he would be willing to let students take filament home to work with as well, which I may ask for because I can print a lot more if I’m printing at home as well. But it will take machine time from my mini tools, which does not enthuse.
5/7 e-log
Second wrench box has gone well at home. My scheme to put my files on every available flash drive at the lab is also paying off. I realized while at the lab yesterday that since additive meets at the start of the week, I can get more machine time by running my prints wed-fri. I had three machines running at once cranking out grid parts, and finished my second drawer, plus started on a third. Had some minor issues with print bed adhesion on one of the Core Ones, which was solved by cranking up the heat on the extruder to 250 C (Thanks Ian!). That makes me wonder if my ongoing bed adhesion issues at home are temperature related, also. I’m going to try to dial that in.
I’m still not certain what to make boxes for, since tools are constantly borrowed between machines anyway. But I’ll probably start with basics that can be easily transferred, like parallels and allen wrenches. And a reprint of the vise handle box with an actual top to it lol.
5/8 Bog
so an increase in temp at home and turning off cooling fans def made things worse. I’m going to try at 250 with fans at 50% instead.
As a general note, I have realized that when printing the tool outline alone from the tooltrace.ai download, it carries the same offset as the bin pocket, so I need to download separately the tool outline (typically ‘body 1’ in the download folder) with no offset, to get a shape to more accurately trace for a pocket liner. These will be especially necessary for my mini wrenches, since I have to make the pocket 1/4″ deep in order for the finger notch to show up at all, but the wrenches themselves are only stamped sheet metal and less than 1/8″ thick.
Try, try again.
Update: alright, so that actually worked beautifully. 250 C + 50% fan + a clean and freshly gluesticked buildplate seems to have done the trick. Only remaining issue is some wibbles in the first few layers. I’m going to try lowering the print speed to 50 mm/sec (it’s at 60 mm/sec right now)
5/10 weeblogs wobblog but they don’t log webs
So, that adjustment didn’t really do anything. I think I’m just running up against the limitations of my printer and buildplate condition, tbh. I’m content with the quality, and it’s doing it’s job, so that’s gonna be good enough.
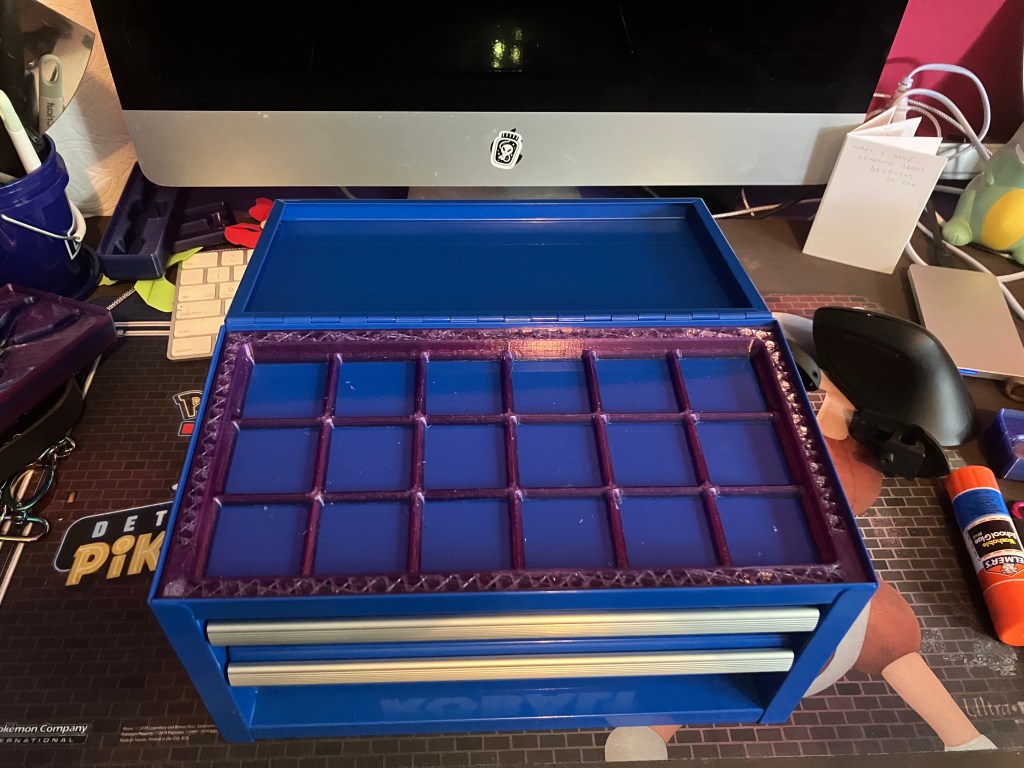
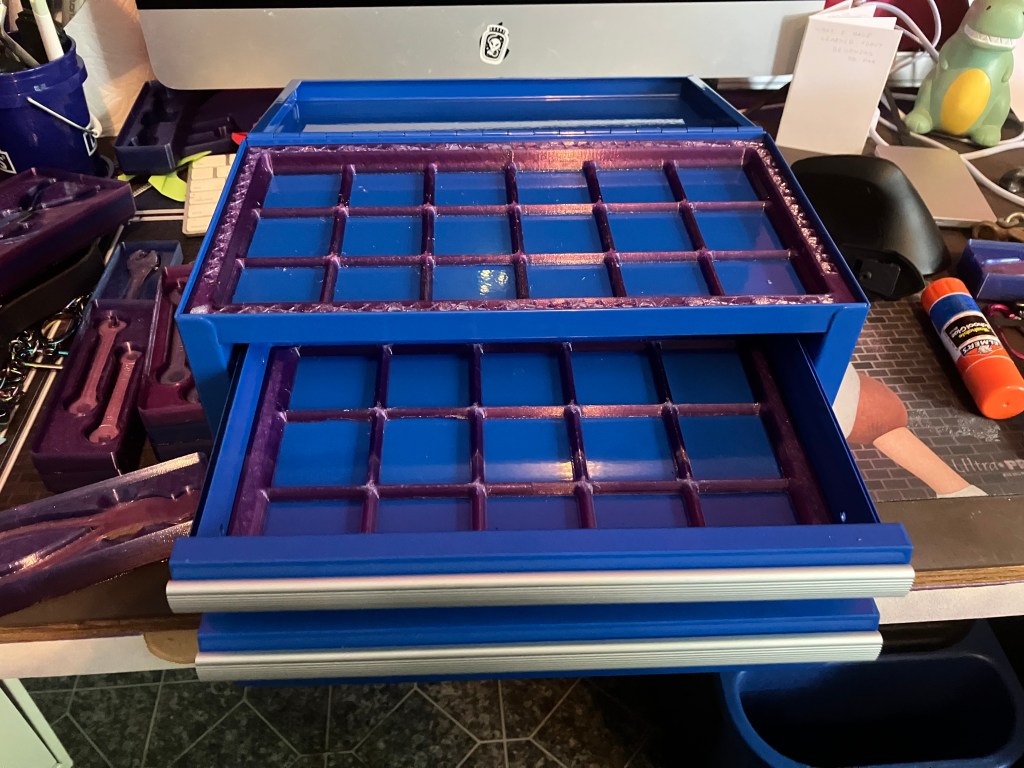
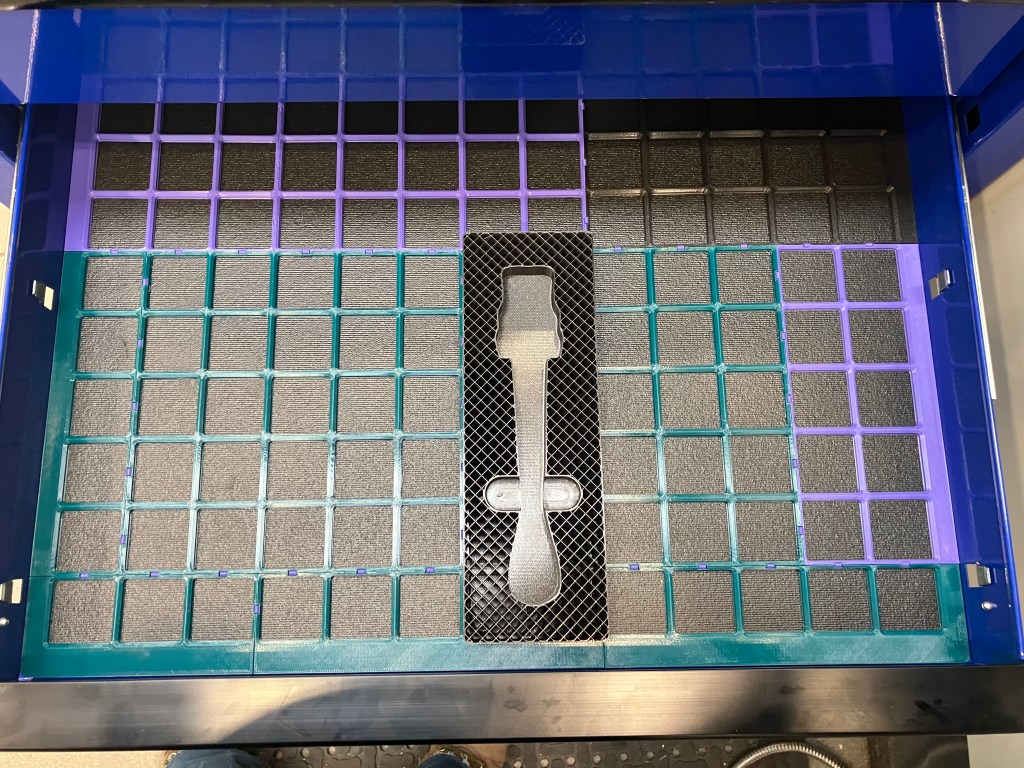
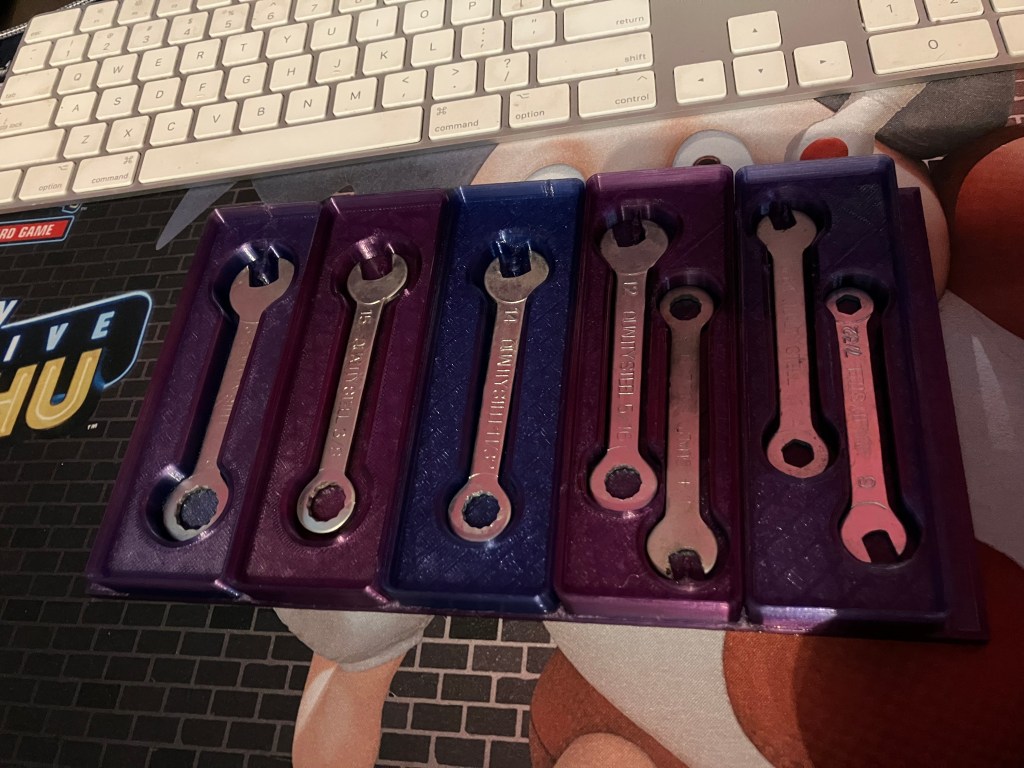
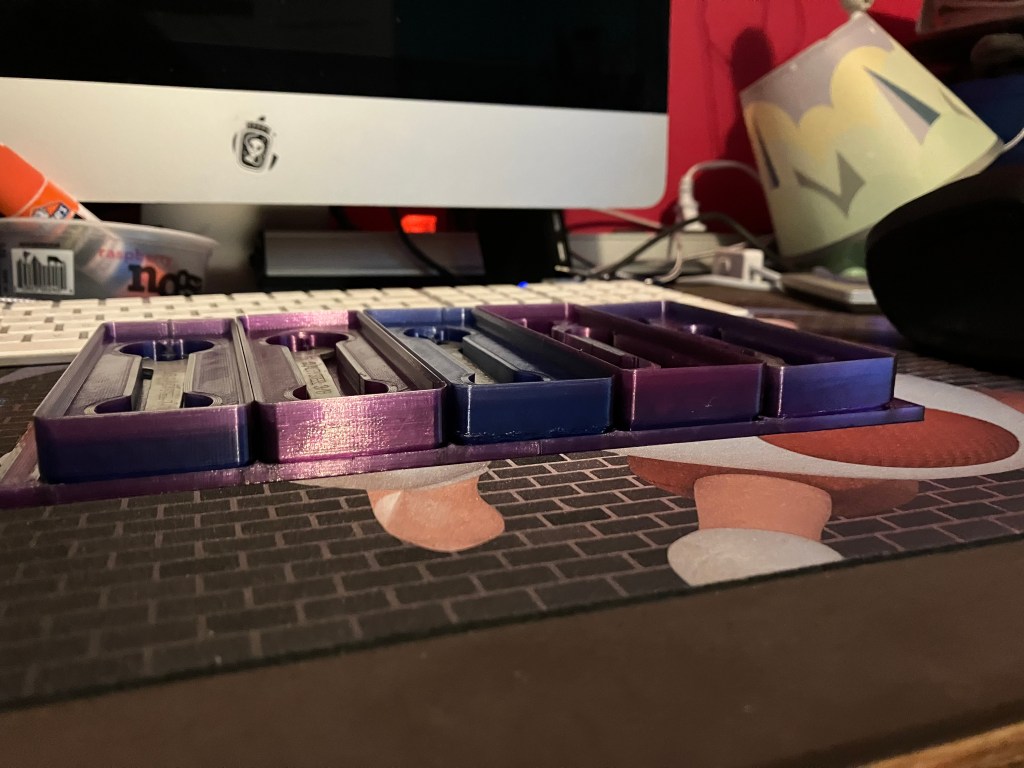
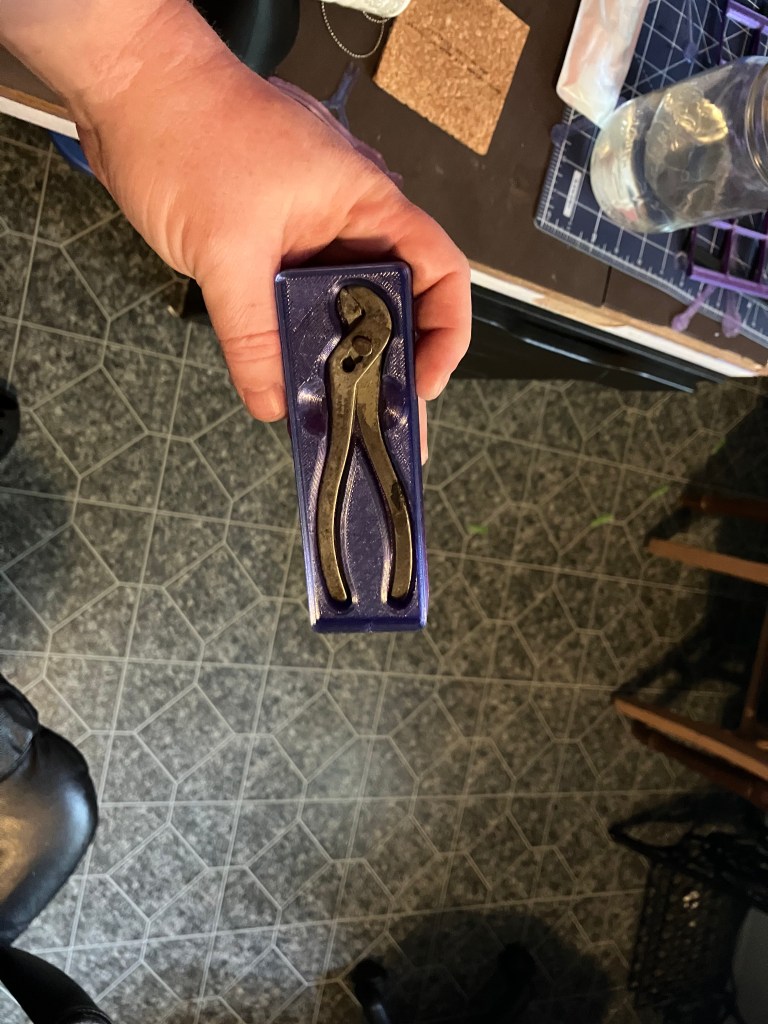
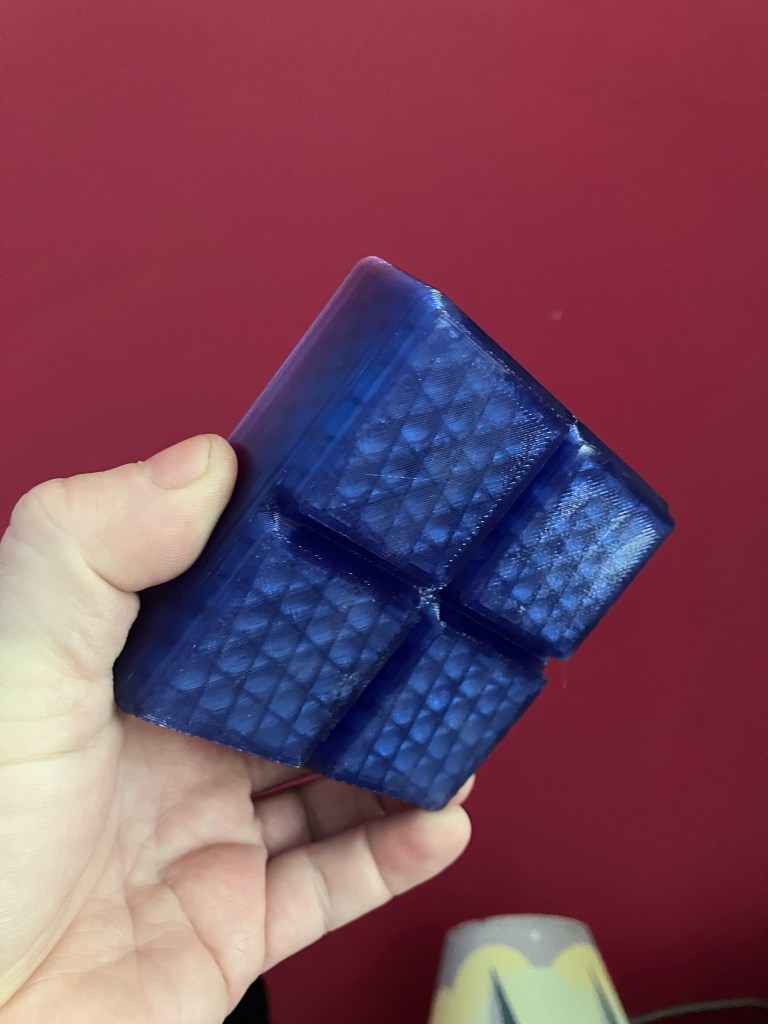
And in a success story, I have completed a full drawer in my mini toolchest! Each wrench box is .7″ high, which means there is room to stack them or stack another layer on top or below them if I choose, which makes me feel less bad about losing the extra space I had to by breaking them up into individual boxes. I like the blue/purple gradient in contrast to the flat blue of the chest. It’s nothing special, but it’s nice I think, and makes it a little easier to differentiate the boxes on sight.

5/18 blogo
Finished a print for the small vise wrench at school. Had some adhesion issues, and something bizarre happened with the wall. Stephen thinks maybe the filament was wet, and maybe I set the print up just before the night AC came on, causing the base to peel up a bit. I got it set up Thursday night at about 5, and night AC comes on at 8. Print was due to finish about 11. So that could track. It looked good when I left at 7:30ish. Anyway, it’s functional, and I’m calling it done. Personally, I believe there is an issue with the leveling on the Prusa XLs. They might do better in an enclosure, but leveling seems like a headache that I’m not sure is worth the print area. I’m going to avoid prints requiring an XL in the future, if I can. My artillery can handle fairly large prints, and I can always break them up into segments, also. I had similar bed adhesion issues with my first attempt at this print, which was also an overnight print.

Update later:
After getting home, I prepped the next batch of mini tools for my mini toolchest to print on my Sidewinder. I’m getting those started now. Hopefully they’ll come out decent.
5/19 Bloog
Continuing to work on this even though I have all my required hours. Cause I might as well.
Mini tools are coming out…mixed quality. I think the print quality I have nailed, but the designs are lacking. Tooltrace.ai doesn’t pick up details well. It’s good enough, but not really good enough for me tbh.

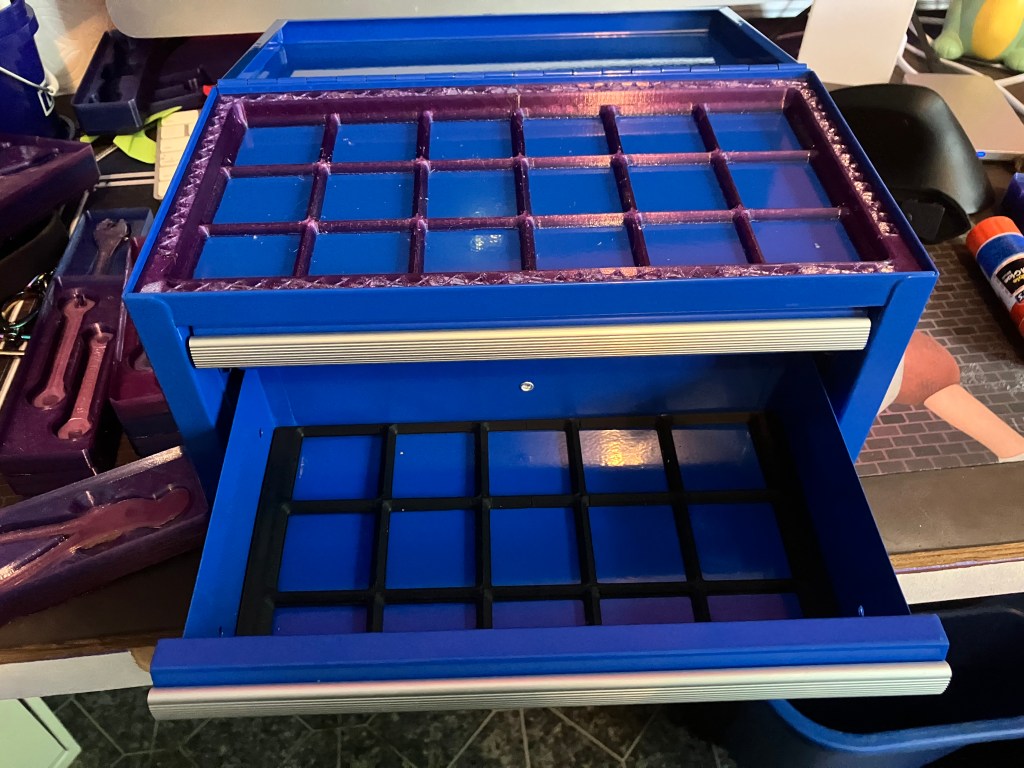
I’m up to 3 full grids in the blue toolchest, and printing the 4th right now.
5/20
Home prints are still going well. Clean bed, fresh glue, head empty, full hearts or whatever lady gaga said.
Prepping the last few mini tools I have found stashed various places around my house. Still debating whether I want to add in my mini screwdrivers. I probably will, tbh. Even though they are mini on purpose and not miniature versions of full-size tools, which makes them less cute.
On a side note, I have still not printed a new reusable filament spool. I want my toolchest inserts to all match, so I kind of dont want to use this spool on that, and once this one is empty I can use it to respool my PLA onto, so it’s not going to keep me from getting a spool-free refill. Then I can use the PLA to print a reusable spool. Not better than petg, but maybe a useful way to use up this older PLA, since I kind of want to stick with PETG going forward.
5/24
The last (final?) batch of mini tool boxes came out well. As with them all, there are things I would do differently if designing from scratch. But I’m not, and would prefer not to until after I take a dedicated CAD class. Still undecided on my small screwdrivers.
I’m now printing the grid for the top of the tool box, which has an additional column compared to the drawers, to finish off the project for now. It should also neatly finish off this spool of petg. If I have any left over, I may print a couple of 1 square loose boxes to fill in grid arrangements.
I took home an empty spool from school to respool my PLA from the spool I warped in the oven, which took forever, but I spent many hours as a tween hand-winding bobbins for my vintage avocado green singer, so I was not deterred.
I have purchased some fun filament to experiment with at home, as well as some metal-filled filament for a mini prototype of Vulcan’s Anvil, from Protopasta. I’m excited to try it out.
At the lab, I’m still chugging along on my toolchest drawer grids. I’m well above my hours for this class, so unless i get some credit hours moved over from subtractive, I’m not planning on designing more bins this quarter. We also ran out of petg spools, which limited my printing ability on Thursday. More should be coming in this week, according to Stephen.
5/27
My mini toolchest is, for now, complete.
The top organizer didn’t quite finish, but it ran out of filament past the point of functionality needed, so that’s fine with me tbh. I never got my printer to not have the wobblies on the bottom few layers, which made it not fit in the drawer at first, but a little bit of time with an xacto knife helped that. I’m a bit at a loss for what else I can do at home without an enclosure or a better bed, so I’ve accepted it as a limitation on my current home setup.