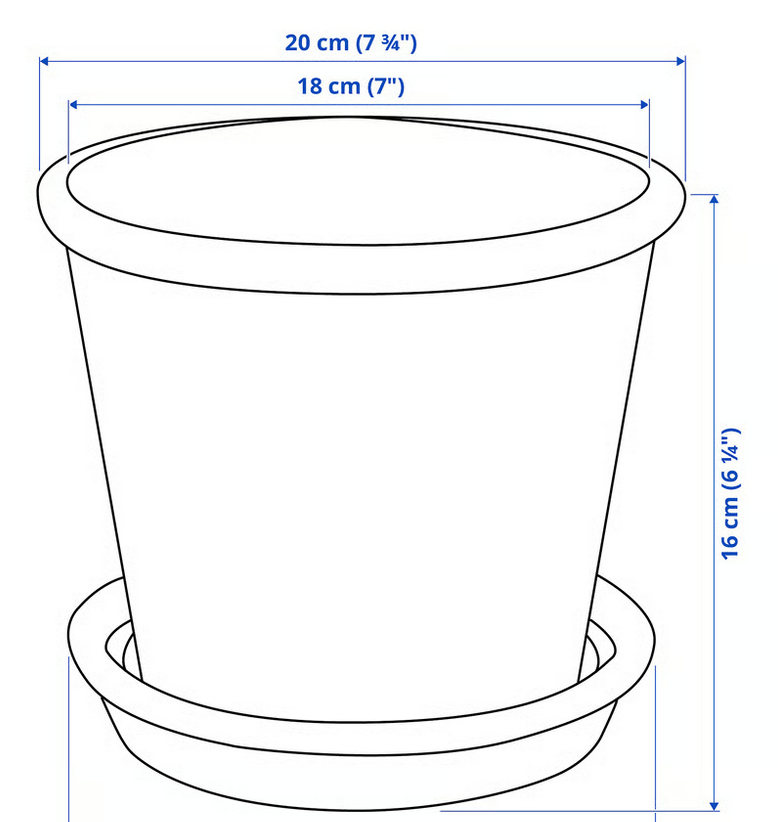
The concept of this design is to make a holder for terracotta pots which will fit easily over a deck railing made with a nominal 2×4″ board. The pot in question, to assist with standardization, is the IKEA MUSKOTBLOMMA, which comes in two sizes. My current design is for the larger size, which according to the website is 7.75″ in diameter. This morning I measured the circumference below the rim 22.625″, which should equal a diameter of about 7.2″, so that adds up.
The problem I’m trying to solve is that currently, I have planters which sit on top of a deck railing I built from an old futon frame. Because they are so top heavy, being filled with soil, they keep on getting knocked off the railing when frenzied squirrels try to a. eat my strawberry plants and b. bury walnuts from my neighbor’s tree in the nice, soft soil I have kindly left out for them.
The concept I have is for a simple bracket that will sit on top of the railing, but keep the weight below the top of the railing, and balance it on the other side of the railing with a decoratively-cut apron of steel acting as a counterweight. It should be attractive from either side of the railing. A terracotta pot will sit in the opening and remain in place by it’s own weight, and the virtue of that weight being centered well below the rim of the holder, in order to foil squirrel mischief. The simplicity of the opening means it can accommodate terracotta pots with tapering sides or a top rim from multiple sources; basically any that will fit.
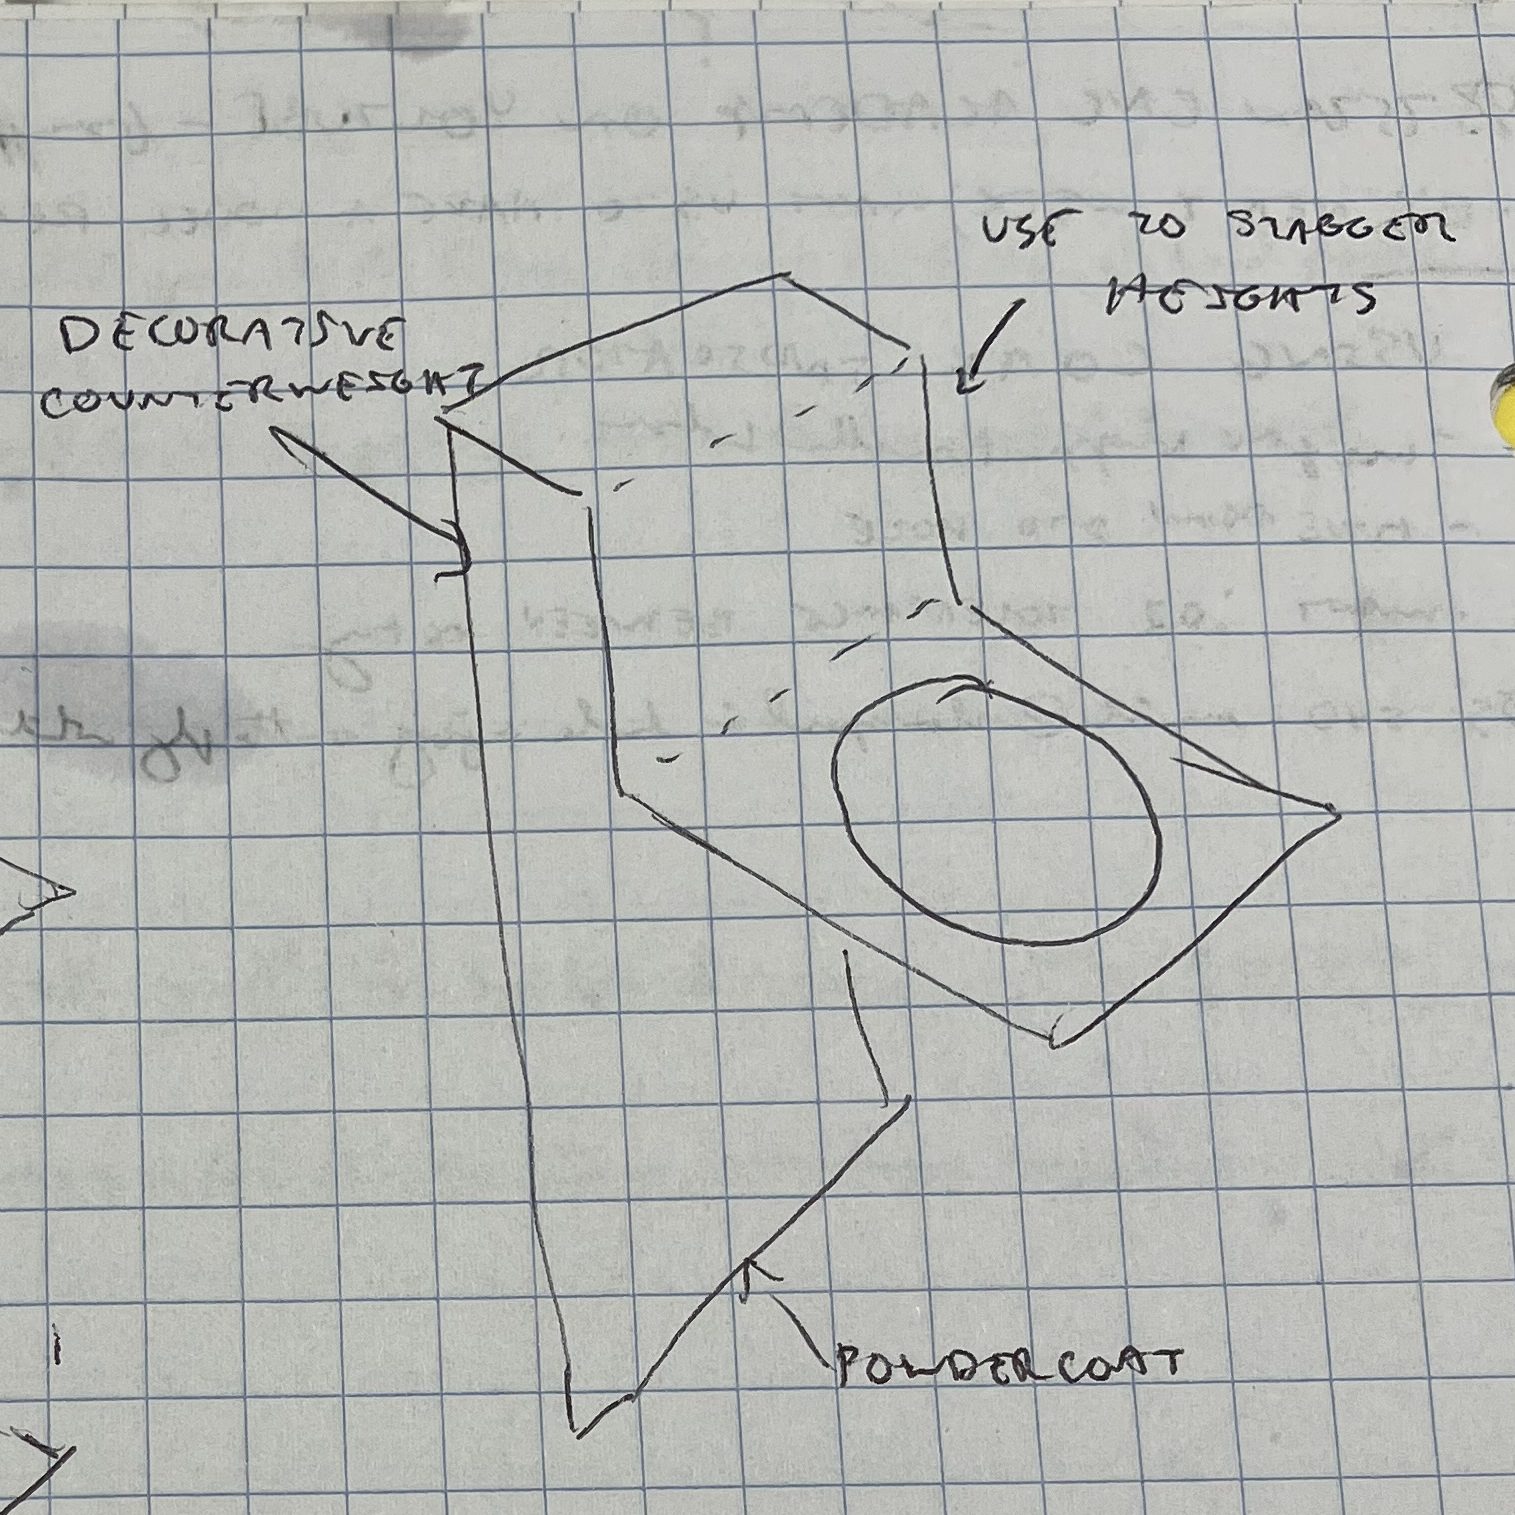
The design can be bent into its final dimensions using a break, or, with relief cuts, a simple vise and mallet. It can then be powdercoated or painted for extra durability. I believe 14 ga steel should offer a decent balance between strength, weight, and durability.
I am hoping to iterate on this design with different width openings to accommodate larger pots, a simple wall-mounted design, various decorative effects on the apron, and different heights of the step-down so pots can be arranged at multiple heights across a deck railing to get different final compositions.
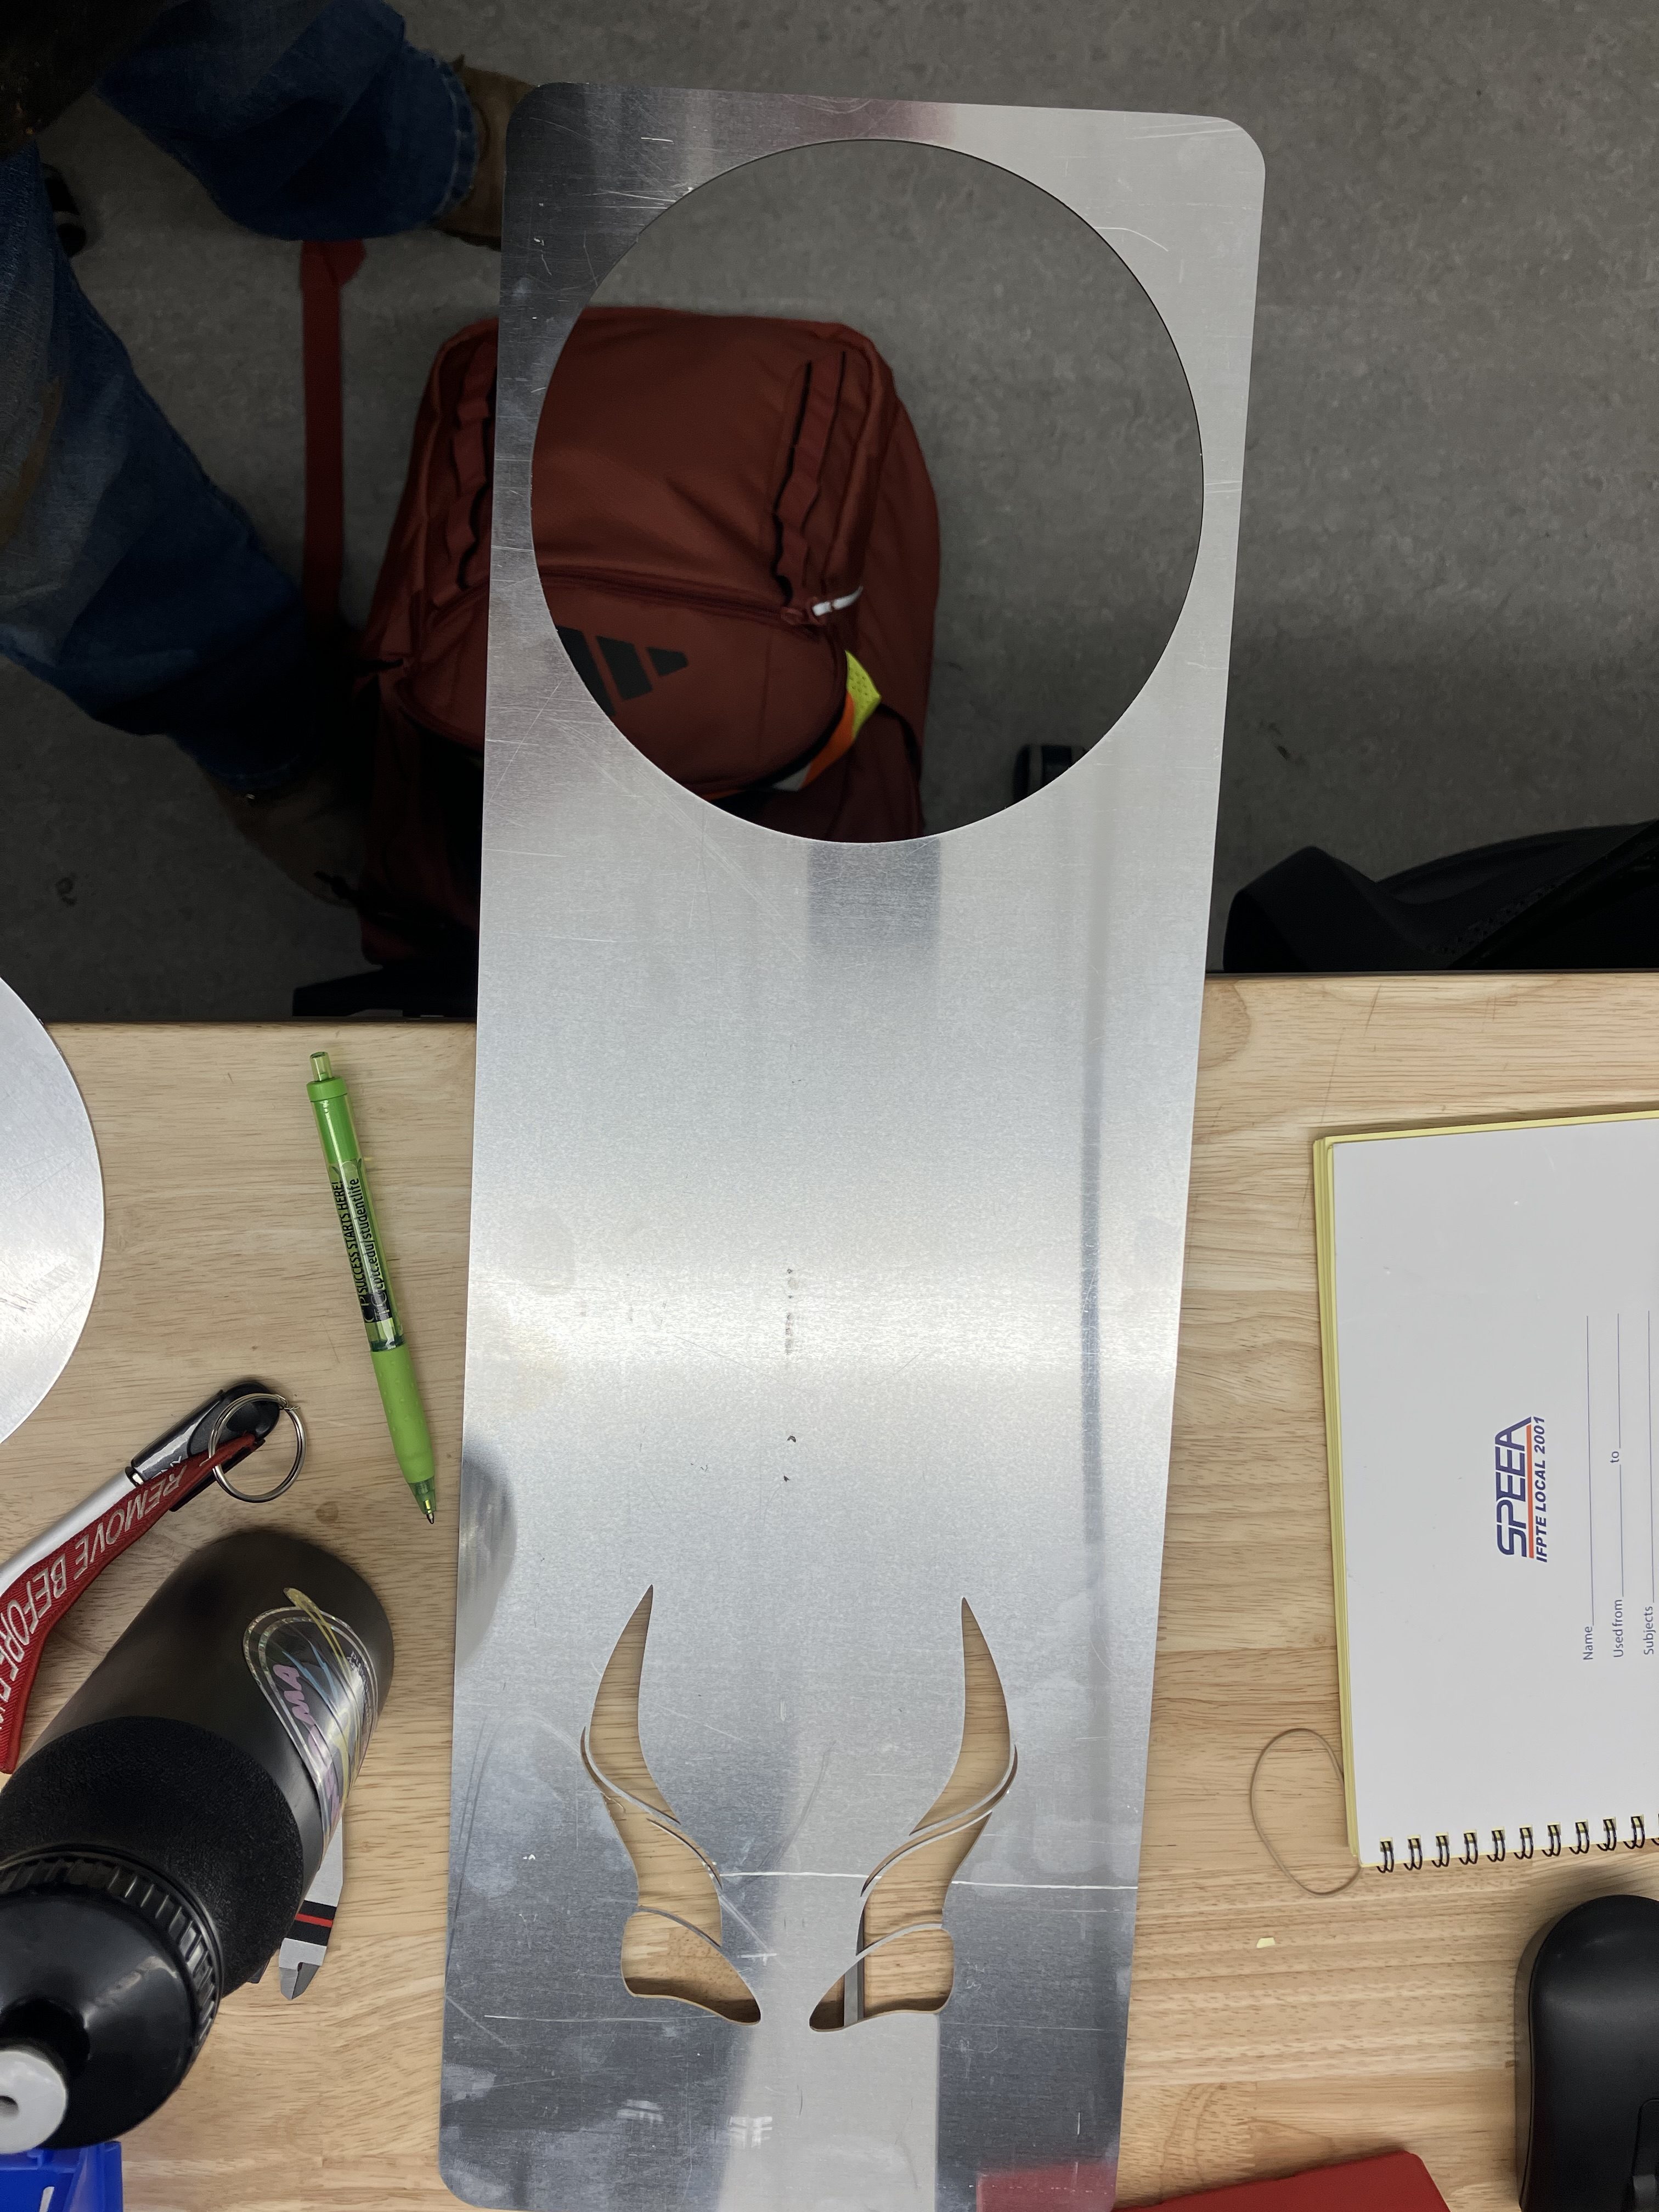
I created the first vector design today in Inkscape, and with Stephen’s assistance, cut a demo on the fiber laser. For my decorative element, I chose the horns of an Eland, which is referenced by the modern cornicello, an italian charm for abundance and good fortune. This is itself a reference to the mythological cornucopia, which was a goat’s horn that remained ever full of sustenance. I wanted, for a planter structure, to reference abundance, especially agricultural abundance.
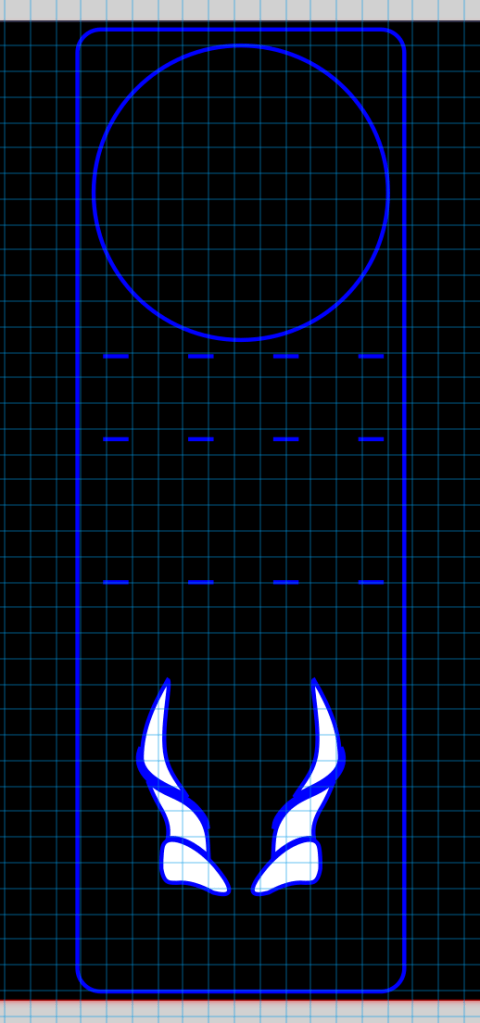
Stephen removed my bend lines from my file thinking they weren’t a part of the finished design, but this is just a scrap piece of aluminum anyway that wouldn’t hold up to my final use, so it doesn’t really matter I guess.
Some changes I plan to make, after making this cut and meeting with Nate about the outcome:
- Scale up the horn design overall, to avoid the parts being too thin to cut effectively.
- Experiment with decorative patterns that change the outline of the apron, rather than just being framed by it, for more interest.
- Move my bend lines so for at least a short distance, they extend through the edge of the material, to void the material crumpling there with a bend
- To keep details intact for powdercoating, consider opening up the narrow parts of my design, spacing them out more from each other, and rounding out the very sharp corners somewhat.
Some things to consider are, how much weight will the full pot add? I can experiment manually, but Nate also recommended using the FEA modeling in Fusion to see what angle I might want to overbend the sheet material to, so it ultimately sits flat. Another option is to include fins in the flat design that I can bend down into ledges that will help support the rim that holds the pot up. Also, I will need to test the pot opening size at home, both with the IKEA pot and with other random terracotta pots, to make sure it is a good size.
Nate also recommended corten steel as a material. It would have to be pre-treated to build up the initial corrosion layer so as not to discolor what it’s set on, but could be cool. Twice as expensive as mild steel, but also doesn’t need to be powdercoated, so big pluses there.
